
Cozy Creamy White Chicken Lasagna Soup: One-Pot Fall Comfort
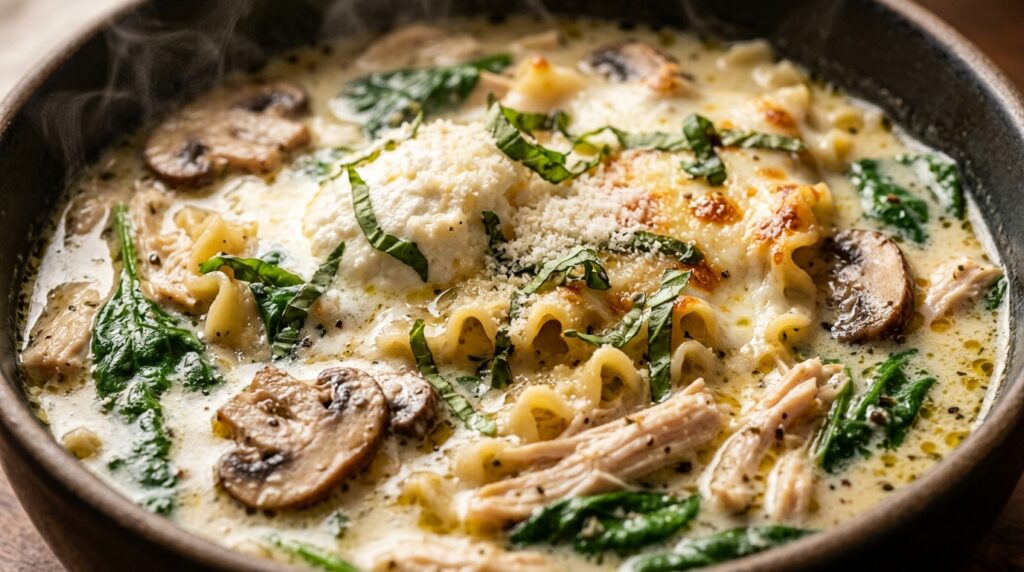
When brisk autumn evenings call for the deeply satisfying comfort of an Italian baked pasta, this Creamy White Chicken Lasagna Soup brings all the luscious indulgence of classic white lasagna into your kitchen in just 45 minutes. Imagine tender, juicy ribbons of shredded chicken breast, ruffled curly lasagna noodles, earthy cremini mushrooms, and tender baby spinach simmered inside an ultra-velvety garlic parmesan and ricotta cream broth. Finished with a melting crown of whole-milk mozzarella and fragrant garden basil, every spoonful delivers restaurant-caliber decadence with all the ease of a simple, one-pot weeknight dinner. Traditional lasagna is undeniably one of culinary history’s great comfort foods, but constructing delicate pasta layers, baking for an hour, and waiting for it to set requires time and energy most busy weeknights simply do not afford. This reimagined soup captures the exact aromatic flavor profile of a five-star white lasagna—nutty Parmigiano-Reggiano, rich whole-milk ricotta, savory garlic, and sweet butter roux—while streamlining preparation into one enameled Dutch oven. By breaking raw lasagna noodles directly into the simmering herb-infused chicken bone broth, the pasta releases natural starches that seamlessly emulsify the broth into a rich, glossy sauce without requiring heavy roux-thickening agents. Why You’ll Love This Recipe Effortless One-Pot Cleanup: Everything from searing the chicken to simmering the ruffled pasta noodles happens in a single pot, minimizing sink clutter and evening kitchen cleanup. Ready in Under 45 Minutes: Enjoy genuine slow-baked Italian pasta flavor on a Tuesday evening without laboring over multi-step assembly or lengthy oven times. Luxurious 3-Cheese Balance: The silky combination of whole-milk ricotta, aged Parmigiano-Reggiano, and gooey melted mozzarella provides velvety richness without feeling overly heavy. Packed with wholesome Lean Protein: Tender shredded chicken breasts and nutrient-rich baby spinach make this comforting bowl hearty, nutritious, and deeply satisfying for the entire family. Key Ingredients & Smart Swaps Fresh, wholesome ingredients neatly prepped for creamy white chicken lasagna soup. Boneless Skinless Chicken Breasts: Provide clean, lean savory protein that shreds easily after poaching in the seasoned broth. Smart Swap: Boneless chicken thighs deliver even deeper flavor, or use leftover rotisserie chicken to cut cooking time by 10 minutes. Curly-Edged Lasagna Noodles: Breaking standard dry lasagna noodles into 1.5-inch pieces gives you authentic wavy ruffled ribbons that cup the rich parmesan sauce. Smart Swap: Mafaldine (campanelle or mini lasagna pasta) or penne rigate work beautifully if traditional lasagna sheets are unavailable. Low-Sodium Chicken Bone Broth: Forms the flavorful aromatic base of the soup, offering collagen body and rich poultry flavor. Low sodium is essential so you can calibrate the salt balance alongside salty cheeses. Cremini Mushrooms & Fresh Garlic: Baby bella mushrooms sautéed in golden butter and olive oil lend earthy umami depth, while minced fresh garlic infuses sweet Italian aroma. Whole-Milk Ricotta Cheese: Whisking half the ricotta directly into the hot broth creates instant creamy velvet body, while saving the rest for a fresh cool dollop on top replicates the classic lasagna ricotta layer. Heavy Cream & Fresh Spinach: Heavy cream brings luxurious silkiness, while tender fresh baby spinach adds bright color, dietary iron, and balanced freshness to cutting through richness. Step-by-Step Cooking Walkthrough 1. Sear the Seasoned Chicken: Heat olive oil in a large Dutch oven over medium-high heat. Season chicken breasts with sea salt and cracked black pepper, then sear for 2 to 3 minutes per side until lightly browned. Set aside on a plate; the chicken will finish cooking through gently while simmering in the broth. 2. Sauté Vegetables & Build Flavor Base: Melt butter in the same pot over medium heat. Sauté the diced yellow onions and sliced cremini mushrooms for 5 minutes until soft and caramelized. Stir in minced garlic, Italian herbs, and red pepper flakes, cooking for 60 seconds until delightfully fragrant. Gently stirring ruffled lasagna ribbons and baby spinach as they simmer in velvety cream broth. 3. Simmer Broth & Poach Chicken: Dust the sautéed vegetables with flour, cooking for 1 minute to coat. Gradually pour in chicken bone broth while scraping up all the delicious browned bits from the base of the pot. Return chicken breasts to the liquid, bring to a gentle boil, then cover and simmer over medium-low heat for 12 to 14 minutes until cooked through (165°F internal temperature). 4. Shred Chicken & Boil Lasagna Noodles: Remove the cooked chicken breasts to a cutting board and shred with two forks. Drop the broken lasagna noodles into the simmering soup broth, cooking uncovered for 10 to 12 minutes until al dente. Stir periodically to keep noodles floating freely without clumping. 5. Fold in Creams, Cheeses & Spinach: Reduce heat to low. Whisk in heavy cream, half of the whole-milk ricotta, and finely grated Parmigiano-Reggiano until smoothly incorporated. Fold the shredded chicken and fresh baby spinach back into the pot, simmering for 2 minutes just until spinach wilts into tender, vibrant emerald ribbons. 3 Chef Secrets for Perfect Results 1. Break Noodles into Varied Rustic Shapes: When breaking your dry lasagna noodles by hand, don’t worry about uniform squares. A mix of ruffled edges and flat pieces provides delightful textural variation that captures broth in every fold. Break them over the pot or inside a clean kitchen towel to catch stray flying crumbs! 2. Whisk Ricotta at Room Temperature: Cold cheese straight from the refrigerator can seize or appear slightly grainy when introduced to hot broth. Let your ricotta and heavy cream sit on the counter for 15 minutes before stirring in, ensuring a smooth, restaurant-grade emulsion. 3. Cook Pasta Just to Firm Al Dente: The lasagna noodles will continue to soften and absorb liquid even after the stove is turned off. Pull them off the heat when they still have a slight toothsome bite so they stay tender and structured throughout dinner. What to Serve With White Chicken Lasagna Soup Comforting bowl of white lasagna soup served restaurant-style with warm garlic bread. Warm Toasted Garlic Sourdough: Crusty artisan sourdough baguette rubbed with garlic butter is essential for mopping up every last drop of garlic parmesan
Million Dollar Chicken Casserole: Ultra Rich and Creamy Comfort
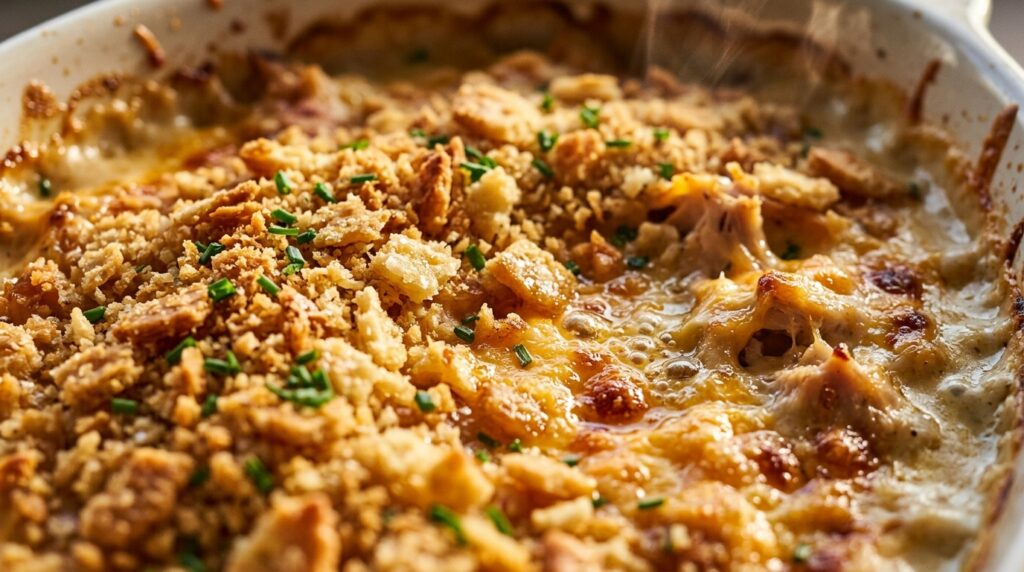
If there is one weeknight dish that universally unites picky eaters and seasoned food lovers alike, it is this legendary million dollar chicken casserole. Tender strands of juicy roasted chicken are folded into an undeniably luxurious sauce of softened cream cheese, tangy sour cream, delicate cottage cheese, and sharp cheddar, then topped with an avalanche of buttery crushed Ritz crackers baked until glistening and shatteringly crisp. Rich, bubbling, and intensely savory, this restaurant-worthy comfort casserole tastes like a million bucks while requiring just fifteen minutes of effortless kitchen prep. The culinary genius behind the “million dollar” label lies in the textural harmony between its multi-dairy sauce and its iconic toasted topping. Rather than relying solely on heavy cream or canned soup, blending softened cream cheese with full-fat sour cream and protein-rich cottage cheese produces a velvety, balanced base that holds its structure without separating or turning greasy in the oven. As the cheddar and mozzarella melt into every fiber of tender chicken, the crushed Ritz crackers—tossed in melted European butter—form a crunchy, caramelized barrier that seals in moisture while delivering an irresistible salty-sweet crunch in every single forkful. Why You’ll Love This Recipe 15-Minute Easy Prep: Using pre-cooked rotisserie or leftover roast chicken means zero stovetop sautéing or complicated prep—simply stir, spread, top, and bake. Shatteringly Crisp Ritz Cracker Topping: Generously tossing crushed butter crackers in melted European butter guarantees a deeply toasted, crackling crust that never turns soggy. Velvety Sauce That Never Breaks: The trifecta of cream cheese, sour cream, and cottage cheese creates an ultra-stable, glossy sauce that clings perfectly to every shred of chicken. Ultimate Make-Ahead & Freezer Friendly: Assemble the casserole up to 24 hours in advance, refrigerate covered, and pop it into the oven for a stress-free weeknight dinner or potluck showstopper. Key Ingredients & Smart Swaps Fresh, wholesome ingredients neatly organized on a clean quartz workstation before assembly. Cooked Halal Chicken Breast (4 cups): Shredded or cubed. Rotisserie chicken is a massive time-saver, or you can poach and shred fresh chicken breasts seasoned with salt and pepper. Smart Swap: Leftover roasted turkey works spectacularly well during the holiday season. Cream Cheese (8 oz): Ensure your cream cheese is completely softened to room temperature so it blends effortlessly into a silky, lump-free sauce. Pro Hack: Microwave unwrapped cream cheese in 15-second intervals on 50% power if pressed for time. Sour Cream & Cottage Cheese: Full-fat sour cream adds quintessential tang, while cottage cheese provides a light creaminess and extra protein. Pro Hack: If you dislike curds, buzz the cottage cheese in a mini food processor for 10 seconds until ultra-smooth before adding. Sharp Cheddar & Mozzarella: Sharp cheddar injects bold, punchy flavor, while whole-milk mozzarella ensures irresistible stretchy cheese pulls. Grate your cheese fresh from a block for superior melting. Ritz Crackers & Butter: Two sleeves of classic buttery round crackers, coarsely crushed by hand so you maintain satisfying cracker chunks alongside fine crumbs. Mixed with melted butter, they caramelize to golden perfection. Step-by-Step Cooking Walkthrough 1. Prep the Baking Dish & Oven: Preheat your oven to 350°F (175°C). Mist a 9×13-inch ceramic baking dish with cooking spray or wipe with a thin layer of softened butter. 2. Whisk the Luxurious Sauce: In a large mixing bowl, vigorously whisk together the softened cream cheese, sour cream, cottage cheese, condensed cream of chicken soup, garlic powder, onion powder, kosher salt, and freshly cracked black pepper until completely smooth and velvety. Folding tender shredded chicken and sharp cheddar into the velvety cheese sauce until thoroughly incorporated. 3. Fold, Layer & Top with Cheese: Gently fold the shredded chicken, 1 cup of sharp cheddar, and 1 cup of mozzarella into the sauce until thoroughly combined. Transfer into the prepared baking dish and smooth into an even layer. Sprinkle the remaining 1/2 cup of sharp cheddar evenly over the top. 4. Add the Golden Ritz Crust & Bake: In a bowl, toss the coarsely crushed Ritz crackers with melted butter. Scatter evenly over the cheese layer. Bake uncovered at 350°F (175°C) for 30 to 35 minutes until the edges are vigorously bubbling and the crust is deeply golden brown. Rest 5 to 10 minutes, garnish with minced chives, and enjoy. 3 Chef Secrets for Perfect Results 1. Bring Cream Cheese to True Room Temperature: Cold cream cheese will stubbornly resist blending and form tiny unappetizing white flecks in your sauce. Setting it on the counter 45 minutes prior ensures a glossy, homogeneous sauce that melts seamlessly. 2. Keep the Cracker Crumbs Coarse: Do not crush the Ritz crackers into fine powder in a food processor! Place the crackers in a zip-top bag and crush them gently with your hands or a rolling pin, leaving nickel-sized pieces. These uneven chunks create maximum surface area for crunch. 3. Bake Uncovered for Ultimate Crispiness: Never cover this casserole with aluminum foil during baking. The dry, convective oven heat is essential to toast the buttery cracker crumbs and allow excess steam to evaporate without making the topping soggy. What to Serve With Million Dollar Chicken Casserole Served restaurant-style with crisp sautéed garlic green beans and warm artisanal dinner rolls. Crisp Garden Greens: Because this casserole is rich and indulgent, a light, peppery arugula salad tossed with fresh lemon juice and extra virgin olive oil provides the perfect refreshing contrast. Garlic Roasted Vegetables: Tender-crisp roasted asparagus, steamed broccoli florets, or garlic butter green beans add vibrant color, essential fiber, and earthy freshness. Warm Artisan Breads: Freshly baked buttermilk biscuits, crusty sourdough slices, or fluffy garlic knots are ideal for swiping up every last bit of creamy cheese sauce from your plate. Storage, Freezing & Reheating Instructions Refrigeration: Allow leftovers to cool completely before transferring to an airtight container or tightly sealing the baking dish with plastic wrap. Store in the refrigerator for up to 4 days. Gentle Reheating: To restore the original crackling crust, reheat individual portions in an oven or toaster oven at 350°F (175°C) for 12 to 15 minutes. Microwave reheating
Creamy French Onion Chicken Skillet (Gruyère Melt)
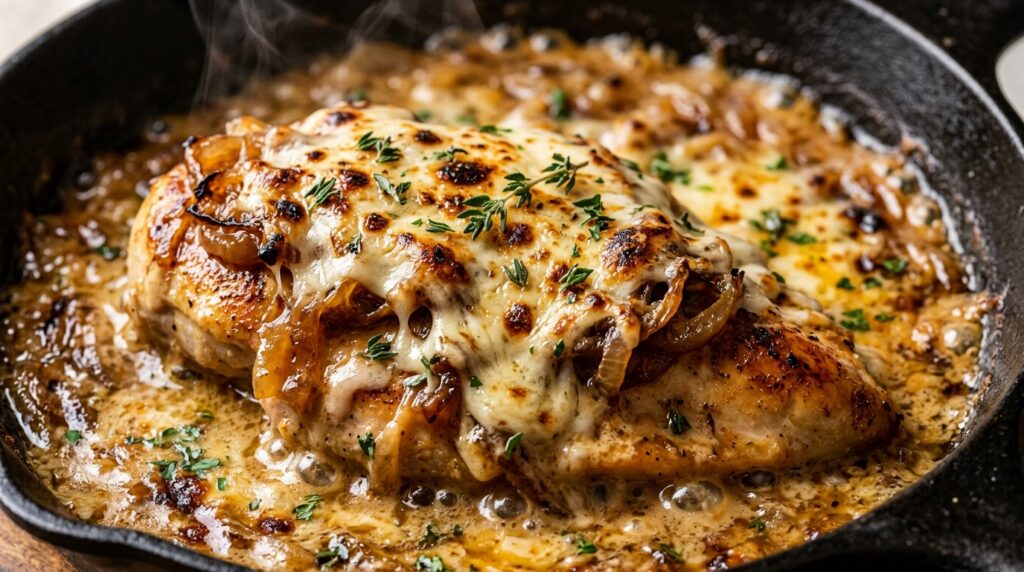
When brisk autumn nights call for an ultra-cozy, bistro-style skillet dinner that fills your kitchen with the intoxicating, sweet aroma of melting butter and caramelized Vidalia onions, this Creamy French Onion Chicken Skillet is pure culinary luxury. Featuring golden pan-seared chicken cutlets smothered in velvety thyme garlic pan sauce, heaped with deeply browned sweet onions, and blanketed under a blistered, gooey crown of broiled Gruyère and Swiss cheese, every single bite captures the timeless soul of classic French onion soup in a hearty, high-protein weeknight masterpiece. While traditional French onion soup requires hours of slow simmering, this skillet dinner delivers all that rich, complex umami flavor in just 35 minutes flat. By searing thinly cut chicken breasts first to establish a savory fond on the bottom of a heavy cast-iron skillet, the sliced onions cook down rapidly in sweet butter, absorbing pan juices as their natural sugars break down into rich caramel. Deglazing with savory beef broth, balsamic vinegar, and a swirl of heavy cream creates a luxurious sauce that ties the crisp chicken and earthy melted Gruyère together. Alongside our reader-favorite comfort classics like Creamy Garlic Parmesan Chicken Skillet and holiday staples like Garlic Herb Butter Roasted Chicken, this one-pan dinner brings upscale restaurant magic to your weeknight table. Why You’ll Love This Recipe One-Pan Simplicity: From searing the chicken and caramelizing the onions to broiling the bubbling cheese, everything happens in a single oven-safe cast-iron skillet for effortless cleanup. High-Protein Gourmet Comfort: Delivering a massive 46 grams of lean protein per serving with only 14 grams of carbs, making it nourishing and satisfying without feeling heavy. Deep Bistro Flavors in 35 Minutes: Strategic thin-slicing of sweet Vidalia onions drastically cuts caramelization time while developing that deep mahogany sweetness you crave. 100% Halal Wholesome: Replaces traditional culinary wine with rich halal beef broth, aromatic garlic, fresh garden thyme, and aged balsamic vinegar for authentic gourmet depth. Key Ingredients & Smart Swaps Boneless Skinless Chicken Breasts: Cut horizontally into thin cutlets. Thinner cutlets sear in minutes, remaining incredibly juicy and tender without requiring extended oven baking. Boneless chicken thighs can be substituted 1:1. Yellow & Sweet Vidalia Onions: A blend of pungent yellow onions and sweet Vidalia onions creates the ideal flavor profile: yellow onions provide sharp umami while sweet onions caramelize into jammy golden sweetness. Gruyère & Swiss Cheese: Gruyère is the undisputed star of French onion dishes, offering a nutty, earthy profile and unmatched melting capabilities. Shredding a block fresh rather than buying pre-shredded cheese ensures silky, clumpless melting under the broiler. Aged Balsamic Vinegar: Our 100% Halal secret weapon. A single tablespoon of balsamic vinegar deglazes the pan, adding acidity, subtle sweetness, and rich dark color that mimics hours of wine reduction. Low-Sodium Beef Broth & Heavy Cream: Beef broth brings classic soup depth, while heavy cream mellows the sharpness, yielding a velvety pan sauce that clings to every bite. Fresh Thyme Leaves: Fresh thyme releases herbal essential oils that cut through the richness of the cheese and cream. Dried thyme can be used in a pinch (use 1 tsp). Step-by-Step Cooking Walkthrough 1. Dredge & Sear the Chicken: Pat chicken cutlets dry and season with garlic powder, salt, and pepper. Lightly dredge in flour. Heat olive oil in a 12-inch cast-iron skillet over medium-high heat. Sear cutlets for 4 to 5 minutes per side until golden brown. Transfer to a plate. 2. Caramelize the Onions: Melt butter in the same hot skillet. Add all sliced onions with a pinch of salt. Sauté over medium heat for 15 to 18 minutes, stirring frequently, until the onions collapse into a dark golden, fragrant, jammy consistency. 3. Build the Creamy Pan Sauce: Add minced garlic, fresh thyme, and balsamic vinegar to the caramelized onions. Cook 1 minute, then pour in beef broth and Dijon mustard. Simmer 3 minutes until slightly reduced, then stir in heavy cream to form a velvety sauce. 4. Assemble, Blanket & Broil: Return chicken cutlets to the pan, mounding caramelized onions over each piece. Generously top with shredded Gruyère and Swiss cheese. Broil in the oven on high for 3 to 4 minutes until the cheese is bubbling, gooey, and speckled with toasted brown spots! 3 Chef Secrets for Perfect French Onion Chicken 1. Thinly Slice Your Onions Uniformly: Thick onion slices take 40+ minutes to caramelize and often burn on the edges before softening in the middle. Using a sharp chef’s knife or mandoline to slice onions uniformly to 1/8-inch thickness ensures rapid, even caramelization in half the time. 2. The Light Flour Dusting Trick: Lightly dredging your chicken cutlets in flour before searing does double duty: it locks in internal juices to keep the breast tender, and the starches release into the pan sauce later, naturally thickening it into a luxurious velouté consistency. 3. Watch the Broiler Closely: Gruyère cheese has a high butterfat content that transforms from gorgeously blistered to charred in seconds. Keep your oven door cracked or watch through the oven window during the 3-minute broil step to catch that perfect golden-speckled bubbly finish. What to Serve With French Onion Chicken Buttery Garlic Mashed Potatoes: The ultimate vessel to catch every spoonful of the rich caramelized onion cream sauce. Toasted Crusty French Baguette: Warm baguette slices rubbed with garlic butter recreate the crouton experience of classic French onion soup right on your plate. Roasted Green Beans or Asparagus: Crisp, lemon-garlic roasted greens provide a fresh, vibrant crunch that balances the decadent cheese and cream. Storage, Freezing & Reheating Instructions Refrigeration: Cool leftover chicken completely. Store in an airtight glass container in the refrigerator for up to 4 days. The caramelized onion flavors deepen and taste even better the next day! Gentle Reheating: For best results, place chicken and sauce in a baking dish, cover with foil, and warm at 350°F (175°C) for 12 to 15 minutes. Alternatively, microwave on 50% power in 60-second intervals to avoid breaking the cream sauce. Freezing: We recommend freezing the cooked chicken cutlets and
Mediterranean Lemon Garlic Chicken Rice Bowls: Easy Meal Prep
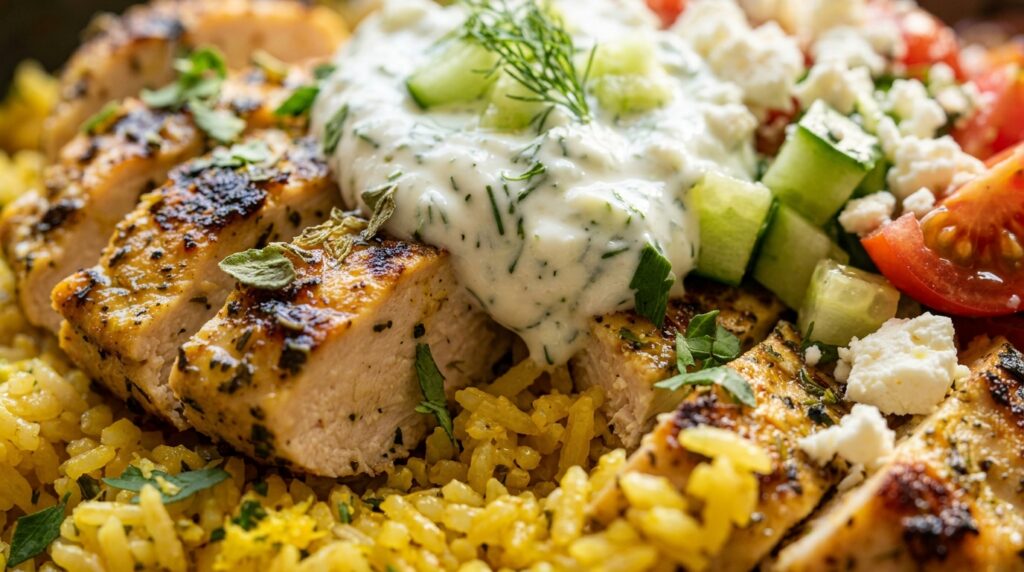
When your busy weekday schedule demands a wholesome, restaurant-quality meal that delivers massive vibrant flavor while fueling your afternoon with 42 grams of clean lean protein, these Mediterranean Lemon Garlic Chicken Rice Bowls are your ultimate lunchtime victory. Featuring tender, charred chicken breast cutlets steeped in a zesty garlic-herb marinade, layered over a bed of fragrant golden turmeric basmati rice and crowned with crisp cucumber-tomato salad and cool tzatziki, every single forkful delivers an irresistible balance of hot and cold, savory and bright. Unlike bland, dried-out chicken meal prep that feels like a chore to eat by day three, the Mediterranean approach to grain bowls relies on high-impact flavor layering. The dual marinade technique infuses the chicken with fresh lemon zest, pungent crushed garlic, and aromatic Mediterranean oregano, sealing in natural juices during a hot skillet sear. Meanwhile, the fluffy basmati rice absorbs broth, turmeric, and garlic powder, providing a savory foundation that soaks up every drop of cool dill tzatziki and tangy feta brine. Alongside our high-protein favorites like our Crispy Hot Honey Chicken Bowls and savory weeknight hits like Creamy Garlic Parmesan Chicken Skillet, these Mediterranean bowls prove that clean eating can be genuinely mouthwatering. Why You’ll Love This Recipe 30-Minute Efficiency: While the golden turmeric rice simmers hands-off on the stove, your chicken marinates and sears in under 12 minutes in a single hot skillet. High-Protein Fuel: Packing an impressive 42 grams of high-quality protein per bowl to keep you energized, focused, and satisfied through long workdays. Flawless Meal Prep: Assembles beautifully into four individual glass airtight containers that stay crisp, juicy, and vibrant in the refrigerator for up to 4 days. 100% Halal Wholesome: Crafted exclusively with certified Halal chicken breasts, extra virgin olive oil, crisp fresh garden produce, and authentic probiotic Greek yogurt. Key Ingredients & Smart Swaps Boneless Skinless Chicken Breasts: Slicing thick chicken breasts horizontally into thinner cutlets allows the citrus marinade to penetrate deeply and ensures rapid, even searing without drying out. Chicken thighs can also be used for extra richness. Fresh Lemon Zest & Juice: Lemon zest holds fragrant essential oils that infuse deep citrus aroma without making the meat mushy, while fresh juice provides bright acidity. Extra-Long Grain Basmati Rice: Basmati grains stay delightfully separate and fluffy, absorbing the golden turmeric broth without turning sticky or gummy. Brown rice or quinoa work equally well for added whole grains. Ground Turmeric: Imparts the signature golden yellow Mediterranean deli hue along with subtle earthy warmth and well-known antioxidant benefits. Persian Cucumbers & Cherry Tomatoes: Mini Persian cucumbers have delicate thin skins and tiny seeds, offering maximum crunch without needing to be peeled or seeded. Greek Feta & Kalamata Olives: Briny Greek sheep’s milk feta in brine and dark Kalamata olives provide salty, savory contrast that cuts through the rich chicken. Step-by-Step Cooking Walkthrough 1. Marinate the Chicken: In a shallow dish, whisk extra virgin olive oil, fresh lemon juice and zest, minced garlic, oregano, thyme, salt, and pepper. Coat the chicken cutlets thoroughly. Let rest for 15 minutes at room temperature while you start the rice. 2. Simmer the Golden Turmeric Rice: In a saucepan, toast rinsed basmati rice in a dab of butter with ground turmeric and garlic powder for 90 seconds. Pour in broth, bring to a boil, cover tightly, and simmer on low for 15 minutes. Remove from heat and rest covered for 5 minutes before fluffing. 3. Sear to Golden Brown: Heat olive oil in a heavy cast-iron skillet over medium-high heat. Sear chicken cutlets for 5 to 6 minutes per side until deeply golden with caramelized edges and cooked through to 165°F (74°C). Rest on a cutting board for 5 minutes, then slice against the grain. 4. Assemble the Bowls: Spoon fluffy golden rice into bowls. Fan out sliced chicken strips alongside diced cucumbers, cherry tomatoes, and Kalamata olives. Crown with a swirl of cool tzatziki sauce, crumbled feta, and fresh dill. 3 Chef Secrets for Restaurant-Quality Bowls 1. Don’t Skip Lemon Zest in the Marinade: Lemon juice alone can chemically ‘cook’ and toughen chicken meat if left too long. The real secret to punchy lemon flavor is the yellow zest—it contains aromatic limonene oils that provide bold citrus notes without excess moisture or harsh acid. 2. Toast the Rice Grains Before Simmering: Sautéing the rinsed basmati grains in butter with ground turmeric for 1 to 2 minutes coats each starch granule. This prevents the grains from sticking together, resulting in individual, tender, vibrant yellow grains that separate effortlessly with a fork. 3. Rest Before Slicing: Always resist the temptation to slice the chicken straight out of the skillet! Giving the meat 5 minutes on a cutting board allows muscle fibers to relax and redistribute internal juices throughout every bite. What to Serve With Greek Chicken Bowls Warm Charred Pita Bread: Brush soft pita or naan bread with olive oil and warm it in the chicken skillet for 30 seconds to scoop up rice, tzatziki, and chicken juices. Hummus or Baba Ganoush: Add a generous scoop of roasted garlic hummus alongside the tzatziki for extra creaminess and healthy fats. Citrus Mint Sparkling Water: A tall glass of ice water infused with fresh mint leaves and cucumber slices provides refreshing hydration that complements Mediterranean spices. Storage, Freezing & Meal Prep Instructions Weekly Meal Prep: Divide cooked rice and sliced chicken into 4 glass meal-prep containers. Pack cucumber-tomato salad and tzatziki sauce into separate small silicone cups so the fresh vegetables stay crisp and cold. Keeps fresh in the refrigerator for up to 4 days. Gentle Reheating: Reheat the rice and chicken in the microwave for 90 seconds until steaming hot. Add the fresh cold salad and tzatziki right before eating for the ultimate hot-and-cold contrast! Freezing Cooked Chicken: The sliced marinated cooked chicken can be frozen in freezer bags for up to 2 months. Thaw overnight in the fridge and reheat gently in a skillet with a splash of broth. Frequently Asked Questions Can I bake or
Sheet Pan Honey Garlic Chicken and Roasted Veggies
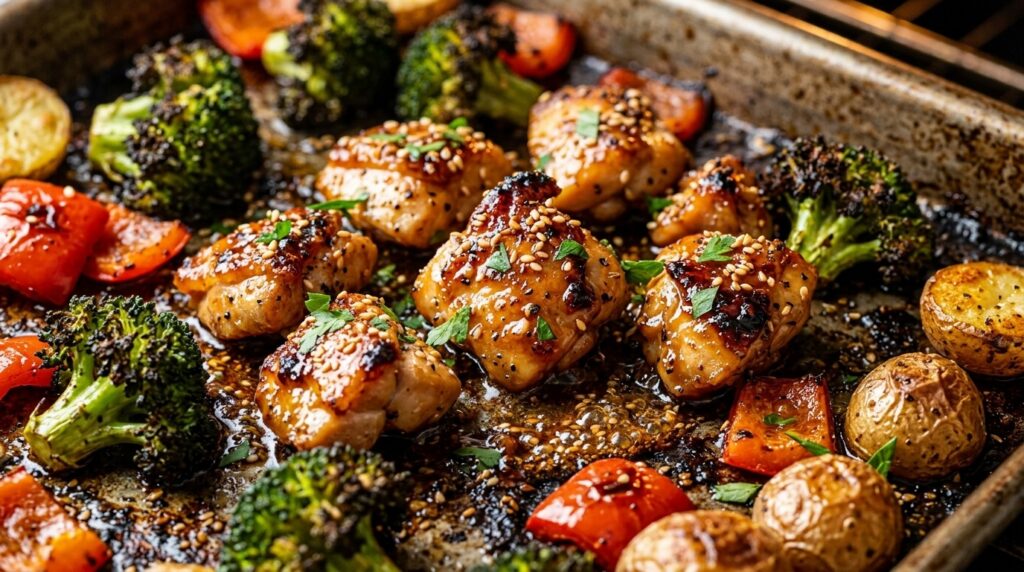
When busy weeknights demand a wholesome, mouthwatering family dinner with virtually zero cleanup, this Sheet Pan Honey Garlic Chicken and Roasted Veggies is the ultimate culinary lifesaver. Featuring tender, juicy chicken bites cloaked in a glossy, bubbling honey garlic glaze and roasted alongside crispy baby potatoes, charred broccoli florets, and sweet red bell peppers, this vibrant 30-minute meal delivers maximum restaurant-worthy flavor using just one single pan. The secret to great sheet pan meals is timing the ingredients so that hearty root vegetables turn golden and crispy at the exact same moment that lean poultry reaches peak juicy perfection. By giving the baby potatoes a brief 10-minute head start in the oven before adding the chicken and quick-cooking vegetables, every component emerges flawlessly roasted without turning soggy or dry. Along with our viral meal-prep favorite Crispy Hot Honey Chicken Bowls and weeknight classic Garlic Butter Steak Bites, this recipe makes wholesome, high-protein weeknight dining entirely stress-free. Why You’ll Love This Recipe One Pan, Zero Sink Mess: Everything bakes together on a single parchment-lined baking sheet, keeping evening dishwashing down to just one cutting board and a bowl. The Ultimate 30-Minute Speed: Simple knife work and a quick 3-minute whisked glaze get dinner into the oven in just 10 minutes flat. High-Protein & Nutrient-Packed: Delivers 38 grams of lean protein, 5 grams of dietary fiber, and nearly 100% of your daily vitamin C in one balanced serving. Addictive Sweet-Savory Umami Glaze: Rich amber honey, savory soy sauce, and aromatic minced garlic bubble down into a thick, sticky glaze that clings to every bite. Key Ingredients & Smart Swaps Fresh ingredients flat-lay: cubed chicken breast, broccoli florets, baby red potatoes, red bell pepper, honey, garlic, soy sauce, and seasonings. Chicken Breast or Thighs: Boneless skinless chicken breasts cook quickly into tender, lean bites. If you prefer extra richness, boneless skinless chicken thighs can be used 1:1 with fantastic caramelized results. Baby Red or Yukon Gold Potatoes: Small waxy potatoes hold their shape beautifully in the oven without getting mushy. Sweet potatoes or butternut squash cubes also make delicious autumnal alternatives. Fresh Broccoli & Bell Peppers: Broccoli florets develop delicious charred, nutty crispy edges under high heat, while red bell pepper adds natural sweetness and vibrant color. Pure Clover Honey: Forms the sticky, glossy glaze that caramelizes over the meat. Pure maple syrup can be substituted for an earthy seasonal twist. Low-Sodium Soy Sauce & Garlic: Provides the savory, umami backbone that balances the natural sweetness of the honey. Tamari or coconut aminos work seamlessly for gluten-free diets. Apple Cider Vinegar & Cornstarch: A dash of vinegar cuts through the sweetness with refreshing acidity, while a teaspoon of cornstarch guarantees the glaze thickens into a clingy, bubbling sauce on the sheet pan. Step-by-Step Cooking Walkthrough 1. Par-Roast the Potatoes: Halve the baby potatoes, toss with olive oil, salt, and pepper, and roast on your lined sheet pan at 400°F (200°C) for 10 minutes to give them a head start. 2. Whisk the Honey Garlic Glaze: In a small bowl, whisk together the honey, soy sauce, minced garlic, apple cider vinegar, olive oil, and cornstarch until smoothly blended. Active cooking action: brushing rich amber honey garlic glaze over chicken chunks and colorful veggies before roasting. 3. Arrange & Glaze: Slide the baking pan out of the oven. Arrange chicken cubes, broccoli florets, and red bell peppers in a single layer. Generously brush the chicken with glaze and toss the veggies in the remaining sauce. 4. Roast & Broil Finish: Roast for 15 to 18 minutes until chicken is cooked through (165°F / 74°C) and potatoes are fork-tender. Broil on high for 2 minutes for extra caramelized edges, garnish with sesame seeds and parsley, and serve! 3 Chef Secrets for Perfect Results 1. Never Skip the Potato Head Start: Potatoes are dense and require at least 25 minutes of roasting, whereas bite-sized chicken breasts cook through in just 15 minutes. Giving the potatoes that initial 10-minute solo roast guarantees both finish at the exact same moment. 2. Use a Giant Half-Sheet Pan (No Crowding!): If ingredients overlap on a crowded pan, they will steam in their own moisture rather than roasting. Use a standard 18×13-inch rimmed baking sheet (or two smaller pans) to ensure every piece gets caramelized crispy edges. 3. The 2-Minute Broiler Blast: Because honey contains natural sugars, popping the pan under the broiler for the final 120 seconds creates irresistible charred blister spots and concentrates the glaze into a thick, glossy restaurant lacquer. What to Serve With Sheet Pan Honey Garlic Chicken Plated weeknight-style: sticky glazed chicken nestled over fluffy jasmine rice with charred broccoli, crispy potatoes, and sweet peppers. Fluffy Grain Bases: Spoon the chicken and vegetables over steamed jasmine rice, nutty brown rice, or quinoa to soak up every drop of the sweet-savory pan drippings. Fresh Cooling Accompaniments: Serve alongside a crisp Asian cucumber salad tossed in rice vinegar or a light cabbage slaw with sesame dressing. Beverage Pairings: Pair with an iced sparkling citrus mocktail, unsweetened iced green tea with mint, or sparkling mineral water with fresh lemon wedges. Storage, Freezing & Reheating Instructions Meal Prep Refrigeration: Portion the cooked chicken, vegetables, and rice into airtight meal prep containers. Store in the refrigerator for up to 4 days—the flavors deepen overnight! Reheating to Restore Crispiness: For best texture, reheat in a 375°F (190°C) oven or toaster oven for 5 to 7 minutes to re-crisp the potatoes and re-melt the glaze. Microwave on high for 90 seconds for a quick office lunch. Freezing: The cooked chicken and roasted potatoes freeze well for up to 2 months. Thaw in the refrigerator overnight before warming through. Frequently Asked Questions Can I use chicken thighs instead of chicken breasts?Yes! Boneless skinless chicken thighs work brilliantly in this recipe. They remain exceptionally juicy and can withstand higher roasting temperatures without drying out. Can I add other vegetables to this sheet pan meal?Absolutely. Zucchini chunks, asparagus spears, green beans, or sliced carrots all make
Crispy Hot Honey Chicken Bowls: Easy 30-Minute Meal Prep
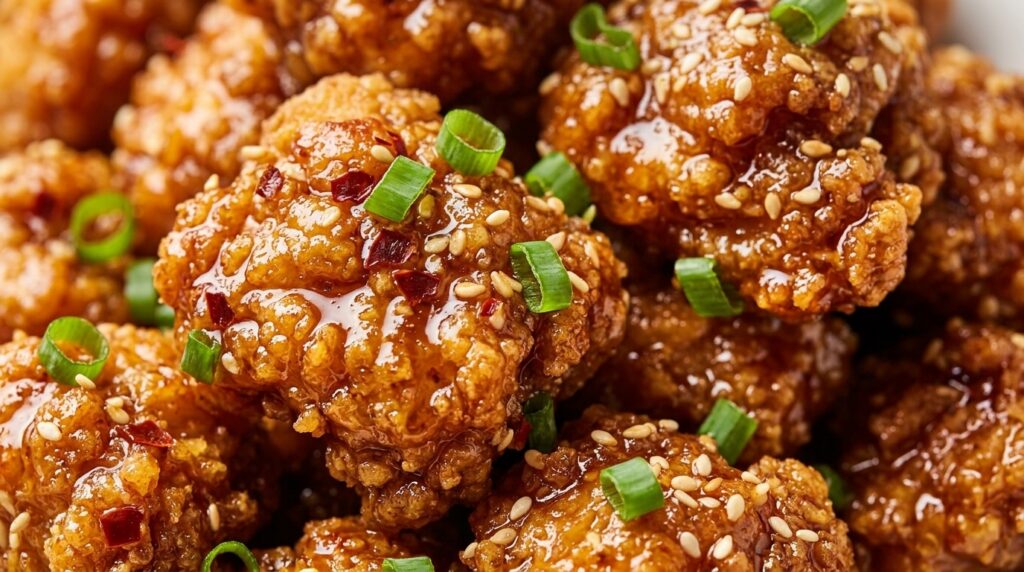
If you are searching for the ultimate vibrant weekday lunch that delivers serious restaurant-quality crunch, look no further than these Crispy Hot Honey Chicken Bowls. Tender, golden bite-sized chicken pieces are dusted in savory spices and seared to a shatteringly crisp texture, then tossed in an addictive bubbling amber hot honey glaze. Paired with caramelized roasted sweet potatoes, charred broccoli florets, and fluffy steamed jasmine rice, this 30-minute balanced bowl elevates your weekly meal prep into an unforgettable culinary experience. The beauty of this recipe lies in the dynamic contrast between fiery heat, luscious floral honey sweetness, and wholesome roasted textures. Rather than dealing with messy deep-frying, a light dusting of cornstarch creates a blistered, crunchy shell in just a few tablespoons of olive oil. Just like our reader-favorite Garlic Butter Steak Bites with Crispy Potatoes and quick Creamy Garlic Parmesan Chicken Skillet, this dish proves that gourmet, high-protein comfort can be assembled on a busy weekday in half an hour. Why You’ll Love This Recipe 30-Minute Speed: The veggies roast on a sheet pan while the chicken cooks on the stovetop, making this entire meal ready in exactly half an hour. Shatteringly Crispy Without Deep Frying: The simple cornstarch dusting creates an incredible pan-seared crunch without greasy batters or heavy cleanup. High-Protein Meal Prep Powerhouse: Delivering 38 grams of lean protein and 6 grams of fiber per serving, this bowl keeps you satisfied and energized all afternoon. Customizable Heat & Sweet Balance: Dial the chili flakes and hot sauce up or down to match your family’s personal spice preference. Key Ingredients & Smart Swaps Fresh ingredients flat-lay: diced chicken breast, sweet potatoes, broccoli florets, pure honey, chili flakes, and aromatic seasonings. Chicken Breast or Thighs: Boneless skinless chicken breasts cook quickly into tender, lean bites. Boneless chicken thighs can also be used if you prefer extra richness and juiciness. Cornstarch: The secret to the restaurant-grade crispy crust. It absorbs moisture and crisps dramatically upon contact with hot oil. Arrowroot powder or tapioca starch are great 1:1 gluten-free substitutes. Pure Honey & Hot Sauce: Raw clover or wildflower honey provides a lush natural base, while cayenne hot sauce and crushed chili flakes deliver signature warmth. A splash of apple cider vinegar cuts through the sugar for a balanced finish. Sweet Potatoes & Fresh Broccoli: Roasted together on a sheet pan until tender and caramelized, providing complex carbohydrates, beta-carotene, and vibrant green crunch. Grain Base: Steamed jasmine rice absorbs the hot honey sauce beautifully. You can easily swap with brown rice, nutty quinoa, or cauliflower rice for a low-carb alternative. Step-by-Step Cooking Walkthrough 1. Sheet Pan Roasting: Toss your cubed sweet potatoes and broccoli florets with olive oil, salt, and smoked paprika. Roast at 400°F (200°C) until fork-tender with golden charred edges. 2. Season & Coat Chicken: Pat diced chicken dry, then toss thoroughly with cornstarch, garlic powder, smoked paprika, sea salt, and black pepper until completely coated in an even, powdery layer. Active cooking action: tossing sizzling golden chicken bites in bubbling hot honey chili glaze in a cast iron skillet. 3. Sear to Golden Crisp: Heat olive oil in a skillet over medium-high heat. Sear the chicken cubes for 3 to 4 minutes per side until deeply browned and crunchy. Remove to a side dish. 4. Glaze & Assemble: Simmer honey, hot sauce, minced garlic, vinegar, and chili flakes in the pan for 60 seconds until bubbling. Toss the chicken back into the sauce for 30 seconds to glaze, then assemble your bowls over fluffy jasmine rice with roasted vegetables. 3 Chef Secrets for Perfect Results 1. Dry the Meat Thoroughly: Moisture is the enemy of crispiness! Always pat the chicken cubes with paper towels before tossing them in cornstarch. A dry surface ensures the starch forms a crunchy shell instead of a gummy paste. 2. Don’t Crowd the Pan: Give the chicken bites space to breathe. If the skillet is overcrowded, the meat steams instead of browning. Cook in two quick batches if your pan is under 12 inches. 3. Toss at the Very Last Second: Honey burns easily due to its natural sugars. Simmer the hot honey sauce for just 60 seconds, then toss the chicken for 30 to 45 seconds off direct high heat. This keeps the exterior crunchy while ensuring full glossy coverage. What to Serve With Crispy Hot Honey Chicken Bowls Plated restaurant-style: sweet and spicy crispy chicken nestled alongside caramelized sweet potatoes, tender broccoli, and warm jasmine rice. Fresh Toppings & Drizzles: Sliced scallions, toasted white sesame seeds, pickled red onions, or an extra drizzle of spicy sriracha mayo create an epic flavor explosion. Alternative Greens: Sautéed baby spinach, roasted snap peas, or a crisp cucumber ribbon salad add fresh cooling crunch to balance the warm chili glaze. Refreshing Beverages: Pair with iced sparkling water with a fresh lemon wedge, homemade iced peach tea, or a crisp citrus mocktail. Storage, Freezing & Reheating Instructions Meal Prep Refrigeration: Store assembled bowls in airtight glass meal prep containers in the refrigerator for up to 4 days. Keep extra hot honey on the side for drizzling after reheating. Reheating to Preserve Crunch: For the crispiest results, reheat the chicken in an air fryer or toaster oven at 375°F (190°C) for 3 to 4 minutes. The microwave works great too (about 90 seconds) for a quick lunch at the office. Freezing: The cooked glazed chicken and roasted sweet potatoes freeze well for up to 2 months. Thaw overnight in the fridge before warming through. Frequently Asked Questions Can I make this in the air fryer instead of pan-frying?Yes! Coat the chicken in cornstarch and spray generously with olive oil spray. Air fry at 400°F (200°C) for 10 to 12 minutes, shaking the basket halfway, then toss in the warm hot honey sauce. How can I adjust the heat level for kids?To make a milder version, cut the hot sauce down to 1 teaspoon and omit the crushed red pepper flakes. You will still get that luscious
Garlic Herb Butter Roasted Whole Chicken: Crispy & Juicy
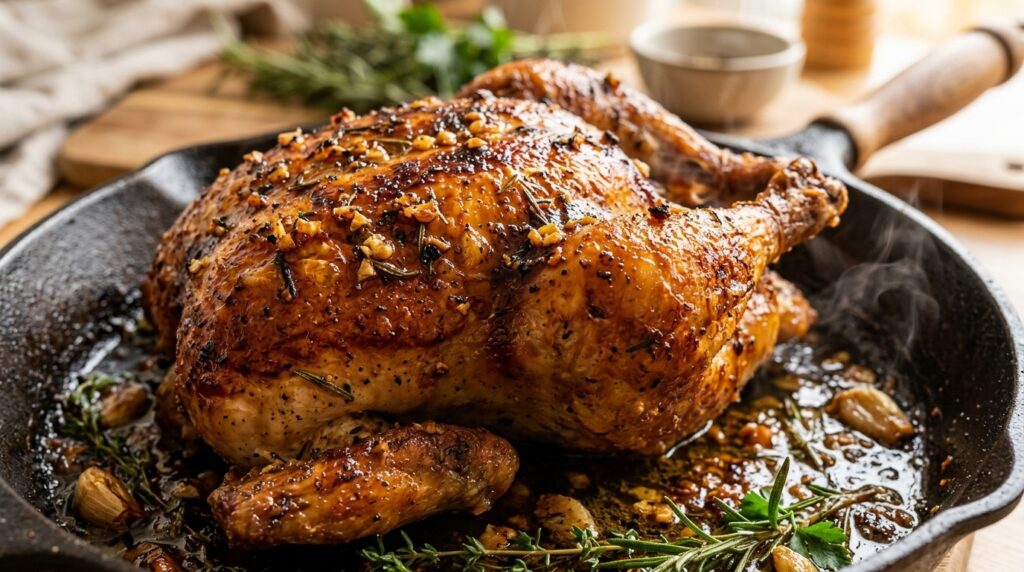
There is no culinary centerpiece more timeless, inviting, or universally loved than a golden, sizzling whole roast chicken. This Garlic Herb Butter Roasted Whole Chicken takes Sunday dinner and holiday hosting to legendary heights—featuring crackling mahogany crispy skin basted in aromatic garlic herb butter, enveloping succulent, ultra-juicy breast meat that melts in your mouth while baby potatoes and sweet carrots caramelize in the savory pan juices below. Roasting a whole bird often intimidates home cooks fearing dried-out white meat or pale, rubbery skin. But the culinary secret to flawless results every single time comes down to two techniques: packing a deeply flavorful garlic herb compound butter directly underneath the breast skin to continuously baste the meat from the inside out, and roasting on an initial high-heat blast to render skin fat crisp before gently finishing through. Why You’ll Love This Recipe Crackling Crispy Skin: High-heat roasting renders the butter and chicken fat into paper-thin, shatteringly crisp skin with smoky paprika depth. Incredibly Moist Breast Meat: Spreading the herb butter under the skin protects the breast from drying out, basting it continuously as it roasts. Built-In Complete Meal: Baby Yukon potatoes, carrots, and sweet onions roast directly under the bird, absorbing all the liquid gold drippings. 100% Halal Wholesome: Made with pure natural ingredients, citrus, aromatic garden herbs, and rich unsalted butter—zero alcohol deglazing needed. Key Ingredients & Smart Swaps Farm-fresh young whole chicken, softened creamery butter, garlic, fresh rosemary, thyme, and roasting vegetables. Whole Young Chicken (4.5 to 5 lbs): Look for an air-chilled whole chicken. Air-chilled poultry retains zero water weight, which guarantees significantly crispier skin and deeper natural flavor. Compound Herb Butter: Softened unsalted butter blended with 6 cloves of fresh minced garlic, chopped fresh rosemary, thyme, Italian parsley, lemon zest, and sweet paprika. This paste is your flavor engine. Cavity Aromatics (Lemon, Halved Garlic Head, Herb Bundle): Stuffed into the cavity, they steam from within during roasting, perfume the meat, and keep internal moisture peak. Baby Yukon Gold Potatoes: These naturally buttery, thin-skinned potatoes roast to tender perfection directly in the rendered chicken fat. Fingerling potatoes or red potatoes also work beautifully. Carrots & Onions: Sliced thick to prevent burning, these root vegetables caramelize and create the foundation for rich, savory pan sauce. Low-Sodium Chicken Broth: A half cup poured in the bottom of the pan prevents vegetable scorching and forms a luscious dipping gravy. Step-by-Step Cooking Walkthrough 1. Build the Herb Compound Butter: In a bowl, mash together room-temperature butter, minced garlic, chopped rosemary, thyme, parsley, lemon zest, sweet paprika, kosher salt, and black pepper until completely smooth and evenly distributed. 2. Prep and Stuff the Bird: Pat the chicken completely dry with paper towels inside and out. Season the cavity with salt and pepper, then stuff tightly with lemon halves, the halved garlic head, and fresh herb sprigs. Tie the legs snugly with kitchen twine. Spreading the rich garlic herb butter generously underneath and over the skin before roasting. 3. Butter Under and Over the Skin: Loosen the skin over the breasts and thighs with clean fingers. Push two-thirds of the compound butter directly against the breast meat under the skin. Massage the rest over the outside skin. Arrange baby potatoes, carrots, and onions in your roasting pan or skillet, pour in broth, and set chicken on top. 4. Two-Stage Roast & Rest: Roast at 425°F (220°C) for 20 minutes to blister the skin. Reduce heat to 375°F (190°C) and roast for another 45 to 55 minutes until internal temperature hits 165°F (74°C) in the thickest part of the thigh. Rest 15 minutes before carving to lock in all savory juices. 3 Chef Secrets for Flawless Roast Chicken 1. Bone-Dry Skin is Mandatory: If the chicken skin has any surface moisture when it goes into the oven, it will steam rather than crisp. Unpack the chicken, pat it down thoroughly with paper towels, and if you have time, let it sit uncovered in the fridge for 2 hours to air-dry. 2. Butter Under the Skin, Oil on the Skin: Butter contains milk solids that brown and caramelize, which can scorch if placed exclusively on the exterior. By placing the majority under the skin, it protects the meat, while olive oil on top provides a clean, crackling finish. 3. Always Rest Before Carving: Slicing into a roast chicken right out of the oven causes the internal juices to flood the cutting board, leaving the meat dry. Resting for 15 minutes allows muscle fibers to relax and reabsorb every drop of moisture. What to Serve With Garlic Herb Roast Chicken Carved restaurant-style with golden roasted potatoes, caramelized carrots, and savory pan gravy. Holiday Potato Specialties: Round out your feast with our viral Loaded Sweet Potato Casserole with Pecan Streusel, crispy Crispy Parmesan Potatoes, or fan-favorite Crispy Hasselback Potatoes. Holiday Stuffing & Rolls: Warm artisanal sourdough dinner rolls or herb-buttered cornbread stuffing to mop up every drop of garlic herb drippings. Fresh Green Sides: Crisp roasted garlic green beans, sautéed asparagus, or a shaved Brussels sprout salad tossed in apple cider vinaigrette. Pan Dripping Gravy: Pour the collected roasting juices through a fine sieve into a small saucepan, simmer with a teaspoon of flour and butter, and drizzle generously over the sliced meat. Storage, Meal Prep & Leftover Ideas Refrigeration: Carve remaining meat from the carcass and store in an airtight container with any leftover roasted vegetables for up to 4 days. Gentle Reheating: Reheat carved chicken in a 325°F (165°C) oven covered with foil and a splash of broth for 10 minutes to maintain juiciness without drying out. Repurpose Leftovers: Shred leftover chicken meat for cozy chicken salad, pot pies, or hearty autumn soups. Save the bones in the freezer to brew homemade golden bone broth! Frequently Asked Questions How do I know when the whole chicken is completely cooked?The most reliable method is using an instant-read meat thermometer inserted into the thickest part of the inner thigh (without touching the bone). It should register 165°F
Creamy Garlic Chicken Tortellini Soup: Easy 30-Minute Dinner
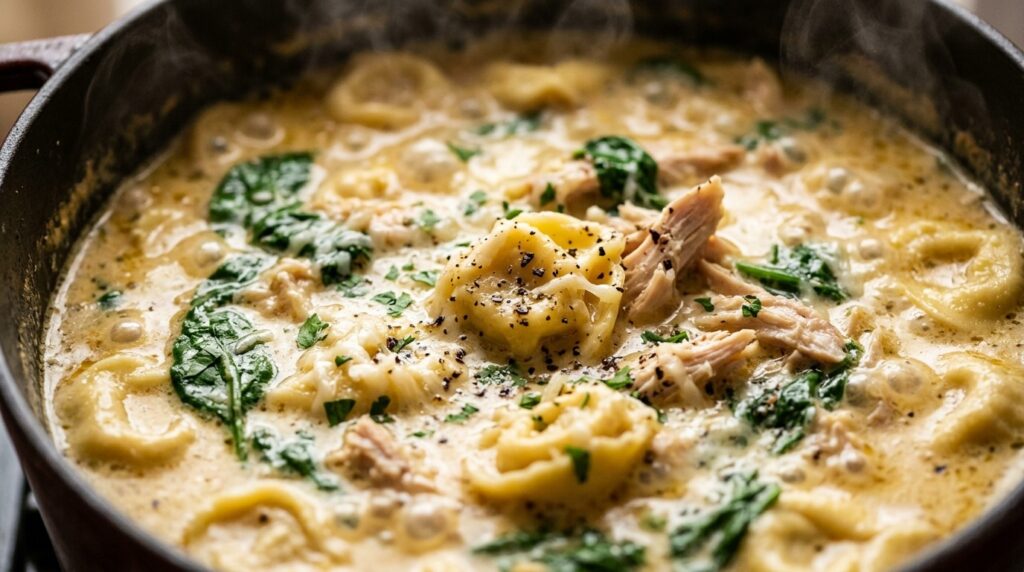
As autumn evenings turn crisp and chilly, nothing restores warmth quite like a steaming bowl of rich, velvety soup bubbling on the stove. This Creamy Garlic Chicken Tortellini Soup combines tender pillowy cheese-stuffed pasta, succulent shredded chicken, and wilted baby spinach in an ultra-luxurious garlic parmesan broth—creating a hearty, restaurant-worthy one-pot dinner ready from cutting board to table in just 30 minutes. Unlike thin brothy soups that leave you raiding the pantry an hour later, this cozy autumn classic achieves an incredible balance between rich indulgence and wholesome nourishment. By building a savory mirepoix foundation of sweet carrots, onions, and celery bloomed in butter and six cloves of fresh garlic, you infuse the chicken bone broth with foundational depth before the three-cheese tortellini cooks right in the pot, releasing just enough natural starch to give the soup a silk-like body. Why You’ll Love This Recipe Effortless 30-Minute Comfort: Everything simmers together in a single Dutch oven, making weeknight dinner completely stress-free. Ultra-Hearty All-in-One Meal: Packed with protein from shredded chicken, hearty carbs from cheese tortellini, and vitamins from fresh baby spinach. 100% Halal Wholesome Goodness: Pure low-sodium chicken bone broth and sweet dairy butter without any alcohol deglazing or pork bacon shortcuts. Stays Pillowy, Never Mushy: Using refrigerated pasta cooked right at the end guarantees tender al dente pasta bites in every spoonful. Key Ingredients & Smart Swaps Fresh, wholesome ingredients arranged on a clean workstation. Refrigerated Three-Cheese Tortellini: Fresh refrigerated tortellini (stuffed with ricotta, parmesan, and romano) cooks in just 3 to 4 minutes and maintains superior texture over dried boxed varieties. If you enjoy classic Italian comfort pasta, you will also love our aromatic Garlic Butter Pasta. Cooked Shredded Chicken Breast: Shredded rotisserie chicken or leftover skillet-seared chicken breast saves massive prep time on busy evenings while absorbing all that savory garlic broth. Fresh Baby Spinach: Folds into the warm soup at the very last minute, wilting into vibrant, silky ribbons that brighten the bowl. Baby kale also works wonderfully. Low-Sodium Chicken Bone Broth: Provides a rich, savory backbone with natural collagen, keeping the recipe 100% halal and wholesome. Heavy Whipping Cream & Parmigiano-Reggiano: Whisked in off direct heat to transform the simmered broth into a silky, luxurious bisque-like texture. Step-by-Step Cooking Walkthrough 1. Sauté the Mirepoix & Garlic: Melt olive oil and butter in a large Dutch oven over medium heat. Add the diced yellow onion, carrots, and celery. Cook for 5 to 6 minutes until soft and fragrant. Stir in the minced garlic, Italian herbs, salt, and black pepper for 60 seconds until delightfully aromatic. Dust the vegetables with flour and stir for 1 minute. 2. Simmer the Savory Broth: Slowly pour in the warm chicken bone broth while stirring to ensure a smooth, velvety consistency. Bring to a gentle boil, then reduce heat to medium and simmer for 5 minutes to let the aromatic flavors meld. TECHNIQUE CUE: Simmer the tortellini for just 3 to 4 minutes until they float to the top; avoid overcooking to keep the pasta pillowy and al dente. 3. Cook the Tortellini: Gently drop the three-cheese tortellini into the bubbling soup. Cook uncovered for 3 to 4 minutes until the pasta puffs up and floats to the surface. 4. Finish with Chicken, Spinach & Velvet Cream: Lower the burner to low. Stir in the shredded chicken breast and fresh baby spinach, watching the leaves wilt gently in about 90 seconds. Pour in the heavy cream and whisk in the freshly grated Parmesan cheese. Simmer on low for 2 minutes until hot and silky. Remove from heat and ladle into warm bowls! 3 Chef Secrets for Perfect Results 1. Never Boil the Cream: High boiling heat can cause dairy fats to break and curdle. Always reduce your burner to the lowest setting before pouring in the heavy cream and whisking in the grated cheese. 2. Cook Tortellini Just Until Floating: Fresh refrigerated pasta cooks remarkably fast in hot broth. The moment the tortellini float to the top of the pot, they are perfectly cooked. Residual heat in the Dutch oven will continue to warm them through. 3. Store Pasta Separately for Meal Prep: If you are making a double batch for weekday lunches, cook the tortellini separately in salted water and store it in an airtight container with a drop of olive oil. Add pasta to individual soup bowls right before reheating to prevent the pasta from soaking up all your delicious broth overnight. What to Serve With Chicken Tortellini Soup Served restaurant-style with warm garlic sourdough bread, shaved parmesan, and fresh herbs. Warm Crusty Garlic Sourdough Bread: Thick-cut artisan bread toasted with butter is non-negotiable for soaking up every last spoonful of velvety garlic broth. Crisp Caesar or Garden Salad: A crisp romaine salad dressed in a zesty lemon-dijon vinaigrette provides a refreshing, acidic contrast to the rich cream soup. Cozy Texas Skillet Dinners: If serving a crowd for Sunday family gatherings, pair this autumn soup as a starter before our celebrated Creamy Garlic Parmesan Chicken Skillet. Roasted Vegetable Medley: Balsamic-roasted green beans or charred broccoli florets add vibrant color and earthy crispness to your dinner table. Storage, Freezing & Reheating Instructions Refrigeration: Allow leftover soup to cool to room temperature. Store in an airtight container in the refrigerator for up to 3 to 4 days. Gentle Stove Reheating: Reheat in a saucepan over medium-low heat. Add 1/4 cup of chicken broth or milk to loosen the broth, stirring occasionally until warmed through. Freezing Guidelines: Because dairy and cooked pasta can alter in texture after freezing, we recommend freezing the soup base (broth, vegetables, shredded chicken) before adding the heavy cream and tortellini. Freeze for up to 3 months, then thaw overnight and add fresh tortellini and cream when reheating. Frequently Asked Questions Can I use frozen tortellini instead of refrigerated?Yes, frozen cheese tortellini works wonderfully! Simply add an extra 2 to 3 minutes of simmering time until the tortellini are tender and floating at the surface. Can I
Creamy Garlic Parmesan Chicken Skillet: Easy 30-Minute Dinner
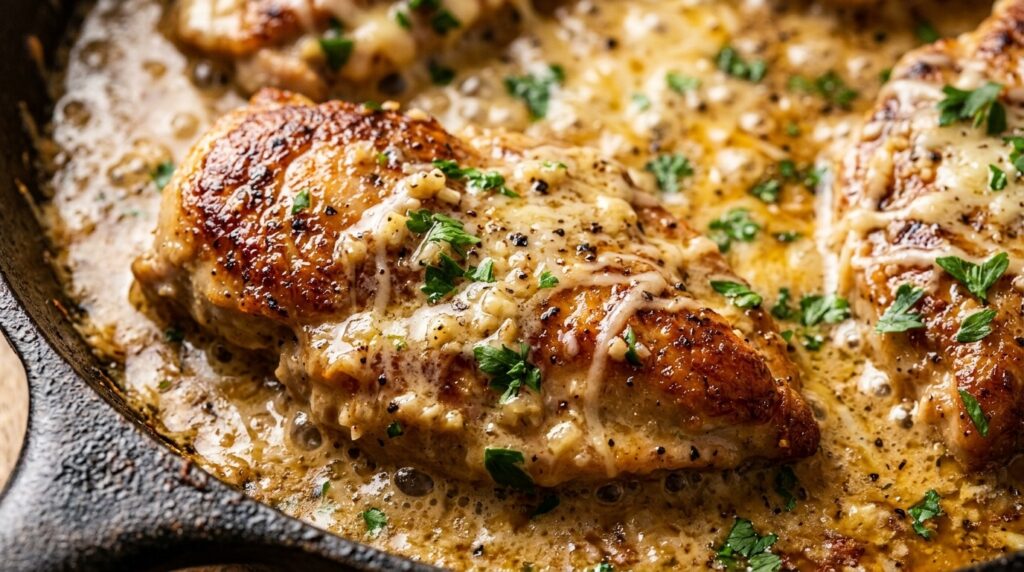
The irresistible aroma of golden seared chicken sizzling in rich garlic butter and freshly grated Parmesan is enough to draw everyone straight to the kitchen. With tender, juicy cutlets smothered in an ultra-velvety garlic herb cream sauce, this Creamy Garlic Parmesan Chicken Skillet is pure restaurant-quality comfort made right on your stovetop in just 30 minutes. What elevates this skillet dinner beyond standard weeknight chicken is the fond—the deep, golden caramelized drippings left behind in the cast-iron pan after searing the cutlets. By gently blooming six cloves of fresh minced garlic in melted butter and deglazing those savory pan drippings with low-sodium chicken bone broth, you build an incredibly rich flavor foundation before whisking in the cream and aged Parmigiano-Reggiano. The result is a sauce that clings luxuriously to every slice of chicken with zero artificial shortcuts. Why You’ll Love This Recipe Lightning-Fast Weeknight Speed: Ready from cutting board to table in just 30 minutes, making it the ultimate solution for busy evenings. Effortless One-Pan Cleanup: Everything cooks in a single skillet, which means less time washing dishes and more time relaxing after dinner. 100% Halal Wholesome Comfort: Naturally free from pork or alcohol, relying on pure chicken bone broth and fresh aromatics for depth of flavor. Luxurious Restaurant-Quality Texture: Searing thin chicken cutlets keeps the meat extraordinarily juicy, while freshly grated Parmesan creates a silky, velvety emulsion. Key Ingredients & Smart Swaps Fresh, high-quality ingredients arranged on a clean kitchen workstation. Boneless Skinless Chicken Breasts: Slicing them horizontally into thin cutlets ensures rapid, even cooking without drying out. You can also use boneless chicken thighs for an even richer bite. Fresh Minced Garlic: Six plump cloves provide that signature aromatic punch. Avoid pre-minced jarred garlic, as fresh cloves yield superior sweetness when bloomed in butter. Parmigiano-Reggiano: Freshly grated Parmesan from a solid block melts smoothly into the sauce. Pre-shredded cheese contains anti-caking agents that can cause graininess. Low-Sodium Chicken Bone Broth: Used to deglaze the pan drippings, infusing the cream sauce with savory richness while keeping the recipe 100% halal. Heavy Whipping Cream: Provides the luxurious velvet body for the sauce. For a lighter touch, half-and-half can be substituted with a pinch of extra flour for thickening. Step-by-Step Cooking Walkthrough 1. Season and Prep the Cutlets: Pat the chicken breasts dry with paper towels. Slice horizontally into four even cutlets. Season both sides generously with kosher salt, freshly cracked black pepper, garlic powder, and Italian herbs, then lightly dust in flour to create a delicate crust that locks in juices. 2. Sear to Golden Perfection: Heat olive oil and butter in a large 12-inch cast-iron skillet over medium-high heat. Add the cutlets in a single layer and sear undisturbed for 4 to 5 minutes per side until deeply golden brown and an instant-read thermometer registers 165°F (74°C). Transfer the chicken to a warm plate and tent loosely with foil. TECHNIQUE CUE: Lower the heat before whisking in the grated parmesan to ensure a silky, lump-free sauce. 3. Build the Garlic Pan Fond: Turn the burner heat down to medium. Melt the remaining butter in the skillet drippings, then toss in the minced garlic. Sauté for 60 seconds until fragrant, scraping up every bit of caramelized fond from the bottom of the pan. 4. Deglaze and Simmer Cream: Pour in the chicken bone broth to deglaze the skillet and let it reduce by half for 2 minutes. Pour in the heavy cream, bring to a gentle bubble, then lower the heat and gradually whisk in the grated Parmesan until a smooth, velvety sauce forms. 5. Baste and Finish: Return the golden chicken cutlets and all resting plate juices back into the skillet. Spoon the bubbling garlic parmesan sauce generously over each piece and let them simmer together for 2 minutes before removing from heat. 3 Chef Secrets for Perfect Results 1. Grate the Cheese Fresh: Pre-bagged cheeses are coated in cellulose to prevent clumping in the package, which prevents them from melting smoothly. Grating your own block of Parmesan takes less than 60 seconds and produces a restaurant-grade velvet emulsion. 2. Control the Heat Before Adding Dairy: Boiling heavy cream or adding cheese over high heat can cause the dairy fats to separate and turn oily. Always reduce your burner to medium-low before whisking in the cheese, letting the residual skillet warmth melt it gently. 3. Never Discard the Skillet Fond: Those brown caramelized bits stuck to the bottom of the cast iron after searing the chicken are concentrated savory gold. Deglazing with chicken broth releases all that natural flavor straight into your cream sauce. What to Serve With Creamy Garlic Parmesan Chicken Served restaurant-style with crisp roasted asparagus and crusty sourdough bread. Crusty Artisan Bread or Warm Garlic Bread: Perfect for dipping into every last drop of that velvety garlic parmesan cream sauce. Tender Roasted Vegetables: Charred asparagus spears, roasted broccoli florets, or green beans provide a vibrant, crisp contrast to the rich chicken. Fluffy Grains or Pasta: Spoon the chicken and extra sauce over a bed of buttery fettuccine, angel hair pasta, creamy mashed potatoes, or steamed jasmine rice. Crisp Garden Salad: A simple mixed greens salad dressed with a bright lemon vinaigrette balances the richness of the skillet sauce. Storage, Freezing & Reheating Instructions Refrigeration: Allow leftovers to cool completely, then transfer to an airtight glass container. Store in the refrigerator for up to 4 days. Gentle Stove Reheating (Best Method): Reheat cutlets in a small skillet over low heat. Add 1 to 2 tablespoons of chicken broth or milk to loosen the sauce and stir gently until warm and creamy. Microwave Reheating: Heat on 50% power in 45-second intervals, stirring the sauce between bursts to prevent the cream from separating. Freezing: Because cream-based sauces can slightly separate upon thawing, freezing is best done before adding the cream. If freezing the completed dish, freeze in a freezer-safe container for up to 2 months and thaw overnight in the fridge before gently reheating. Frequently Asked Questions Can