
Cozy Creamy White Chicken Lasagna Soup: One-Pot Fall Comfort
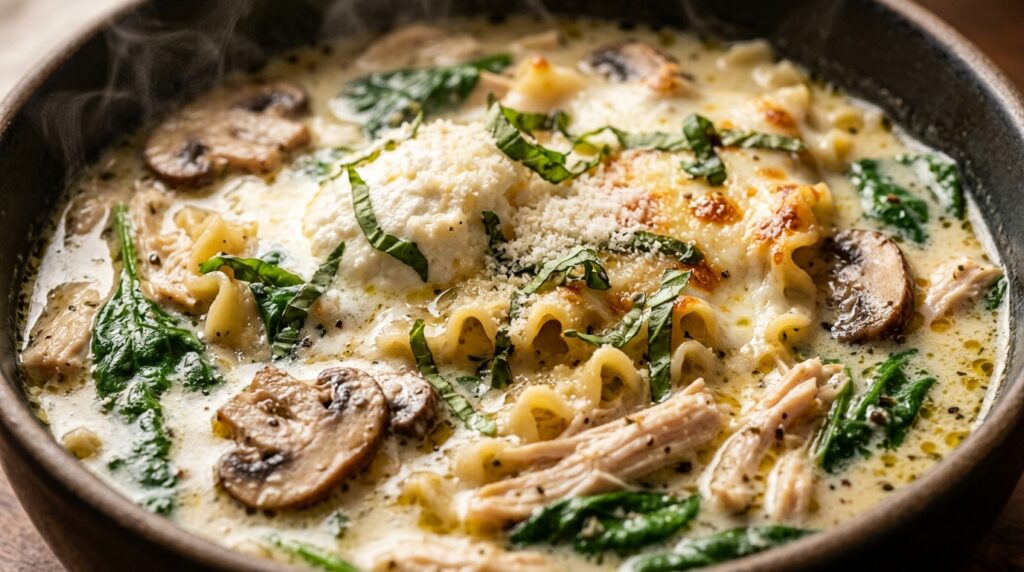
When brisk autumn evenings call for the deeply satisfying comfort of an Italian baked pasta, this Creamy White Chicken Lasagna Soup brings all the luscious indulgence of classic white lasagna into your kitchen in just 45 minutes. Imagine tender, juicy ribbons of shredded chicken breast, ruffled curly lasagna noodles, earthy cremini mushrooms, and tender baby spinach simmered inside an ultra-velvety garlic parmesan and ricotta cream broth. Finished with a melting crown of whole-milk mozzarella and fragrant garden basil, every spoonful delivers restaurant-caliber decadence with all the ease of a simple, one-pot weeknight dinner. Traditional lasagna is undeniably one of culinary history’s great comfort foods, but constructing delicate pasta layers, baking for an hour, and waiting for it to set requires time and energy most busy weeknights simply do not afford. This reimagined soup captures the exact aromatic flavor profile of a five-star white lasagna—nutty Parmigiano-Reggiano, rich whole-milk ricotta, savory garlic, and sweet butter roux—while streamlining preparation into one enameled Dutch oven. By breaking raw lasagna noodles directly into the simmering herb-infused chicken bone broth, the pasta releases natural starches that seamlessly emulsify the broth into a rich, glossy sauce without requiring heavy roux-thickening agents. Why You’ll Love This Recipe Effortless One-Pot Cleanup: Everything from searing the chicken to simmering the ruffled pasta noodles happens in a single pot, minimizing sink clutter and evening kitchen cleanup. Ready in Under 45 Minutes: Enjoy genuine slow-baked Italian pasta flavor on a Tuesday evening without laboring over multi-step assembly or lengthy oven times. Luxurious 3-Cheese Balance: The silky combination of whole-milk ricotta, aged Parmigiano-Reggiano, and gooey melted mozzarella provides velvety richness without feeling overly heavy. Packed with wholesome Lean Protein: Tender shredded chicken breasts and nutrient-rich baby spinach make this comforting bowl hearty, nutritious, and deeply satisfying for the entire family. Key Ingredients & Smart Swaps Fresh, wholesome ingredients neatly prepped for creamy white chicken lasagna soup. Boneless Skinless Chicken Breasts: Provide clean, lean savory protein that shreds easily after poaching in the seasoned broth. Smart Swap: Boneless chicken thighs deliver even deeper flavor, or use leftover rotisserie chicken to cut cooking time by 10 minutes. Curly-Edged Lasagna Noodles: Breaking standard dry lasagna noodles into 1.5-inch pieces gives you authentic wavy ruffled ribbons that cup the rich parmesan sauce. Smart Swap: Mafaldine (campanelle or mini lasagna pasta) or penne rigate work beautifully if traditional lasagna sheets are unavailable. Low-Sodium Chicken Bone Broth: Forms the flavorful aromatic base of the soup, offering collagen body and rich poultry flavor. Low sodium is essential so you can calibrate the salt balance alongside salty cheeses. Cremini Mushrooms & Fresh Garlic: Baby bella mushrooms sautéed in golden butter and olive oil lend earthy umami depth, while minced fresh garlic infuses sweet Italian aroma. Whole-Milk Ricotta Cheese: Whisking half the ricotta directly into the hot broth creates instant creamy velvet body, while saving the rest for a fresh cool dollop on top replicates the classic lasagna ricotta layer. Heavy Cream & Fresh Spinach: Heavy cream brings luxurious silkiness, while tender fresh baby spinach adds bright color, dietary iron, and balanced freshness to cutting through richness. Step-by-Step Cooking Walkthrough 1. Sear the Seasoned Chicken: Heat olive oil in a large Dutch oven over medium-high heat. Season chicken breasts with sea salt and cracked black pepper, then sear for 2 to 3 minutes per side until lightly browned. Set aside on a plate; the chicken will finish cooking through gently while simmering in the broth. 2. Sauté Vegetables & Build Flavor Base: Melt butter in the same pot over medium heat. Sauté the diced yellow onions and sliced cremini mushrooms for 5 minutes until soft and caramelized. Stir in minced garlic, Italian herbs, and red pepper flakes, cooking for 60 seconds until delightfully fragrant. Gently stirring ruffled lasagna ribbons and baby spinach as they simmer in velvety cream broth. 3. Simmer Broth & Poach Chicken: Dust the sautéed vegetables with flour, cooking for 1 minute to coat. Gradually pour in chicken bone broth while scraping up all the delicious browned bits from the base of the pot. Return chicken breasts to the liquid, bring to a gentle boil, then cover and simmer over medium-low heat for 12 to 14 minutes until cooked through (165°F internal temperature). 4. Shred Chicken & Boil Lasagna Noodles: Remove the cooked chicken breasts to a cutting board and shred with two forks. Drop the broken lasagna noodles into the simmering soup broth, cooking uncovered for 10 to 12 minutes until al dente. Stir periodically to keep noodles floating freely without clumping. 5. Fold in Creams, Cheeses & Spinach: Reduce heat to low. Whisk in heavy cream, half of the whole-milk ricotta, and finely grated Parmigiano-Reggiano until smoothly incorporated. Fold the shredded chicken and fresh baby spinach back into the pot, simmering for 2 minutes just until spinach wilts into tender, vibrant emerald ribbons. 3 Chef Secrets for Perfect Results 1. Break Noodles into Varied Rustic Shapes: When breaking your dry lasagna noodles by hand, don’t worry about uniform squares. A mix of ruffled edges and flat pieces provides delightful textural variation that captures broth in every fold. Break them over the pot or inside a clean kitchen towel to catch stray flying crumbs! 2. Whisk Ricotta at Room Temperature: Cold cheese straight from the refrigerator can seize or appear slightly grainy when introduced to hot broth. Let your ricotta and heavy cream sit on the counter for 15 minutes before stirring in, ensuring a smooth, restaurant-grade emulsion. 3. Cook Pasta Just to Firm Al Dente: The lasagna noodles will continue to soften and absorb liquid even after the stove is turned off. Pull them off the heat when they still have a slight toothsome bite so they stay tender and structured throughout dinner. What to Serve With White Chicken Lasagna Soup Comforting bowl of white lasagna soup served restaurant-style with warm garlic bread. Warm Toasted Garlic Sourdough: Crusty artisan sourdough baguette rubbed with garlic butter is essential for mopping up every last drop of garlic parmesan
Loaded Hashbrown Breakfast Casserole: Easy Make-Ahead Morning Bake

When it comes to feeding a hungry crowd on busy holiday mornings or hosting an effortless weekend family brunch, nothing beats this Loaded Hashbrown Breakfast Casserole. Featuring golden shredded hashbrowns, fluffy baked farm eggs, melted sharp cheddar and pepper jack cheese, savory crumbled breakfast sausage, and sweet bell peppers, every single bite delivers pure homestyle breakfast perfection with zero morning stress. The true genius of this breakfast bake is its remarkable versatility: you can assemble the entire dish the evening before, refrigerate it overnight, and simply slide it into the preheated oven while you brew your morning coffee. By thoroughly drying the thawed shredded hashbrowns and whisking sour cream directly into the egg custard, the casserole bakes with crispy golden edges and an ultra-fluffy, velvety center that never turns watery or rubbery. Alongside our viral sweet brunch favorites like Overnight Pumpkin French Toast Casserole and savory Loaded Sweet Potato Bacon Hash, this savory bake is the undisputed champion of weekend breakfast tables. Why You’ll Love This Recipe Effortless Make-Ahead Convenience: Assemble everything in 15 minutes the night before, cover, and bake fresh in the morning for stress-free hosting. Crispy Hashbrowns, Fluffy Eggs: Squeezing excess moisture from the potatoes ensures a sturdy, crispy bottom crust paired with a tender egg custard. Crowd-Pleasing & Freezer-Friendly: Yields 12 hearty portions that slice cleanly into beautiful squares and reheat like a dream throughout the week. Completely Customizable: Easily adapt the fillings to your taste with turkey bacon, vegetarian veggies, or spicy jalapeños. Key Ingredients & Smart Swaps Shredded hashbrowns, farm eggs, cheese varieties, savory sausage, peppers, and seasoning essentials arranged on a quartz workstation. Shredded Russet Hashbrowns: Use standard frozen shredded hashbrowns, thawed completely. Squeeze in a clean dishtowel to extract moisture so they bake crisp rather than mushy. Savory Halal Breakfast Sausage: Cooked and crumbled breakfast sausage (or crispy halal turkey bacon) brings smoky, spiced warmth that anchors the savory profile. Dual Cheese Blend (Cheddar & Pepper Jack): Sharp cheddar provides rich tang and deep golden melt, while Monterey or Pepper Jack adds velvety creaminess and subtle spice. Farm-Fresh Eggs & Sour Cream: Whisking sour cream into whole eggs produces a richer, loftier custard that prevents the casserole from weeping liquid as it bakes. Bell Peppers & Scallions: Red and green bell peppers add vibrant holiday color and gentle crunch, while scallions provide fresh allium sharpness. Smoked Paprika & Garlic Powder: A touch of smoked paprika complements the toasted hashbrowns, enhancing the appetizing amber color of the crust. Step-by-Step Cooking Walkthrough 1. Prep Pan & Dry Hashbrowns: Preheat oven to 375°F (190°C) and grease a 9×13-inch baking dish with butter. Firmly wring out thawed shredded hashbrowns in a clean dish towel to remove moisture, then spread them evenly across the bottom of the dish. 2. Brown Sausage & Layer Fillings: In a skillet, brown and crumble the savory sausage. Scatter sausage crumbles, diced red and green bell peppers, chopped scallions, and 1.5 cups of shredded cheese over the hashbrown layer. Pouring the rich egg and sour cream custard evenly over the layered hashbrowns, sausage, and shredded cheese. 3. Whisk Custard & Pour: Whisk 10 eggs, milk, sour cream, garlic powder, onion powder, smoked paprika, salt, and pepper until light and frothy. Pour slowly over the dish so the custard settles between the potatoes. Top with remaining cheese. 4. Bake to Golden Perfection: Bake uncovered at 375°F (190°C) for 45 to 50 minutes until the center is set and edges are crisp. Let rest 10 minutes, slice into squares, and garnish with fresh chives. 3 Chef Secrets for Perfect Results 1. Thoroughly Wring Out Thawed Hashbrowns: Frozen potatoes contain substantial water from ice crystals. If dumped straight into the casserole dish, that trapped moisture will steam instead of roast, leading to a soggy, watery bottom. Wringing them dry guarantees crisp edges and a firm, sliceable structure. 2. The Sour Cream Secret Weapon: Adding 1/2 cup of sour cream (or full-fat Greek yogurt) to the egg custard prevents overcooking and creates a velvety, soufflé-like crumb. The acidity softens the egg proteins, ensuring the casserole remains moist and tender even after reheating. 3. Observe the 10-Minute Rest: Resist the urge to slice immediately upon pulling the dish from the oven. Resting allows the melted cheeses to settle and the egg custard to firm up slightly, ensuring clean, bakery-neat square slices that hold their shape on the plate. What to Serve With Hashbrown Breakfast Casserole Served brunch-style with fresh avocado slices, hot drip coffee, and snipped fresh chives. Fresh Fruit Salad or Berry Medley: Crisp autumn apples, juicy berries, and melon provide sweet, refreshing balance to the rich, cheesy casserole. Sliced Avocado & Hot Sauce: Creamy avocado slices and a dash of your favorite artisanal hot sauce elevate each bite with bright zing. Freshly Brewed Hot Coffee or Chai: A dark roast morning brew or spiced chai latte pairs naturally with warm melted cheddar and savory sausage. Warm Cinnamon Pastries or Muffins: Serve alongside warm bakery treats like our Cinnamon Swirl Apple Fritter Bread for the ultimate sweet-and-savory brunch spread. Storage, Freezing & Reheating Instructions Overnight Make-Ahead: Assemble the casserole completely, cover tightly with foil or plastic wrap, and refrigerate for up to 24 hours. In the morning, let it sit on the counter for 15 minutes before baking as directed (add 5 minutes to bake time if still cold). Refrigeration: Store leftover slices in an airtight container in the refrigerator for up to 4 days. Reheat individual squares in the microwave for 60 to 90 seconds, or in a toaster oven at 350°F for 8 minutes to re-crisp the potato crust. Freezing: Cut the fully cooled casserole into individual portions, wrap each square tightly in plastic wrap and aluminum foil, then store in a freezer zip-top bag for up to 3 months. Reheat from frozen at 350°F for 20 minutes. Frequently Asked Questions Can I use frozen hashbrown patties or diced potatoes instead?Yes! You can layer frozen hashbrown patties across the bottom, or use frozen
Melt-In-Your-Mouth Crockpot Salisbury Steak: Tender Beef in Rich Mushroom Gravy
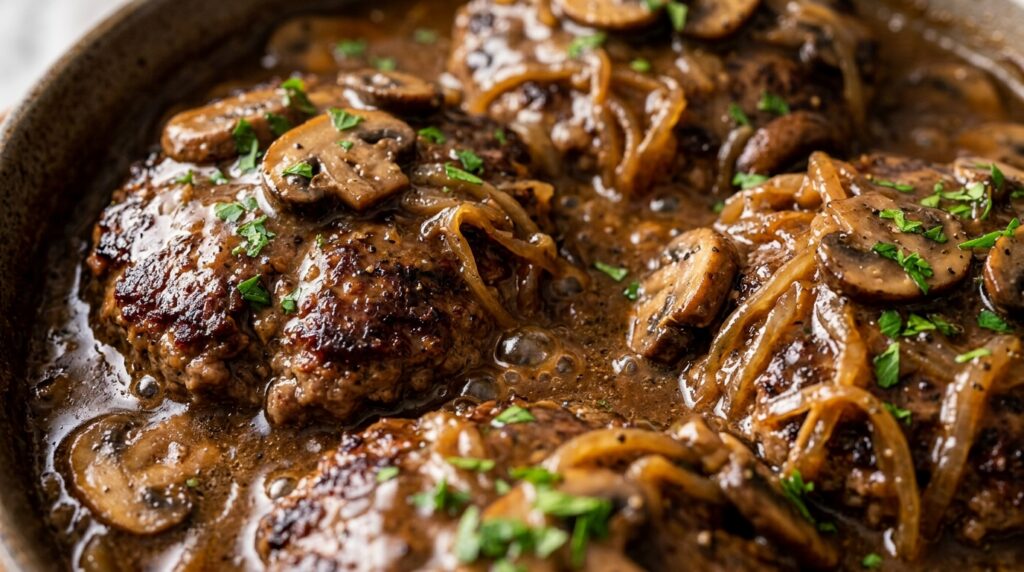
Few vintage comfort foods hit the spot quite like tender, juicy Salisbury steak smothered in rich caramelized onion and earthy cremini mushroom brown gravy. Making it in the slow cooker transforms this retro mid-century classic into an effortless weeknight triumph: seasoned lean beef patties develop incredible fork-tender succulence as they simmer low and slow in a velvety broth packed with savory umami flavors. While many old-fashioned recipes rely on canned condensed soup, our chef-crafted version builds deep, authentic restaurant-quality flavor from scratch using rich beef bone broth, tender cremini mushrooms, sweet yellow onions, and tangy Dijon mustard. The quick stovetop sear locks in savory juices and creates gorgeous caramelized edges before the slow cooker takes over the hard work. Alongside our popular Tender Crockpot Garlic Butter Steak Bites and comforting Classic Creamy Beef Stroganoff, this recipe is guaranteed to earn a permanent spot on your weekly dinner rotation. Why You’ll Love This Recipe Melt-In-Your-Mouth Tenderness: Gentle slow cooking tenderizes the seasoned beef patties so thoroughly you can cut them with just a fork. Scratch-Made Rich Gravy: Made with natural beef bone broth, fresh mushrooms, and caramelized onions without sodium-heavy canned soup. Effortless Hands-Off Cooking: Quick 15-minute skillet sear, then let the slow cooker simmer away while you go about your busy day. Ultimate Family Comfort: An affordable, high-protein dinner that kids and adults alike adore when served over a mountain of mashed potatoes. Key Ingredients & Smart Swaps Fresh ground beef, cremini mushrooms, onions, panko breadcrumbs, broth, and seasoning essentials arranged on a quartz countertop. Lean Ground Beef (85/15 or 90/10): Offers the ideal balance of rich flavor without leaving an excessively greasy pool in the slow cooker crock. Panko Breadcrumbs & Egg: Form a gentle panade that binds the patties while trapping internal juices, preventing the meat from turning dense or rubbery. Fresh Cremini (Baby Bella) Mushrooms: Provide deeper earthy flavor and firmer texture than white button mushrooms, holding up beautifully through hours of simmering. Sliced Yellow Onions: Soften and gently caramelize during the slow cooking process, infusing the brown gravy with natural savory sweetness. Worcestershire Sauce & Dijon Mustard: The essential seasoning duo that delivers Salisbury steak’s signature zesty, tangy flavor foundation. Rich Beef Bone Broth: Provides full-bodied collagen richness to form the backbone of the velvety pan gravy. Step-by-Step Cooking Walkthrough 1. Season & Shape Patties: In a mixing bowl, combine ground beef, panko, beaten egg, Worcestershire sauce, Dijon mustard, tomato paste, garlic powder, onion powder, salt, and pepper. Gently shape into 6 equal oval patties. 2. Golden Skillet Sear: Heat olive oil in a large cast-iron skillet over medium-high heat. Sear patties for 2 to 3 minutes per side until nicely browned on the exterior. This builds the Maillard reaction that deepens the gravy’s color and flavor. Searing beef patties to a deep golden-brown crust before layering in the slow cooker with mushrooms and onions. 3. Layer & Slow Cook: Spread half the sliced onions and mushrooms in the bottom of your slow cooker. Place the seared patties on top, then cover with remaining mushrooms and onions. Whisk broth, Worcestershire, and thyme, then pour over everything. Cover and cook on LOW for 4 to 5 hours. 4. Thicken Velvety Gravy: Remove patties to a plate. Whisk cornstarch slurry into the simmering liquid and cook for 3 to 5 minutes until glossy and thick. Spoon the piping-hot mushroom gravy generously over the patties and garnish with fresh parsley. 3 Chef Secrets for Perfect Results 1. Never Skip the 5-Minute Skillet Sear: While placing raw patties straight into the crockpot is tempting for speed, quick browning locks in meat juices, prevents the patties from breaking apart during hours of simmering, and caramelizes fond that enriches the entire sauce. 2. Handle Ground Beef with a Gentle Touch: Overworking or firmly compressing the meat mixture will yield tough, dense hockey pucks. Mix just until combined and form patties with a light hand for an airy, tender texture. 3. Cook on LOW for Superior Tenderness: Beef patties cook best on the slow cooker’s LOW setting (4 to 5 hours) rather than HIGH. Gentle heat allows the proteins to tenderize without squeezing out moisture, resulting in supreme juiciness. What to Serve With Crockpot Salisbury Steak Served restaurant-style with creamy garlic mashed potatoes, tender green beans, and fresh parsley. Creamy Garlic Mashed Potatoes: The quintessential partner! The velvety mushroom gravy creates divine pools in buttery mashed spuds. Buttered Egg Noodles: Wide ribbon egg noodles tossed in a pat of butter catch every last drop of savory onion gravy. Roasted Green Beans or Steamed Broccoli: Crisp-tender greens provide a fresh, vibrant contrast to the rich beef and mushroom sauce. Warm Crusty Dinner Rolls: Essential for wiping your plate completely clean of delicious brown gravy. Storage, Freezing & Reheating Instructions Refrigeration: Allow leftover patties and gravy to cool completely, then transfer to an airtight container. Refrigerate for up to 4 days. The flavors deepen even further overnight! Gentle Reheating: Reheat in a covered skillet over medium-low heat with a splash of broth for 6 to 8 minutes until hot throughout. You can also microwave individual portions on 70% power for 2 minutes to keep the meat juicy. Freezing Guidelines: Salisbury steak freezes exceptionally well. Place cooked patties and gravy in freezer-safe containers or zip-top bags and freeze for up to 3 months. Thaw in the refrigerator overnight before reheating. Frequently Asked Questions Can I make Salisbury steak with ground turkey instead?Absolutely! Lean ground turkey (93/7) works wonderfully. Add an extra tablespoon of Worcestershire sauce and olive oil to keep the poultry moist and savory. Can I prepare this recipe ahead of time?Yes! You can season and shape the patties up to 24 hours in advance and keep them covered in the refrigerator until you are ready to sear and slow cook. How can I make gluten-free Salisbury steak?Simply substitute gluten-free panko breadcrumbs or crushed gluten-free crackers, and ensure your Worcestershire sauce and soy sauce (or tamari) are certified gluten-free. Pin This Recipe for Later
Homestyle Amish Chicken and Noodles: Ultra Creamy Fall Comfort
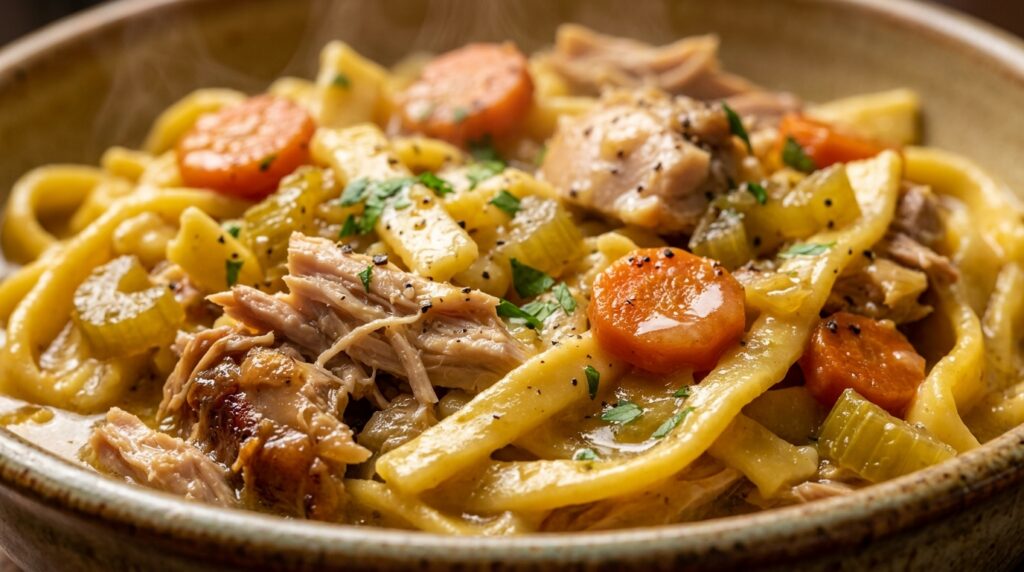
When the autumn chill settles in and you crave a meal that wraps you in pure culinary warmth, nothing compares to the nostalgic magic of authentic Homestyle Amish Chicken and Noodles. Far richer and thicker than standard chicken noodle soup, this beloved Midwestern specialty features thick, chewy homestyle egg noodles and fork-tender shredded chicken enveloped in a velvety, golden buttery gravy infused with sweet carrots, tender celery, and garden herbs. Famously spooned over a cloud of creamy mashed potatoes, it is the ultimate comfort dinner that will make your kitchen feel like a cozy country hearth. In traditional Amish country kitchens across Ohio and Pennsylvania, chicken and noodles is revered not as a simple soup, but as a rich and hearty main course simmered gently until the egg noodles release their starches into the seasoned chicken broth, transforming it into a luxurious sauce. Unlike quick 15-minute pasta dishes, cooking thick homestyle noodles directly in the concentrated poultry stock infuses every single bite with deep, roasted chicken essence. Alongside our reader-favorite Cozy Crockpot Chicken and Stuffing and slow-simmered Crockpot Chicken Pot Pie Soup, this timeless dish represents home-style comfort at its finest. Why You’ll Love This Recipe Pure Unapologetic Comfort: Thick, chewy egg noodles coated in rich golden gravy deliver that deeply satisfying, old-fashioned diner nostalgia in every mouthful. One-Pot Simplicity: The entire meal cooks in a single Dutch oven or heavy pot, meaning minimal cleanup and maximum flavor retention. Thick Gravy Without Artificial Mixes: The natural starches from slow-simmered homestyle noodles combine with butter and bone broth to create an ultra-glossy gravy naturally. The Amish Double-Carb Tradition: Serving this creamy chicken and noodle creation over a bed of buttery mashed potatoes is an iconic Midwestern tradition that will change weeknight dinner forever. Key Ingredients & Smart Swaps Fresh poultry, thick homestyle egg noodles, garden aromatics, and rich bone broth organized on a quartz workstation. Thick Homestyle Egg Noodles: The soul of this dish. Look for dried Amish-style noodles (such as Essenhaus) or frozen homestyle egg noodles (such as Reames) in the supermarket freezer aisle. Regular ribbon egg noodles cook too quickly and lack the signature chewy heft. Boneless Skinless Chicken Breasts or Thighs: Chicken breasts yield lean, clean shredded meat, while boneless chicken thighs add extra richness and stay remarkably tender during simmering. Low-Sodium Chicken Bone Broth: Provides a rich, gelatinous poultry foundation that builds incredible depth of flavor. Low sodium allows you full control over the seasoning. Unsalted Butter & Flour: Cooking a quick roux with the aromatic vegetables coats every ingredient, creating the velvety golden sheen that defines true Amish gravy. Fresh Mirepoix (Onion, Carrots & Celery): Sliced into thick, hearty pieces so they hold their texture without disintegrating during the noodle simmer. Heavy Cream: A modest splash at the very end rounds out the poultry savoriness with irresistible restaurant-quality silkiness. Step-by-Step Cooking Walkthrough 1. Sauté Aromatics & Build Gravy Base: Melt 4 tablespoons of butter in a large Dutch oven over medium heat. Sauté the diced onion, sliced carrots, and celery for 5 to 6 minutes until tender. Stir in the minced garlic and flour, cooking for 60 seconds to toast the flour and unlock nutty richness. 2. Poach the Chicken: Slowly pour in the chicken bone broth while stirring to prevent lumps. Nestle the chicken breasts into the liquid and add bay leaves, poultry seasoning, garlic powder, onion powder, salt, and black pepper. Bring to a boil, then cover and simmer on low for 20 minutes until the chicken is tender and cooked through. Gently stirring the thick homestyle noodles as they slowly simmer to tender perfection in rich chicken gravy. 3. Shred Meat & Simmer Noodles: Remove the chicken to a cutting board and shred into bite-sized strips. Discard the bay leaves. Bring the broth back to a lively simmer, add the thick Amish egg noodles, and cook uncovered for 15 to 18 minutes, stirring frequently, until the noodles are tender and the gravy is thick and glossy. 4. Finish with Cream & Garnish: Return the shredded chicken to the pot and gently fold in the heavy cream. Let everything simmer together on low heat for 3 to 4 minutes until piping hot. Sprinkle with fresh flat-leaf parsley and serve immediately. 3 Chef Secrets for Perfect Results 1. Use Reames or Essenhaus Thick Noodles: Standard cellophane-bagged egg noodles are too thin and will become soggy under the weight of the thick gravy. Thick, flour-dusted Amish noodles contain more egg yolk and release starch slowly, providing the quintessential chewy texture and natural gravy thickening. 2. Stir Frequently During the Noodle Simmer: Because homestyle noodles are dense and starch-rich, they tend to sink to the bottom of the Dutch oven. Stirring every 3 to 4 minutes ensures even cooking and prevents the starches from scorching on the base of the pot. 3. Keep Extra Warm Broth on Hand: Thick egg noodles continue to absorb liquid even after the pot is removed from the heat. If you prefer a saucier consistency or are reheating leftovers the following day, simply stir in an extra cup of warm chicken broth to restore the velvety sheen. What to Serve With Amish Chicken and Noodles Served the authentic Midwestern way: spooned generously over garlic mashed potatoes with warm artisan bread. Creamy Garlic Mashed Potatoes: The legendary Amish tradition! Ladling saucy chicken and noodles over a mountain of buttery mashed potatoes turns this into the ultimate cold-weather feast. Warm Buttery Yeast Dinner Rolls: Crucial for swiping every remaining drop of golden chicken gravy from the bowl. Sweet Buttered Corn: Steamed sweet yellow corn or creamed corn brings bright color and delightful sweetness that complements the rich poultry gravy. Crisp Garden Salad: A simple mixed greens salad tossed with apple cider vinaigrette provides crisp acidity to balance the rich comfort meal. Storage, Freezing & Reheating Instructions Refrigeration: Allow the dish to cool completely before transferring to airtight storage containers. Refrigerate for up to 4 days. The noodles will soak up the sauce overnight,