
Bakery-Style Apple Cinnamon Muffins: Fluffy with Cinnamon Streusel
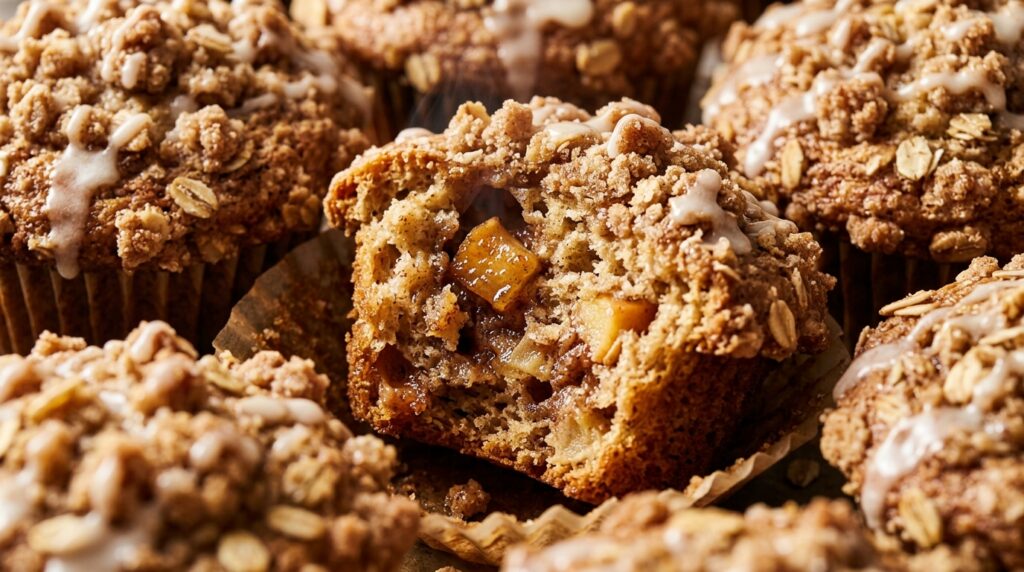
There is nothing quite like waking up to the intoxicating aroma of warm baked apples, brown sugar, and sweet cinnamon wafting through a cozy kitchen on a crisp autumn morning. These Bakery-Style Apple Cinnamon Muffins feature an ultra-moist, fluffy spiced crumb loaded with tender juicy bites of fresh Honeycrisp apples, piled high with a mountain of buttery brown sugar cinnamon oat streusel. Baked with towering domed tops and finished with an optional sweet vanilla drizzle, they rival the finest coffeehouse pastries you can buy—straight from your own oven in just 35 minutes. Most homemade muffins turn out flat, dense, or dry, but this foolproof recipe employs two professional baking secrets that transform ordinary batter into artisan masterpieces. First, Greek yogurt and melted butter guarantee an impossibly tender, velvety crumb that stays moist for days. Second, our signature “high-heat initial burst” baking method activates the leavening agents instantly, shooting the muffin tops upward to create those sky-high, rounded domes characteristic of high-end bakeries. Alongside our popular Bakery-Style Glazed Pumpkin Scones and weekend favorite Cinnamon Sugar Apple Cider Donut Cake, this recipe is autumn breakfast perfection. Why You’ll Love This Recipe Towering Bakery-Style Domes: Our initial 425°F heat burst technique forces the batter upward before setting, giving you gorgeous, high-crowned artisan muffin tops every single time. Double Cinnamon & Real Fresh Apples: Infused with warm ground cinnamon in both the moist batter and the crunchy streusel, packed with crisp diced orchard apples in every bite. Stays Moist for Days: The natural acidity of Greek yogurt interacts with baking soda to create an airy, melt-in-your-mouth crumb that never dries out. 100% Halal & Wholesome: Made with pure natural spices, fresh fruit, real butter, and certified halal pure vanilla extract—zero artificial shortcuts. Key Ingredients & Smart Swaps Fresh baking ingredients arranged on a clean quartz workstation: crisp apples, rolled oats, brown sugar, cinnamon, flour, and Greek yogurt. Fresh Baking Apples: Firm, tart-sweet apples like Honeycrisp, Granny Smith, Pink Lady, or Braeburn are best. They hold their shape and delicate bite during baking rather than turning to mush like Red Delicious. Plain Greek Yogurt or Sour Cream: Adds rich moisture and gentle acidity without thinning out the batter, ensuring tall domes and a plush crumb structure. Melted Butter: Imparts that rich, authentic bakery flavor. You can swap half the butter for mild olive oil or coconut oil if preferred. Old-Fashioned Rolled Oats: In the streusel topping, rolled oats toast to golden, nutty perfection, giving the crown an addictive crunchy texture contrast. Warm Autumn Spices: High-quality Saigon cinnamon combined with a touch of fragrant ground nutmeg elevates the fresh apple flavor into full autumn comfort. Step-by-Step Cooking Walkthrough 1. Mix Chilled Streusel: In a small bowl, combine flour, oats, brown sugar, and cinnamon. Cut in cold cubed butter with a fork or fingers until crumbly pea-sized clusters form. Chill in the fridge while prepping the batter. 2. Whisk Dry & Wet Batter: Whisk dry ingredients in a large bowl. In a separate bowl, whisk eggs, melted butter, Greek yogurt, milk, and vanilla. Fold wet into dry just until combined, then gently fold in diced fresh apples. Active baking action: piling generous mounds of chilled cinnamon oat streusel crumble over the fresh apple muffin batter in parchment-lined cups. 3. Fill High & Top Generously: Fill 12 standard muffin cups completely to the brim. Pile the chilled streusel topping generously over each muffin, gently pressing crumbs into the batter so they stick. 4. The Two-Temperature Bake: Bake at 425°F (220°C) for 5 minutes, then reduce heat to 350°F (175°C) without opening the door and bake for 15 to 17 minutes until golden and springy. Cool, drizzle with vanilla glaze, and devour! 3 Chef Secrets for Perfect Results 1. The Two-Temperature Oven Trick: Baking at 425°F for the first 5 minutes creates a rapid burst of steam that lifts the muffin batter rapidly before the outer crust hardens. Lowering to 350°F allows the interior to bake through gently without burning the streusel. 2. Dice Apples Small (1/4-inch Cubes): Large apple chunks will weigh down the batter and prevent proper rising, causing wet pockets. Dicing into neat 1/4-inch cubes distributes fruit evenly so every bite has juicy apple without compromising muffin height. 3. Keep Streusel Butter Cold: Using warm or melted butter in streusel causes it to melt into the muffin batter while baking. Chilling the cubed butter and keeping the prepared streusel in the refrigerator until ready to top guarantees distinct, crunchy golden streusel nuggets on top. What to Serve With Apple Cinnamon Muffins Plated artisan-style: freshly baked apple cinnamon streusel muffins served warm alongside spiced autumn coffee and fresh orchard fruit. Warm Morning Beverages: Pair with a velvety cinnamon latte, hot spiced apple cider, dark roast drip coffee, or a cozy chai tea latte. Whipped Spiced Butter: Serve warm muffins split in half with a generous smear of whipped salted honey butter or maple cinnamon cream cheese spread. Weekend Brunch Spread: Complement on your brunch table alongside savory items like fluffy scrambled eggs, crispy hashbrowns, or fresh fruit salad. Storage, Freezing & Reheating Instructions Room Temperature: Line an airtight container with a paper towel (to absorb moisture and keep streusel crisp), place muffins in a single layer, and top with another paper towel. Keep for up to 3 days at room temperature. Freezing: Wrap individual cooled muffins tightly in plastic wrap and store in a freezer-safe zip-top bag for up to 3 months. Reheating to Restore Bakery Crispness: Reheat frozen or room-temperature muffins in a 325°F (165°C) toaster oven or conventional oven for 5 to 7 minutes to re-crisp the buttery streusel crust. Frequently Asked Questions Should I peel the apples before adding them to the batter?Yes, we strongly recommend peeling the apples. Apple skins can become tough and chewy when baked inside delicate muffins, whereas peeled diced apples melt into tender, juicy pockets of sweet cinnamon flavor. Can I make mini muffins with this recipe?Yes! Fill a 24-cup mini muffin tin and top with streusel. Bake
Classic Spiced Pumpkin Roll: Tender Sponge with Cream Cheese Filling
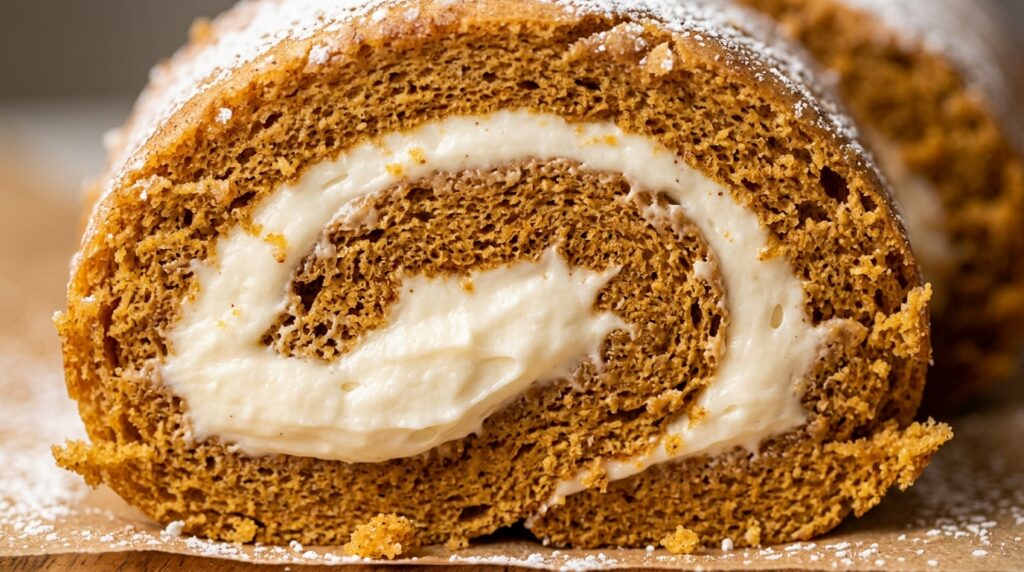
When the autumn leaves begin to turn and holiday aromas fill the kitchen, nothing captures the spirit of the season quite like a Classic Spiced Pumpkin Roll. Featuring a tender, melt-in-your-mouth spiced pumpkin sponge cake rolled into a breathtaking spiral around a thick layer of tangy cream cheese filling, this iconic bakery-style showstopper looks like it came straight from a gourmet patisserie—yet comes together with simple pantry staples in just 40 minutes of hands-on prep. While many home bakers feel intimidated by jelly roll cakes fearing cracks or broken sponges, our foolproof warm-towel method guarantees a supple, flexible cake that curls effortlessly every single time. Unlike store-bought rolls made with overly sweet artificial fillings, this scratch-made recipe uses pure pumpkin purée, warm autumn spices, and real cream cheese frosting that balances natural sweetness with a clean, tangy finish. Alongside our crowd-pleasing Bakery-Style Glazed Pumpkin Scones and irresistible Super Moist Pumpkin Cream Cheese Bread, this timeless dessert is destined to become your signature holiday tradition. Why You’ll Love This Recipe Foolproof Zero-Crack Technique: Rolling the cake inside a sugar-dusted tea towel straight out of the oven builds “muscle memory” in the warm sponge, eliminating cracking completely. Flawless Texture Contrast: The delicate, spiced pumpkin sponge provides the ideal soft canvas for the luscious, silky, velvety cream cheese swirl. Make-Ahead Holiday Lifesaver: In fact, this pumpkin roll tastes significantly better on the second day after the flavors meld in the refrigerator, making it the ultimate stress-free holiday centerpiece. 100% Halal & Wholesome: Made with pure natural spices, fresh dairy, and certified pure halal vanilla extract—free from artificial preservatives or shortenings. Key Ingredients & Smart Swaps Fresh baking ingredients arranged on a clean quartz workstation: pumpkin purée, eggs, spices, flour, and cream cheese. Pure Pumpkin Purée: Be sure to use 100% pure canned pumpkin purée (such as Libby’s), NOT canned pumpkin pie mix, which contains added sugar, water, and thickeners that would make the batter overly dense. Room-Temperature Eggs: Whisking eggs at room temperature allows them to trap air and double in volume, giving this sponge cake its signature light and springy lift without needing yeast. Warm Autumn Spice Quartet: Ground cinnamon, fragrant nutmeg, ginger, and cloves create that comforting harvest flavor profile. You can substitute 2 teaspoons of pre-mixed pumpkin pie spice. Brick-Style Cream Cheese: Always use full-fat block cream cheese softened to room temperature. Tub cream cheese spreads contain excess moisture and vegetable oils that will cause the filling to run. Confectioners’ (Powdered) Sugar: Sifted powdered sugar dissolves smoothly into the butter and cream cheese without any grittiness, while providing the non-stick barrier on the rolling towel. Step-by-Step Cooking Walkthrough 1. Whip Eggs & Fold Batter: Beat room-temperature eggs and sugar on high for 3 to 4 minutes until thick and pale ribbons form. Gently fold in the pumpkin purée and vanilla, then sift in the spiced dry ingredients just until combined. Spread evenly into a parchment-lined 15×10-inch jelly roll pan. 2. Bake to Springy Perfection: Bake at 375°F (190°C) for 13 to 15 minutes. Test by gently touching the center—the sponge should spring right back without leaving an indentation. Active baking action: rolling the hot, freshly baked pumpkin sponge cake tightly inside a powdered-sugar-dusted linen towel to set the spiral shape without cracking. 3. Roll Warm in Sugar-Dusted Towel: Invert the hot cake immediately onto a clean kitchen towel dusted with powdered sugar. Peel off parchment and, starting from the short end, roll the cake and towel together into a cylinder. Cool completely on a wire rack for 1 hour. 4. Fill, Chill & Slice: Unroll the cooled sponge gently. Spread the whipped cream cheese filling evenly across the surface. Reroll tightly without the towel, wrap firmly in plastic wrap, and chill for at least 2 hours before slicing into clean, stunning rounds! 3 Chef Secrets for Perfect Results 1. Roll While Steaming Hot: The single most critical secret to a flawless pumpkin roll is rolling the cake the exact minute it leaves the oven. When warm, the cake structure is pliable and pliable. If you wait even 5 minutes, the starches begin to set and the cake will crack when rolled. 2. Blot Excess Pumpkin Moisture: Different cans of pumpkin purée contain varying amounts of water. If your purée looks particularly wet or watery, spread it between two paper towels and press gently for 10 seconds. Removing excess surface water prevents a gummy sponge. 3. Chill Before Slicing & Wipe the Blade: Never slice a room-temperature pumpkin roll! Chilling in the refrigerator for at least 2 hours firms both the cake and the cream cheese. For sharp, magazine-worthy spirals, dip a long chef’s knife into warm water and wipe it clean with a kitchen towel between every single slice. What to Serve With Classic Pumpkin Roll Plated bakery-style: delicate slices of classic spiced pumpkin roll with creamy spirals, served alongside fresh coffee and autumn harvest garnishes. Warm Autumn Beverages: Serve alongside freshly brewed dark roast coffee, a velvety chai latte, or steaming spiced apple cider with cinnamon sticks. Holiday Dessert Table Spread: Pair on your Thanksgiving or harvest dessert buffet alongside our Easy Apple Cinnamon Roll Casserole and Old-Fashioned Caramel Apple Dumplings. Crunchy Nut Garnishes: Sprinkle toasted chopped pecans, walnuts, or candied ginger over the platter for delightful textural contrast. Storage, Freezing & Reheating Instructions Refrigeration: Because of the fresh cream cheese filling, keep the pumpkin roll wrapped in plastic wrap or stored in an airtight container in the refrigerator for up to 5 days. Freezing: Pumpkin rolls freeze exceptionally well! Wrap the chilled, unfrosted log tightly in two layers of plastic wrap, followed by a layer of heavy-duty aluminum foil. Freeze for up to 3 months. Thaw overnight in the refrigerator before dusting with powdered sugar and serving. Serving Temperature Tip: Let chilled slices sit at room temperature for 15 minutes before serving so the sponge softens and the cream cheese achieves its optimal luscious texture. Frequently Asked Questions Why did my pumpkin roll crack when rolling?Cracking almost
Creamy Crockpot White Chicken Chili: Ultra Cozy Slow Cooker Dinner

When the autumn chill settles in and you crave a deeply satisfying dinner that warms you to the core, nothing hits the spot quite like a steaming bowl of homemade chili. This crockpot white chicken chili recipe transforms humble pantry staples—tender shredded chicken breast, creamy white cannellini beans, sweet golden corn, and fire-roasted green chiles—into an ultra-luxurious, velvety stew. Enriched with melted cream cheese and gooey Monterey Jack, and brightened with fresh lime and cilantro, it delivers restaurant-quality comfort with just 15 minutes of effortless hands-on prep. Unlike traditional tomato-based red beef chili, white chicken chili relies on subtle southwestern aromatics and gentle dairy emulsification for its irresistible flavor profile. Slow-cooking whole chicken breasts directly in rich chicken bone broth infused with toasted cumin, Mexican oregano, and fire-roasted green chiles allows the meat to braise gently, absorbing savory moisture without drying out. Melting room-temperature cream cheese and freshly grated Monterey Jack directly into the broth during the final minutes creates a velvety, velvety body that coats your spoon without requiring heavy flour roux or cornstarch slurries. Why You’ll Love This Recipe True Dump-and-Go Ease: Place chicken, beans, corn, chiles, broth, and spices into your slow cooker—no pre-cooking or browning needed. High Protein & Fiber Packed: Boasting 36 grams of lean protein and 7 grams of wholesome dietary fiber per hearty serving to keep you full and energized. Ultra Creamy Without Flour: Rich cream cheese and freshly melted Monterey Jack create a thick, glossy broth naturally without heavy starches. Crowd-Pleasing Topping Bar: Perfect for game days, busy weeknights, or casual weekend gatherings where everyone customizes their bowl with avocado, chips, and limes! Key Ingredients & Smart Swaps Lean chicken breasts, white cannellini beans, sweet corn, green chiles, spices, and cheeses organized on a quartz counter. Boneless Skinless Chicken Breasts (1 1/2 lbs): Lean and succulent. You can also use boneless chicken thighs or leftover roasted rotisserie chicken added in the final 30 minutes. White Cannellini Beans (2 cans): Creamy and tender with thin skins, cannellini beans (or Great Northern beans) blend seamlessly into the ivory broth. Always rinse and drain well. Fire-Roasted Diced Green Chiles (2 cans): Adds authentic smoky, mild Southwestern chili flavor without overpowering heat. For extra heat, add a diced jalapeño. Sweet Corn Kernels: Brings vibrant golden color, a juicy pop of sweetness, and pleasant textural contrast against the creamy beans and shredded chicken. Cream Cheese & Monterey Jack: The secret behind the silky, luscious texture. Use full-fat brick cream cheese for the smoothest melt without curdling. Southwestern Spice Blend: Ground cumin, Mexican oregano, chili powder, and smoked paprika deliver earthy warmth and aromatic complexity. Fresh Lime Juice: Added at the very end to cut through the rich cheese and brighten every savory flavor note. Step-by-Step Cooking Walkthrough 1. Assemble Ingredients in Slow Cooker: Place chicken breasts at the bottom of a 6-quart slow cooker. Top with rinsed cannellini beans, sweet corn, green chiles, diced onion, and minced garlic. Sprinkle with spices and pour in chicken bone broth. 2. Low-and-Slow Braise: Cover and cook on LOW for 6 hours (or HIGH for 3 1/2 to 4 hours) until the chicken registers 165°F (74°C) and shreds effortlessly. Shredding juicy chicken breasts and melting cream cheese cubes into the bubbling slow cooker broth. 3. Shred Chicken & Melt Cheeses: Transfer cooked chicken to a cutting board, shred into bite-sized strands with two forks, and return to the crockpot. Place cubed cream cheese and shredded Monterey Jack on top. Cover on LOW for 15 minutes to melt. 4. Stir, Brighten & Serve: Whisk vigorously with a wooden spoon until the cheese completely dissolves into a rich, creamy ivory broth. Stir in 2 tablespoons fresh lime juice. Ladle into warm bowls and garnish generously with avocado, cilantro, and tortilla strips. 3 Chef Secrets for Perfect Results 1. Mash Half a Can of Beans for Natural Thickness: For an even thicker, velvety chili body without extra cream, mash one cup of the drained cannellini beans with a fork before adding them to the slow cooker. The natural bean starches thicken the broth luxuriously! 2. Soften Cream Cheese Before Adding: Adding cold, straight-from-the-fridge cream cheese into warm soup creates stubborn little white curd specks that refuse to dissolve. Soften the cream cheese to room temperature and cut into small cubes so it melts into a silky emulsion. 3. Never Skip the Fresh Lime Finish: Rich cheeses, beans, and poultry need an acidic counterbalance to shine. Stirring in fresh lime juice right before serving awakens the cumin and green chiles, transforming good chili into an extraordinary culinary experience. What to Serve With White Chicken Chili Served piping hot with diced ripe avocado, fresh cilantro leaves, sliced jalapeños, and crispy tortilla chips. Warm Honey Jalapeño Cornbread: A slice of sweet, golden cornbread slathered with honey butter is the classic, irresistible companion for dipping into white chili. Crispy Salted Tortilla Chips: Serve a basket of warm artisan tortilla chips or fried corn strips for scooping up every last drop of velvety sauce. Fresh Mexican Street Corn Salad: Pair with a bright, smoky esquites salad tossed with cotija cheese, lime, and chili powder for a full festive Tex-Mex feast. Storage, Freezing & Reheating Instructions Refrigeration: Allow leftover chili to cool to room temperature, then transfer to an airtight container in the refrigerator for up to 4 days. It thickens and tastes even better the next day! Gentle Stovetop Reheating: Reheat in a saucepan over medium-low heat, stirring frequently. Add 2 to 3 tablespoons of extra chicken broth or milk if the chili has thickened excessively in the fridge. Freezing Guidelines: Because of the cream cheese, freeze in airtight glass containers for up to 2 months. Thaw overnight in the refrigerator before reheating gently over low heat, whisking thoroughly to re-emulsify the cheese. Frequently Asked Questions Can I make this spicy?Yes! Add 1 diced fresh jalapeño with seeds, 1/4 teaspoon cayenne pepper, or swap the Monterey Jack for Pepper Jack cheese to dial up the fiery kick. Can
Bakery-Style Glazed Pumpkin Scones: Tender Spiced Autumn Treat

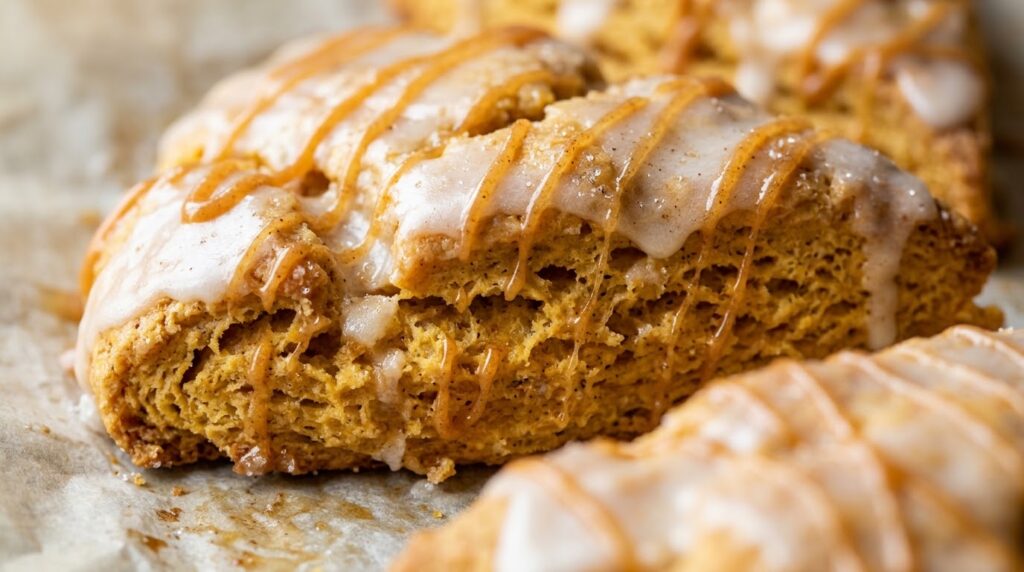
Few things herald the arrival of crisp autumn mornings quite like the warm, comforting scent of cinnamon, ginger, and cloves wafting from the oven. This foolproof pumpkin scones recipe replicates the iconic bakery-style treats made famous by gourmet coffeehouses—delivering tender, buttery crumb layers infused with real pumpkin puree and warm spices. Finished with the signature double-glaze technique—a smooth white vanilla icing base topped with an amber spiced pumpkin drizzle—each flaky triangular scone delivers coffeehouse decadence straight to your kitchen table in just 35 minutes. Many homemade scones suffer from turning dry, crumbly, or unpleasantly bread-like. The culinary secret to achieving tender, moist bakery perfection is twofold: keeping your European butter ice-cold and respecting the moisture balance of real pumpkin puree. Working cold cubed butter into the flour leaves pea-sized butter pockets throughout the dough. As the scones hit a 400°F (200°C) oven, the water inside those trapped butter pockets instantly converts to steam, expanding the dough into glorious, tender flaky layers. Meanwhile, real pumpkin puree acts as a natural humectant, keeping the crumb luscious and moist for days without ever feeling heavy. Why You’ll Love This Recipe Better Than Starbucks: Captures all the nostalgic spiced flavor of the coffeehouse classic with fresher ingredients and far richer flaky texture. Signature Double Glaze: A smooth vanilla icing base followed by a vibrant spiced pumpkin drizzle creates that iconic bakery visual and balanced sweetness. Quick 35-Minute Bake: Requires only 20 minutes of simple hands-on prep—no stand mixer or tedious pastry rolling pins needed. Freezer-Friendly Dough: Cut your wedges ahead of time, freeze raw on a sheet pan, and bake fresh whenever unexpected morning cravings strike! Key Ingredients & Smart Swaps Pure pumpkin puree, cold European butter, autumn spices, unbleached flour, and heavy cream on a quartz counter. Cold European Butter (1/2 cup): Higher fat content and lower water produce ultra-flaky, tender scones. Keep it refrigerator-cold until the second you cut it into the flour. Pure Pumpkin Puree (1/2 cup): Use 100% pure canned pumpkin puree (like Libby’s), not pre-sweetened pumpkin pie mix. Blot lightly with paper towels if visibly watery. Heavy Cream & Cold Egg: Adds richness, tenderness, and structural stability to bind the dough without developing tough gluten strands. Autumn Spice Quintet: A fragrant blend of Ceylon cinnamon, ginger, nutmeg, and cloves delivers that signature coffeehouse autumn aroma. Light Brown Sugar: Adds gentle moisture and subtle molasses notes that complement the pumpkin far better than white granulated sugar alone. Double Glaze Components: Confectioners’ sugar whisked with whole milk, vanilla, and pumpkin puree creates the two-tone bakery glaze. Step-by-Step Cooking Walkthrough 1. Mix Dry & Cut in Cold Butter: Whisk flour, brown sugar, baking powder, spices, and salt in a large bowl. Cut in cold cubed butter using a pastry blender or your fingertips until pea-sized crumbs form. 2. Whisk Wet & Fold Shaggy Dough: Whisk pumpkin puree, cold egg, heavy cream, and vanilla in a small bowl. Pour into dry ingredients and stir gently with a fork just until a soft, shaggy dough forms. Slicing the chilled pumpkin dough round into 8 even triangular wedges before baking. 3. Shape, Slice & Chill: Turn dough onto a floured board, pat into an 8-inch disc (3/4-inch thick), and slice into 8 wedges. Arrange on parchment paper, brush tops with heavy cream, and chill in the freezer for 10 minutes to firm the butter. 4. Bake to Golden & Double Glaze: Bake at 400°F (200°C) for 14 to 16 minutes until edges are golden. Cool completely on a wire rack. Spoon sweet vanilla glaze over each scone, let set 10 minutes, then drizzle with spiced pumpkin glaze in zigzag lines. 3 Chef Secrets for Perfect Results 1. Keep Butter Ice-Cold (The Freeze Trick): If your kitchen is warm, dice your butter and place it in the freezer for 10 minutes before cutting into the flour. Cold butter creates flaky steam pockets; melted butter creates dense, heavy hockey pucks. 2. Never Overwork the Scone Dough: Handle the dough as little as possible. Stir just until the flour is moistened, and pat gently into a round disc. Excessive kneading develops gluten, turning delicate scones into tough bread rolls. 3. Cool Completely Before Applying the First Glaze: Pouring sugar glaze over warm scones causes the icing to melt, thin out, and run right off the pastry onto the counter. Let scones cool to room temperature so the white base sets into a smooth, opaque bakery shell. What to Serve With Glazed Pumpkin Scones Served bakery-style alongside a steaming mug of spiced pumpkin chai tea and freshly brewed espresso. Warm Morning Beverages: Pair with a creamy oat milk pumpkin spice latte, hot spiced apple cider, or rich dark roast French press coffee. Savory Breakfast Proteins: Balance the sweet pastry with crispy halal beef bacon, soft scrambled eggs with fresh chives, or chicken apple sausage links. Autumn Afternoon Tea: Serve on a tiered pastry stand alongside English breakfast tea, clotted cream, and fresh orchard berries for an elegant fall gathering. Storage, Freezing & Reheating Instructions Room Temperature: Store glazed scones in an airtight container lined with parchment paper at room temperature for up to 3 days. Keep the container slightly cracked if you prefer a firmer glaze. Freezing Baked Scones: Freeze fully glazed or unglazed scones in a single layer, then wrap individually in parchment and place in a freezer zip bag for up to 2 months. Thaw at room temperature for 30 minutes. Bake-From-Frozen Hack: Shape and slice raw wedges, freeze solid on a sheet pan, and store in a freezer bag. Bake directly from frozen at 400°F (200°C), adding just 2 to 3 extra minutes to the bake time! Frequently Asked Questions Can I use pumpkin pie spice instead of individual spices?Yes! Replace the cinnamon, ginger, nutmeg, and cloves with 2 1/2 teaspoons of pre-mixed pumpkin pie spice in the dry ingredients. Why are my scones crumbly and dry?Too much flour is the most common culprit. Always fluff your flour with a fork, spoon it gently into
Tender Crockpot Garlic Butter Steak Bites: Melt-In-Your-Mouth Beef
When it comes to unforgettable weeknight comfort food, few culinary creations rival the rich, savory luxury of perfectly tender beef bathed in an aromatic herb-garlic butter sauce. This garlic steak bites crockpot recipe takes prime cubes of succulent sirloin, seared hot for deep golden caramelization, and simmers them low and slow in a velvety broth of European butter, roasted minced garlic, Worcestershire, and fresh garden herbs. By the time you lift the slow cooker lid, the beef is so melt-in-your-mouth tender you won’t even need a steak knife—producing a bistro-worthy dinner with virtually zero evening stress. Cooking steak in a slow cooker often intimidates home cooks who fear turning expensive cuts of beef tough or dry. The secret to achieving juicy, butter-tender perfection is a combination of cut selection, a lightning-fast pan sear, and keeping cooking time calibrated. Choosing well-marbled top sirloin or boneless chuck roast provides just enough intramuscular fat to stay juicy without becoming greasy. Searing the exterior in a smoking-hot skillet for 60 seconds locks in internal moisture through the Maillard reaction, while deglazing the pan with rich beef bone broth captures every microscopic bit of caramelized fond to build the base of your silky garlic butter gravy. Why You’ll Love This Recipe Melt-In-Your-Mouth Tenderness: Gentle low-and-slow simmering tenderizes the beef fibers until every bite melts effortlessly on your tongue. Bistro-Quality Garlic Herb Butter: Real European butter melted with fresh garlic, thyme, and rosemary forms an ultra-luxurious sauce perfect for spooning over potatoes. High Protein & Naturally Low Carb: Packs 38 grams of lean beef protein per serving with only 4 grams of net carbs, making it keto-friendly and nutrient-dense. Effortless Entertaining: Sear ahead in the morning, let the slow cooker do the heavy lifting all afternoon, and serve a hot feast the minute guests arrive. Key Ingredients & Smart Swaps Prime beef sirloin cubes, European butter, fresh garlic, rich bone broth, and garden herbs on a quartz station. Beef Top Sirloin (2 lbs): Lean, beefy, and exceptionally tender. You can also use well-marbled chuck roast or ribeye ends trimmed into uniform 1 1/2-inch cubes. European Unsalted Butter (1/2 cup): Higher butterfat content ensures a richer, silkier sauce that emulsifies beautifully with the beef juices without separating. Fresh Garlic Cloves (8 cloves): Minced fresh garlic infuses sweet, pungent aroma as it cooks down in the butter. Avoid jarred minced garlic for the best flavor. Beef Bone Broth & Worcestershire: Delivers savory depth, umami richness, and enough braising liquid to keep the steak pieces submerged and succulent. Smoked Paprika & Garlic Powder: Added to the dry steak rub to create a savory, deeply caramelized exterior crust during the high-heat sear. Fresh Thyme & Rosemary Sprigs: Woodsy autumn herbs that balance the richness of the butter and infuse steakhouse elegance into the pan juices. Step-by-Step Cooking Walkthrough 1. Season Steak Cubes: Pat the beef cubes thoroughly dry with paper towels. Toss in a large bowl with kosher salt, coarse black pepper, garlic powder, and smoked paprika until every surface is well seasoned. 2. Flash Sear in Cast Iron: Heat avocado oil in a heavy cast-iron skillet over high heat. Sear the steak cubes in batches for 60 seconds per side until a deep mahogany crust forms. Transfer immediately to the slow cooker. Transferring caramelized seared steak bites into the slow cooker insert with aromatic garlic herb broth. 3. Deglaze & Assemble: Add beef bone broth, Worcestershire, soy sauce, and minced garlic to the warm skillet, scraping up all browned fond. Pour over the beef in the slow cooker. Top with sliced pats of butter and fresh herb sprigs. 4. Slow Cook & Thicken: Cover and cook on LOW for 3 1/2 to 4 hours until fork-tender. Discard herb stems. Whisk in the cornstarch slurry and let bubble on HIGH for 10 minutes until the garlic butter sauce is thick and glossy. 3 Chef Secrets for Perfect Results 1. Always Sear First (Never Skip the Cast Iron): Throwing raw steak cubes straight into a slow cooker results in a pale, boiled texture and watery sauce. A smoking-hot 1-minute sear creates deep flavor compounds through the Maillard reaction that permeate the entire dish. 2. Cook on LOW, Not HIGH: High heat boils the delicate steak cubes and contracts the proteins too quickly, turning lean beef tough and chewy. Cooking on LOW allows the connective fibers to relax and break down gently into melt-in-your-mouth tenderness. 3. Deglaze Every Bit of Pan Fond: Those brown bits left behind in your skillet after searing are concentrated culinary gold! Pouring broth into the skillet while it is hot dissolves that rich savory crust, infusing your slow cooker gravy with intense steakhouse flavor. What to Serve With Crockpot Steak Bites Served restaurant-style over creamy garlic mashed potatoes with pan gravy and crisp roasted asparagus. Creamy Garlic Mashed Potatoes: The ultimate pairing—pillowy Yukon gold mashed potatoes soak up the rich garlic butter gravy like a culinary sponge! Buttered Egg Noodles or Rice: Toss wide egg noodles or fluffy jasmine rice in the extra garlic butter sauce for an effortless 30-minute comfort dinner. Roasted Green Vegetables: Complement the savory beef with crisp roasted asparagus spears, charred broccolini, or sautéed green beans with lemon zest. Storage, Freezing & Reheating Instructions Refrigeration: Store leftover steak bites submerged in their garlic butter sauce in an airtight glass container in the refrigerator for up to 4 days. Gentle Stovetop Reheating (Best Method): Reheat slowly in a skillet over medium-low heat with a splash of beef broth. Low heat keeps the beef tender without overcooking the meat. Freezing Guidelines: Freeze cooked steak bites and gravy in a freezer-safe container or zip bag for up to 3 months. Thaw overnight in the fridge before gently reheating. Frequently Asked Questions Can I make this with stew meat?Yes, but beef stew meat is cut from tough chuck or round and requires more time to break down. Cook stew meat on LOW for 6 to 7 hours until it reaches fork-tender perfection. Can I add mushrooms
Super Moist Cinnamon Roll Banana Bread: Easy Swirled Loaf
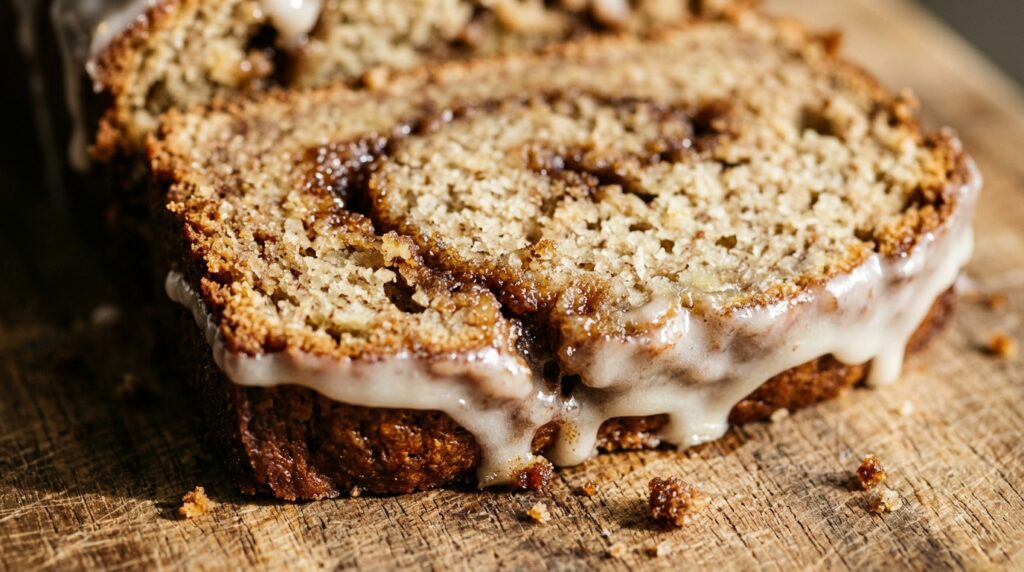
If you have ever found yourself torn on a cozy weekend morning between baking a warm batch of gooey cinnamon rolls or pulling a fragrant, tender loaf of homemade banana bread from the oven, this recipe is your ultimate dream come true. This cinnamon roll banana bread recipe unites the ultra-moist, naturally sweet crumb of brown butter banana bread with thick, molten ribbons of buttery cinnamon brown sugar swirled through every single slice. Crowned with a glossy vanilla icing glaze that pools into warm crevices, it turns simple pantry staples into a showstopping bakery masterpiece with just 15 minutes of hands-on prep. The culinary brilliance of this recipe lies in balancing the moisture of deeply ripe fruit with the structural density needed to hold a molten cinnamon ribbon aloft without sinking. Overripe bananas naturally develop higher fructose levels and liquid content as their peels freckle, infusing the batter with intense natural sweetness and a cloud-like crumb. By melting European butter and incorporating both dark brown and white sugar, the crumb remains remarkably tender for up to five days. Meanwhile, combining melted butter directly into the cinnamon-sugar swirl creates a rich, jammy cinnamon paste that stays luscious and gooey instead of turning grainy during baking. Why You’ll Love This Recipe No Yeast & No Rolling: Get all the decadent flavors of artisan cinnamon rolls without kneading, proofing, or rolling sticky dough on floured counters. Unmatched Moisture & Softness: Ripe mashed bananas combined with melted European butter guarantee an ultra-tender loaf that stays soft for days. Signature Molten Cinnamon Ribbon: Layering the spiced brown sugar paste through the center ensures you enjoy that iconic gooey cinnamon center in every slice. Everyday Pantry Ingredients: Uses simple kitchen basics you already have on hand—ripe fruit, butter, flour, sugar, and autumn spices. Key Ingredients & Smart Swaps Ripe speckled bananas, unbleached flour, farm butter, brown sugar, and ground cinnamon on a quartz prep counter. Overripe Speckled Bananas (3 to 4 large): The darker and more spotted the peel, the sweeter and more aromatic your bread will be. Measure out roughly 1 1/2 cups of mashed puree for consistent results. Melted European Butter (1/2 cup): European-style butter has lower water content and higher butterfat, giving the bread a richer mouthfeel and golden crust. Dark Brown Sugar & White Sugar: White sugar provides light structure, while dark brown sugar lends deep caramel notes that enhance both the batter and the cinnamon swirl. Unbleached All-Purpose Flour (1 1/2 cups): Provides the perfect crumb structure. Always fluff, spoon, and level your flour to avoid a dense, heavy loaf. Ceylon Cinnamon & Melted Butter Swirl: Mixing your cinnamon and brown sugar with melted butter creates a silky paste that bakes into a decadent, gooey ribbon. Pure Vanilla Extract: Enhances the floral, sweet profile of the bananas and gives the glaze that irresistible bakery aroma. Step-by-Step Cooking Walkthrough 1. Prep Pan & Mash Bananas: Preheat your oven to 350°F (175°C). Line a 9×5-inch metal loaf pan with parchment paper, leaving an overhang on the sides. Mash your bananas thoroughly in a large bowl. 2. Whisk Batter & Fold Dry: Whisk melted butter, white sugar, brown sugar, eggs, and vanilla into the bananas until smooth. In another bowl, combine flour, baking soda, and salt. Gently fold dry into wet with a spatula just until combined. Swirling the buttery cinnamon brown sugar paste into the banana batter before sliding into the oven. 3. Layer & Marble Cinnamon Swirl: Stir brown sugar, cinnamon, and melted butter into a paste. Pour half the batter into the loaf pan, layer two-thirds of the cinnamon mixture, pour remaining batter, and top with remaining cinnamon. Gently drag a butter knife in figure-eight patterns to marble. 4. Bake, Cool & Glaze: Bake at 350°F (175°C) for 50 to 60 minutes until a tester comes out clean. Tent loosely with foil at minute 40 if needed. Cool 15 minutes, lift out onto a wire rack, and drizzle generously with glossy vanilla glaze. 3 Chef Secrets for Perfect Results 1. Mix Melted Butter Into the Cinnamon Sugar: Never swirl dry cinnamon and sugar alone into the batter! Dry sugar draws moisture from surrounding dough and creates dry cavities. Adding melted butter binds the cinnamon and sugar into a luscious paste that bakes into a decadent, molten ribbon. 2. Do Not Overmix the Batter: Once you add the flour, fold gently with a silicone spatula just until the flour disappears. Vigorous stirring develops tough gluten strands, which will make your banana bread dense and rubbery rather than tender and fluffy. 3. Tent with Foil at Minute 40: Because of the brown sugar ribbon and natural banana sugars, the top of the loaf browns faster than the dense center cooks. Tenting a loose sheet of aluminum foil over the loaf during the last 15 to 20 minutes prevents burnt edges while ensuring the center bakes completely. What to Serve With Cinnamon Roll Banana Bread Served warm with a melting pat of salted butter and a freshly brewed dark roast morning coffee. Hot Morning Drinks: Pair a warm slice with a freshly brewed dark roast espresso, a cinnamon oat milk latte, or hot spiced chai tea. Salted Farmhouse Butter: Smear a thin layer of salted Kerrygold butter over a warm slice—the savory salt elevates the sweet cinnamon swirl to pure perfection. Savory Breakfast Pairings: Balance the sweetness with crispy halal beef bacon strips, soft scrambled eggs with chives, or savory turkey sausage patties. Storage, Freezing & Reheating Instructions Room Temperature: Store cooled, glazed bread in an airtight container or wrapped tightly in foil at room temperature for up to 4 days. The crumb stays moist and gets even more flavorful by day two! Refrigerator: In warm climates, keep chilled in the fridge for up to 7 days. Bring to room temperature or warm briefly before eating. Freezing: Freeze the unglazed loaf (or individual slices wrapped in plastic wrap and aluminum foil) in a freezer zip bag for up to 3 months. Thaw at
Cozy Crockpot Chicken Pot Pie Soup: Ultra Creamy Fall Comfort
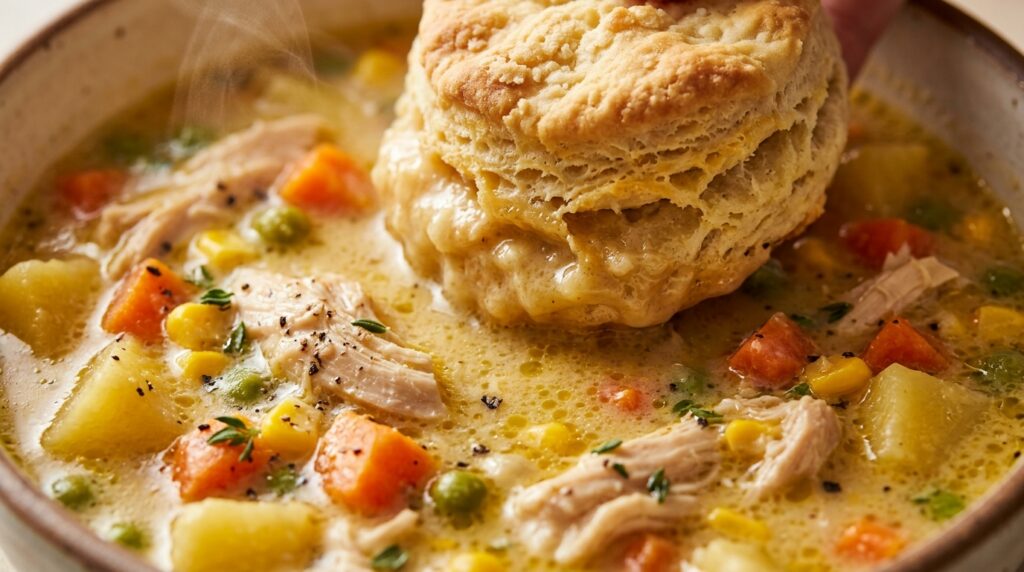
When brisk autumn breezes begin to swirl and twilight settles in early, there is nothing more profoundly comforting than the aroma of homemade chicken pot pie filling your kitchen. This crockpot chicken pot pie soup recipe captures every luscious, velvety layer of classic bakery-style pot pie—succulent shredded chicken, tender Yukon gold potatoes, sweet carrots, golden corn, and tender garden peas simmered in a herb-perfumed cream sauce—entirely hands-free in your slow cooker. Topped with warm, flaky, split buttermilk biscuits right before serving, it delivers pure comfort food bliss without touching a single rolling pin. Traditional chicken pot pie is often saved for elaborate weekend baking projects because blind-baking double pastry crusts requires patience and precision. Transforming the beloved recipe into a hearty slow-cooked soup eliminates every stressful step while amplifying the savory depth of flavor. By letting whole chicken breasts gently braise low-and-slow in golden bone broth with fresh garden thyme, rosemary, and aromatic aromatics, the poultry absorbs deep savory moisture before being shredded into melt-in-your-mouth strands. Finishing the soup with a quick stovetop butter roux and heavy cream gives it that signature luxurious body that clings lovingly to your soup spoon. Why You’ll Love This Recipe True Dump-and-Go Ease: Place chicken, potatoes, carrots, celery, and broth directly into the slow cooker—no pre-searing or skillet browning needed before the braise. All the Flavor, Zero Crust Stress: Enjoy the iconic rich, creamy filling of traditional pot pie without fiddling with temperamental pastry crusts or soggy bottoms. High Protein & Nutrient Dense: Boasting 32 grams of lean poultry protein alongside wholesome root vegetables and nutrient-rich bone broth per hearty serving. Make-Ahead & Freezer Friendly: The base holds up beautifully for busy weeknight meal prep, tasting even richer and more flavorful the next day as the herbs marry. Key Ingredients & Smart Swaps Fresh poultry, Yukon gold potatoes, garden veggies, rich broth, and fragrant herbs organized on a clean quartz station. Boneless Skinless Chicken Breasts (1 1/2 lbs): Lean and tender, braising gently in broth keeps them succulent. You can swap with boneless chicken thighs or leftover roasted rotisserie chicken added in the final 30 minutes. Yukon Gold Potatoes (1 lb): Naturally buttery with a thin skin and waxier starch profile, Yukon Golds hold their shape beautifully during slow cooking without dissolving into mush. Mirepoix Trio (Carrots, Celery & Sweet Onion): The classic French culinary foundation providing earthy sweetness, crunch, and authentic homemade aroma. Rich Chicken Bone Broth (4 cups): Using rich bone broth provides gelatinous body and deep savory umami that elevates simple pantry soup into restaurant caliber. Fresh Thyme & Rosemary: Earthy autumn herbs that cut through the richness of the cream sauce. Fresh sprigs provide optimal fragrance, but dried herbs work nicely in a pinch. Butter & Flour Roux + Heavy Cream: Whisking a quick stovetop roux with heavy cream before stirring it into the slow cooker creates that velvety, thick gravy texture without curdling. Sweet Peas & Corn (Added at the End): Stirred in during the final 20 minutes to preserve their vibrant green and gold colors, crisp-tender snap, and natural sweetness. Step-by-Step Cooking Walkthrough 1. Prep & Slow Cooker Assembly: Place whole raw chicken breasts at the bottom of a 6-quart slow cooker. Scatter diced Yukon gold potatoes, sliced carrots, celery, onion, and minced garlic over and around the meat. Pour in the chicken bone broth, and top with fresh thyme, rosemary sprigs, bay leaf, sea salt, and black pepper. 2. Low-and-Slow Braise: Secure the lid and cook on LOW for 6 to 7 hours (or HIGH for 3 1/2 to 4 hours) until the chicken registers 165°F (74°C) and the potatoes are melt-in-your-mouth tender. Shredding fall-apart tender chicken directly in the bubbling slow cooker before adding the cream roux. 3. Shred Chicken & Whisk Cream Roux: Transfer the cooked chicken to a cutting board and shred with two forks into rustic bite-sized pieces. In a small saucepan over medium heat, melt butter, whisk in flour for 1 minute until bubbling, then slowly whisk in heavy cream until thickened and silky smooth. 4. Combine, Thicken & Finish: Return shredded chicken to the slow cooker. Pour in the velvety cream roux, frozen sweet peas, and frozen corn. Discard the bay leaf and thyme stems. Stir gently, cover, and cook on HIGH for 20 to 25 minutes until the soup turns deeply thick and velvety. 3 Chef Secrets for Perfect Results 1. Always Make the Stovetop Roux (Never Add Cold Cream Directly): Pouring cold heavy cream and raw flour straight into a slow cooker produces a flat, pasty flavor and risks dairy separation. Cooking the flour in bubbly melted butter for 90 seconds neutralizes raw starch notes and guarantees an ultra-luxurious, satiny broth. 2. Keep Frozen Vegetables for the Final 20 Minutes: Adding peas and corn at the start of a 6-hour slow cook turns them brown, limp, and wrinkly. Adding them frozen during the final thickening window gently warms them through while keeping them bright emerald, crisp, and sweet. 3. Choose Yukon Gold Over Russet Potatoes: Russet potatoes are high in loose starch and will disintegrate into the broth during extended slow cooking, turning your soup cloudy. Yukon Golds retain their neat, tender cubes and deliver a buttery bite. What to Serve With Crockpot Chicken Pot Pie Soup Piping hot chicken pot pie soup crowned with a golden, flaky buttermilk biscuit and fresh chopped parsley. Warm Flaky Biscuits or Puff Pastry Rounds: Bake a sheet of golden buttermilk biscuits or cut puff pastry into squares, bake until puffed and deep golden, and float one right on top of each steaming bowl! Crisp Autumn Garden Salad: Balance the rich, velvety broth with a crisp green salad tossed with shaved honeycrisp apples, candied pecans, and a tangy apple cider vinaigrette. Crusty Artisan Sourdough: For ultimate comfort dippers, serve thick slices of warm, toasted sourdough slathered with salted butter. Storage, Freezing & Reheating Instructions Refrigeration: Allow leftover soup to cool to room temperature, then store in an airtight container in the refrigerator
Crispy Old-Fashioned Apple Fritters: Easy Glazed Bakery Treats
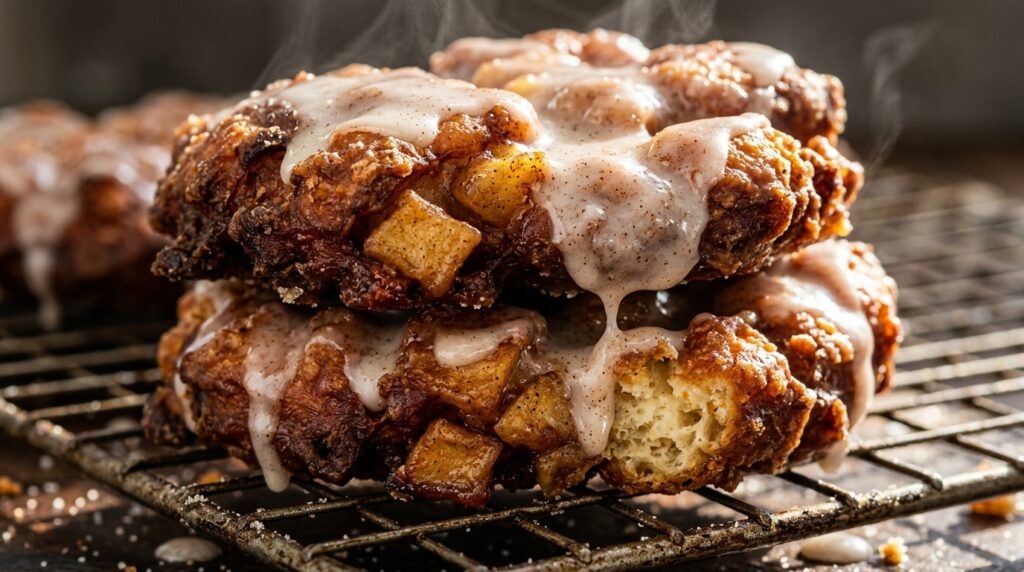
There is truly nothing that compares to the sensory bliss of walking into an artisan bakery on a crisp autumn morning and being greeted by the sweet, spiced aroma of freshly glazed old-fashioned apple fritters. With their famously craggy, crunchy golden-brown edges, a pillowy interior bursting with juicy cinnamon-caramelized apples, and a translucent waterfall of sweet vanilla cider glaze, these homemade bakery treats deliver pure autumn comfort. Best of all, you don’t need yeast or hours of rising time—this foolproof recipe comes together from bowl to table in just 30 minutes! The culinary secret to mastering apple fritters at home is controlling the oil temperature and apple size. Slicing your apples into uniform 1/4-inch dice guarantees they soften and caramelize during the quick 4-to-5-minute fry without leaving stubborn crunchy fruit in the center of the dough. Maintaining your frying oil at a steady 365°F to 370°F (185°C to 188°C) is equally essential: it instantly sets the exterior into an irresistibly crunchy, craggy shell while preventing the dough from absorbing excess grease, keeping the inside light, fluffy, and tender. Why You’ll Love This Recipe No Yeast & No Waiting: Ready in just 30 minutes from start to finish—no tedious dough kneading or hours of proofing required. Signature Craggy, Crispy Edges: Spooning and slightly flattening the batter in hot oil creates those iconic deeply browned ridges that trap puddles of sweet glaze. Loaded with Real Fruit: Generous double-apple proportion ensures you get sweet, cinnamon-spiced apple pieces in every single bite. Rich Apple Cider Glaze: Whisking the powdered sugar glaze with fresh apple cider adds an authentic orchard tang that balances the sweetness. Key Ingredients & Smart Swaps Fresh baking apples, autumn spices, unbleached flour, and pure apple cider organized on a quartz counter. Crisp Baking Apples (2 large): Granny Smith provides essential tart acidity, while Honeycrisp or Fuji adds natural sweetness and moisture. Combining both gives the most complex orchard flavor. Unbleached All-Purpose Flour (1 1/2 cups): Gives the fritters enough structure to hold the heavy fruit without becoming dense. Spoon and level your flour to avoid a dry batter. Brown Sugar & White Sugar (Combined): Granulated sugar keeps the crumb light, while brown sugar adds rich molasses notes that caramelize beautifully with the cinnamon. Baking Powder (2 tsp): The lifting agent that makes the fritters puff up light, airy, and donut-like within seconds of hitting the hot oil. Ceylon Cinnamon & Nutmeg: Freshly ground spices infuse that quintessential autumn donut shop warmth into both the dough and the glaze. Pure Apple Cider or Whole Milk: Whisking your confectioners’ sugar glaze with spiced apple cider adds bright orchard acidity that cuts through the sugar. Step-by-Step Cooking Walkthrough 1. Prep Apples & Heat Frying Oil: Peel, core, and dice your apples into small 1/4-inch cubes. Heat 2 to 3 inches of neutral oil in a heavy Dutch oven to 370°F (188°C) using a candy thermometer. 2. Mix Batter & Fold in Apples: Whisk dry ingredients in a large bowl. In a separate bowl, whisk eggs, milk, melted butter, and vanilla. Stir wet into dry until just combined, then fold in the diced apples. Flipping craggy golden-brown fritters in hot shimmering oil until crisp and cooked through. 3. Scoop, Flatten & Fry: Drop 1/3-cup scoops of batter into the hot oil. Lightly press them down with the back of a spoon to create crags. Fry 2 to 2 1/2 minutes per side until deep mahogany gold. Transfer to a wire rack to drain. 4. Whisk Glaze & Dunk Generously: Whisk powdered sugar, apple cider, and vanilla until smooth. Dunk both sides of each warm fritter into the glaze, letting excess drip through the rack. Let rest 5 minutes for glaze to set into a crackly crust. 3 Chef Secrets for Perfect Results 1. Use a Candy Thermometer (The Golden Rule): If the oil is below 350°F, the batter absorbs oil and turns greasy. If it’s above 380°F, the outside burns before the inside dough and apples cook through. Keep it steady at 365°F to 370°F for guaranteed bakery perfection. 2. Flatten the Scoops in the Oil: Round balls of fritter batter will stay raw in the center. Gently flattening each scoop into an irregular oval as it enters the oil ensures the heat penetrates all the way through while producing crisp, crunchy edges. 3. Glaze While Still Warm: Don’t wait for the fritters to cool completely before glazing! Glazing warm fritters allows the sweet cider glaze to seep slightly into the warm crevices, creating that irresistible signature crackly shell as it cools. What to Serve With Apple Fritters Served bakery-style alongside hot spiced apple cider and freshly brewed dark roast coffee. Hot Spiced Beverages: Pair with a steaming mug of hot spiced apple cider, a cinnamon dolce latte, or rich dark roast French press coffee. Savory Breakfast Proteins: Balance the sweet apple pastry with crispy halal beef bacon, poached eggs, or savory chicken breakfast sausage patties. Ice Cream for Dessert: Transform these fritters into a decadent evening dessert by serving them warm with a scoop of vanilla bean or salted caramel gelato! Storage, Freezing & Reheating Instructions Room Temperature: Best enjoyed fresh the day they are made! Store leftover fritters in an airtight container lined with paper towels at room temperature for up to 2 days. Air Fryer Reheating (Best Crispness): Pop leftover fritters in an air fryer at 350°F (175°C) for 2 to 3 minutes. The exterior crisps right back up into bakery-fresh glory! Oven Reheating: Warm on a baking sheet at 350°F (175°C) for 5 to 7 minutes. Avoid the microwave, which will make the fried crust soft and soggy. Freezing: Freeze unglazed or glazed fritters in a single layer on a sheet pan, then transfer to a freezer-safe zip bag for up to 2 months. Reheat directly from frozen in the oven or air fryer! Frequently Asked Questions Can I bake these apple fritters instead of frying them?While traditional bakery fritters rely on frying for their signature craggy crunch, you
Super Moist Pumpkin Cream Cheese Bread: Easy Fall Baking Loaf
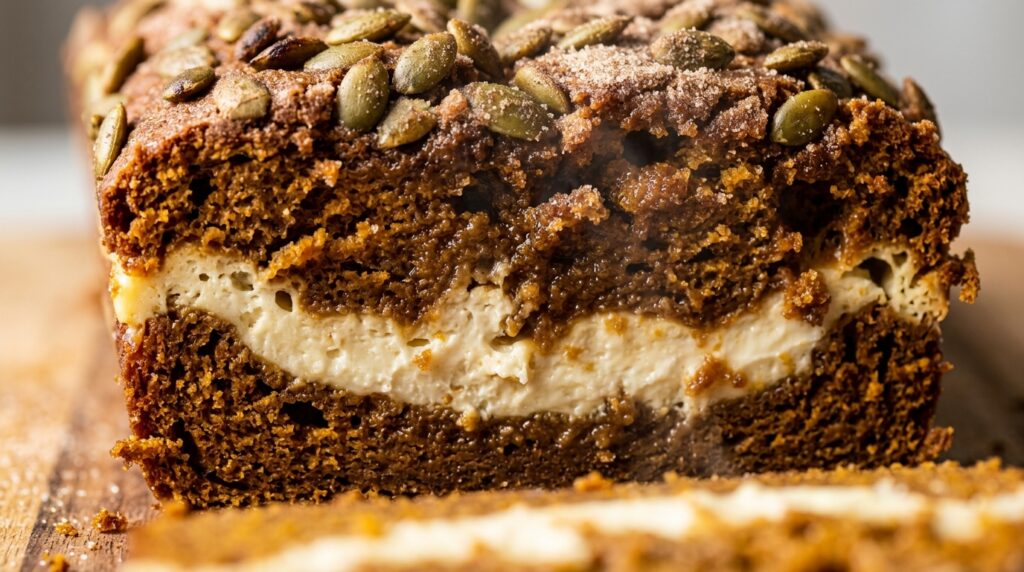
There is no aroma on earth quite as intoxicating as a freshly baked spiced pumpkin loaf emerging from a warm autumn oven, filling every corner of your home with sweet cinnamon, fragrant nutmeg, and rich browned butter. This Super Moist Pumpkin Cream Cheese Bread elevates the iconic bakery-style pumpkin loaf to pure decadence by baking a luscious, tangy ribbon of vanilla cheesecake filling straight through the tender spiced crumb. With crunchy roasted pepitas and sparkling turbinado sugar on top, every thick slice delivers a dreamy contrast of melt-in-your-mouth pumpkin cake and velvety cream cheese that easily rivals your favorite artisan coffeehouse. The secret to achieving an intensely moist crumb that stays tender for days lies in the balance of moisture and fat. Pure pumpkin puree provides immense natural hydration and rich earthiness without making the batter heavy. By combining melted European butter with dark brown sugar, the molasses locks in moisture while creating delicate caramelized edges along the loaf. Meanwhile, stabilizing the cream cheese filling with a single egg yolk and a spoonful of flour prevents the cheesecake layer from sinking to the bottom of the pan or turning rubbery, ensuring that picture-perfect, pillowy white ribbon in every single slice. Why You’ll Love This Recipe Better Than Starbucks: Delivers the coveted bakery-style moist texture and spiced warmth with an even richer, creamier homemade cheesecake ribbon. Stays Ultra-Moist for Days: Thanks to real pumpkin puree, brown sugar, and European butter, this loaf remains incredibly soft, tender, and flavorful throughout the week. Foolproof Cheesecake Swirl: Adding one egg yolk and a touch of flour guarantees the cream cheese stays suspended in the center rather than pooling at the bottom. Crunchy Bakery-Style Crown: Topped with raw green pepitas and coarse turbinado sugar for that signature artisanal crunch and coffeehouse appeal. Key Ingredients & Smart Swaps Pure pumpkin puree, brick cream cheese, and cozy autumn baking spices arranged on a clean quartz counter. 100% Pure Pumpkin Puree (1 cup): Use canned pure pumpkin (such as Libby’s), not pumpkin pie mix, which contains pre-added sweeteners and thickeners. Baker’s Hack: If your puree seems very watery, blot it gently with a paper towel before measuring. Brick Cream Cheese (8 oz): Always choose full-fat brick-style cream cheese. Tub spreads contain added water and air that will break down during baking and cause the swirl to weep. Warm Autumn Spices (1 1/2 tbsp): A fragrant blend of Ceylon cinnamon, freshly grated nutmeg, ginger, and ground cloves infuses deep warmth into every crumb. Dark Brown Sugar & Granulated Sugar: Brown sugar provides deep caramel notes and lasting moisture, while white granulated sugar keeps the crumb light and tender. European Unsalted Butter: Melted butter infuses a rich, nutty flavor. Smart Swap: You can swap half or all the butter for neutral avocado oil if you prefer an even denser, ultra-springy crumb. Raw Green Pepitas (Pumpkin Seeds): Sprinkling raw pepitas over the batter before baking allows them to toast in the oven, creating a delightfully nutty, crunchy contrast. Step-by-Step Cooking Walkthrough 1. Prepare the Pan & Cream Cheese Swirl: Preheat oven to 350°F (175°C). Line a 9×5-inch loaf pan with parchment paper. In a medium bowl, beat room-temperature cream cheese, sugar, egg yolk, flour, and vanilla with an electric hand mixer for 2 minutes until glossy and perfectly lump-free. 2. Whisk the Spiced Pumpkin Batter: In a large mixing bowl, whisk together pumpkin puree, melted butter, brown sugar, white sugar, whole eggs, vanilla, and milk until silky. In a separate bowl, whisk flour, baking soda, salt, and spices. Fold the dry ingredients into the wet mixture with a rubber spatula just until no flour streaks remain. Layering and swirling the velvety cream cheese filling through the spiced pumpkin batter before baking. 3. Layer, Swirl & Crown: Spread half of the pumpkin batter into the bottom of the pan. Spread the cream cheese filling evenly over the top, then spoon the remaining pumpkin batter over the cream cheese. Gently run a skewer or knife through the top layer in a figure-eight motion to swirl. Sprinkle generously with raw pepitas and turbinado sugar. 4. Bake, Tent & Cool Completely: Bake at 350°F (175°C) for 52 to 60 minutes. Loosely tent foil over the top at the 35-minute mark if the loaf is browning quickly. A tester inserted into the pumpkin cake crumb should emerge clean. Cool in the pan for 20 minutes, then transfer to a wire rack. Cool completely to room temperature before slicing for clean, distinct swirl lines. 3 Chef Secrets for Perfect Results 1. Room Temperature Cream Cheese Is Essential: Trying to beat cold cream cheese will result in tiny stubborn lumps that won’t blend smoothly. Let your cream cheese brick sit on the counter for 45 minutes before baking so it whips into a silky cheesecake batter. 2. Don’t Skip the Flour & Yolk in the Swirl: That single tablespoon of flour and extra egg yolk acts as an emulsifying stabilizer. Without them, the cream cheese becomes too heavy, sinking straight through the pumpkin batter to stick to the pan bottom. 3. Chill Before Slicing for Bakery-Perfect Cross Sections: Slicing warm cream cheese bread can cause the delicate warm filling to smear. For sharp, magazine-worthy slices, let the loaf cool completely, then chill in the refrigerator for 1 hour before cutting with a sharp serrated knife. What to Serve With Pumpkin Cream Cheese Bread Served cafe-style with a hot spiced chai latte and artisan whipped honey butter. Artisan Hot Beverages: Pair a thick slice with a hot cinnamon spice latte, freshly brewed French press coffee, or an iced chai tea latte with cold foam. Savory Breakfast Pairings: Balance the sweet spiced warmth of the bread with crispy halal beef bacon, soft scrambled eggs with chives, or savory chicken breakfast sausage. Spreads & Drizzles: Serve with a pat of whipped honey cinnamon butter, apple butter, or a light drizzle of pure amber maple syrup. Storage, Freezing & Reheating Instructions Refrigeration (Required): Because of the fresh dairy cream cheese swirl,
One-Pot Creamy French Onion Pasta: Cozy Fall Comfort Dinner
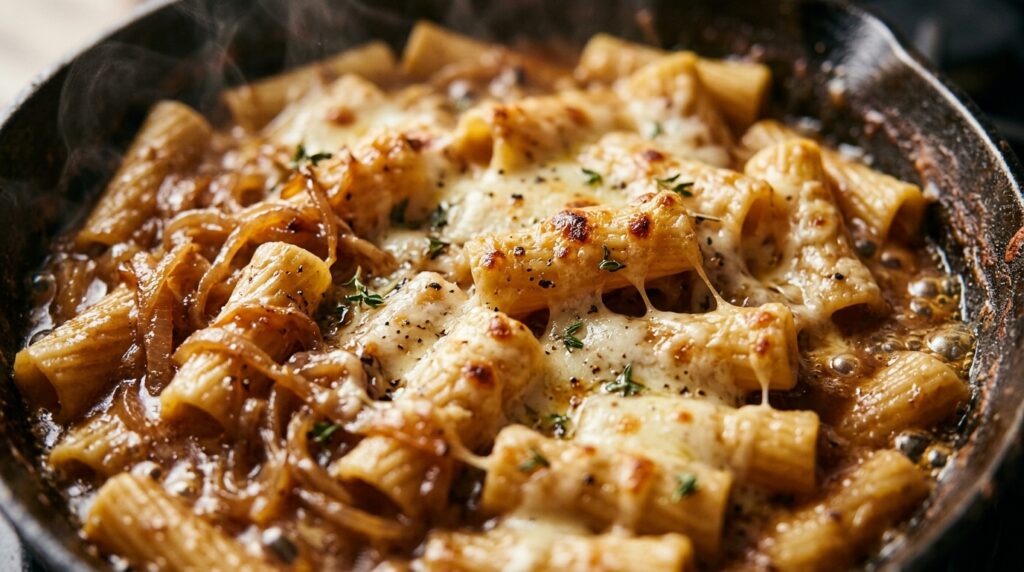
There is nothing quite as deeply comforting as the rich, buttery fragrance of sweet yellow onions slowly melting down into deep mahogany-brown caramel ribbons, filling your entire kitchen with cozy bistro warmth. This One-Pot Creamy French Onion Pasta takes all the legendary umami, aromatic thyme, and bubbling molten Gruyère of classic French onion soup and marries it with tender al dente rigatoni simmered directly in savory beef stock. The result is an ultra-luxurious, velvet-coated pasta dish that delivers restaurant-caliber indulgence in just 35 minutes—using a single skillet and minimal cleanup. What makes this one-pot method truly magical is the science of pasta starch emulsion. Instead of boiling your rigatoni in a separate pot of salted water and draining all that liquid gold down the sink, the noodles cook directly inside the concentrated onion-infused beef broth. As the pasta swells, it releases its natural starches into the simmering reduction. When you swirl in heavy cream, freshly grated Parmigiano-Reggiano, and shredded nutty Gruyère at the very end, that starch binds everything into a glossy, clingy sauce that coats every ridge and inner crevice of the rigatoni without separating or turning watery. Why You’ll Love This Recipe One-Pot Magic & Minimal Cleanup: From searing the onions to simmering the pasta and broiling the cheese topping, the entire dinner comes together in a single deep skillet or Dutch oven. Intense Caramelized Umami: Thinly slicing sweet yellow onions allows them to break down and caramelize evenly, unlocking deep natural sweetness and savory fond in record time. Ultra-Silky Clinging Sauce: Simmering the pasta directly in the seasoned beef broth creates an effortless, restaurant-grade emulsion enriched with heavy cream and aged cheeses. Epic Bistro Cheese Pulls: A generous layer of authentic Gruyère broiled on top delivers that signature golden-crusted, molten cheese experience reminiscent of Parisian brasseries. Key Ingredients & Smart Swaps Wholesome bistro ingredients organized on a clean quartz workstation before starting the caramelization. Sweet Yellow Onions (3 large): Sweet Vidalia or yellow Spanish onions yield the best natural sugars for caramelization. Slice them into uniform 1/4-inch crescents so they soften and brown at an identical pace. European Butter & Olive Oil (3 tbsp butter, 1 tbsp oil): Combining rich European butter (higher butterfat) with olive oil raises the smoke point, preventing the milk solids from scorching while infusing rich nutty flavor. Fresh Thyme & Garlic: Fresh woody garden thyme leaves and minced garlic provide the signature earthy aromatic backbone of French onion soup. Pro Tip: Keep a few extra sprigs aside for a vibrant green garnish before serving. Halal Beef Broth (4 cups): A high-quality, rich beef stock creates the deep amber savory base. You can also use low-sodium rich vegetable broth or mushroom stock for a vegetarian version. Rigatoni Pasta (10 oz): Sturdy tubular pasta shapes like rigatoni, paccheri, or large shells work best because their ridges and hollow cavities trap the rich caramelized onions and cream sauce. Authentic Gruyère Cheese (1 1/2 cups): Gruyère melts like silk and offers a nutty, slightly sweet profile that balances the savory beef fond. Smart Swap: Swiss cheese, Comté, or Fontina make fantastic melting alternatives. Heavy Whipping Cream & Parmigiano-Reggiano: Heavy cream adds luxurious velvet body, while salty aged Parmigiano cuts through the richness with sharp, nutty complexity. Step-by-Step Cooking Walkthrough 1. Caramelize the Onions: Heat 2 tablespoons of butter and 1 tablespoon of olive oil in a deep cast iron skillet over medium heat. Add the sliced onions and a pinch of salt. Cook slowly for 20 to 25 minutes, stirring every few minutes, until the onions wilt down into a rich, golden-brown jam. 2. Bloom Aromatics & Deglaze Fond: Push the onions aside, add the remaining butter, minced garlic, and chopped thyme. Cook for 60 seconds until fragrant. Pour in your deglazing broth and Worcestershire sauce, scraping every bit of brown caramelized fond from the skillet floor with a wooden spoon. Deglazing the skillet floor with beef broth to dissolve all the rich caramelized onion fond into the sauce. 3. Simmer Rigatoni in Beef Stock: Pour in the 4 cups of beef broth and bring to a boil. Add the uncooked rigatoni, stirring to submerge the noodles. Lower heat to medium-low, cover loosely, and simmer for 12 to 14 minutes, stirring occasionally, until the pasta is perfectly al dente and the liquid has reduced into a glossy glaze. 4. Fold in Cream & Cheeses, then Broil: Turn heat to low. Stir in heavy cream, 1 cup of Gruyère, and Parmigiano-Reggiano until smooth and creamy. Top with the remaining 1/2 cup of Gruyère and slide under the oven broiler on HIGH for 2 to 3 minutes until bubbly and golden. Garnish with fresh thyme and cracked black pepper. 3 Chef Secrets for Perfect Results 1. Slice Onions Evenly & Use the “Water Splash” Hack: Thin, uniform onion slices ensure equal browning. If the bottom of your skillet begins to darken too fast before the onions soften, splash 1 to 2 tablespoons of water or broth to dissolve the fond back into the onions and prevent bitterness. 2. Stir Frequently During the Pasta Simmer: Because one-pot pasta cooks in concentrated starch and broth, stir the rigatoni every 3 to 4 minutes to ensure the noodles cook evenly and don’t stick to the bottom of the pan. 3. Grate Your Own Block of Gruyère: Pre-shredded packaged cheeses contain anti-caking starches (cellulose) that inhibit smooth melting and can turn your sauce gritty. Buying a wedge of genuine Swiss Gruyère and grating it fresh ensures that dreamy, velvety cheese pull. What to Serve With Creamy French Onion Pasta Served restaurant-style with warm garlic French baguette and chilled sparkling water. Toasted French Baguette: Slices of warm crusty baguette rubbed with raw garlic cloves or garlic herb butter provide the ideal crunch for scooping up every drop of silky caramelized sauce. Crisp Peppery Green Salad: A bowl of fresh baby arugula and shaved fennel tossed in a bright lemon Dijon vinaigrette cuts through the rich cream and cheese with crisp, zesty acidity.