
One-Pot Creamy French Onion Pasta: Cozy Fall Comfort Dinner
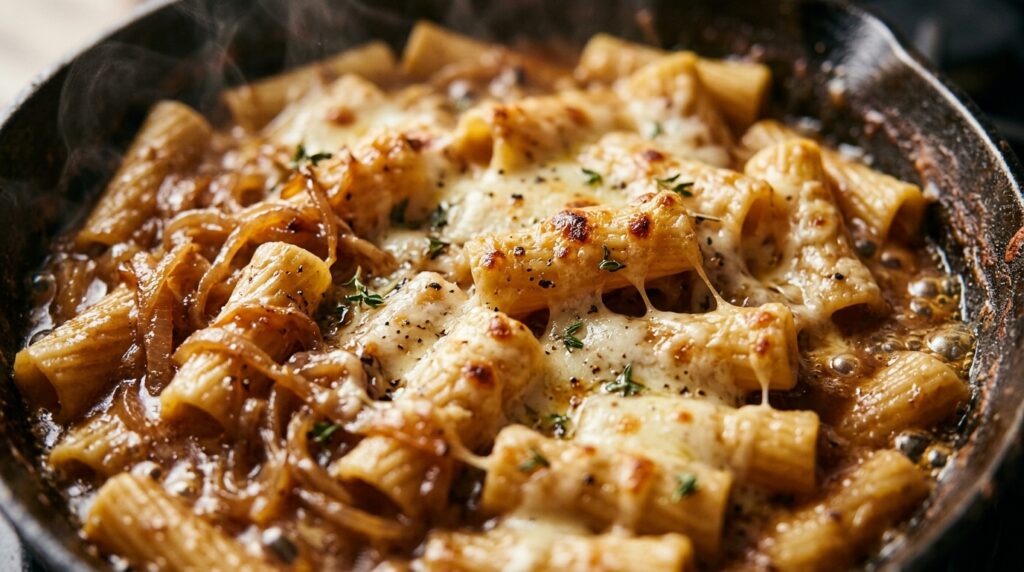
There is nothing quite as deeply comforting as the rich, buttery fragrance of sweet yellow onions slowly melting down into deep mahogany-brown caramel ribbons, filling your entire kitchen with cozy bistro warmth. This One-Pot Creamy French Onion Pasta takes all the legendary umami, aromatic thyme, and bubbling molten Gruyère of classic French onion soup and marries it with tender al dente rigatoni simmered directly in savory beef stock. The result is an ultra-luxurious, velvet-coated pasta dish that delivers restaurant-caliber indulgence in just 35 minutes—using a single skillet and minimal cleanup. What makes this one-pot method truly magical is the science of pasta starch emulsion. Instead of boiling your rigatoni in a separate pot of salted water and draining all that liquid gold down the sink, the noodles cook directly inside the concentrated onion-infused beef broth. As the pasta swells, it releases its natural starches into the simmering reduction. When you swirl in heavy cream, freshly grated Parmigiano-Reggiano, and shredded nutty Gruyère at the very end, that starch binds everything into a glossy, clingy sauce that coats every ridge and inner crevice of the rigatoni without separating or turning watery. Why You’ll Love This Recipe One-Pot Magic & Minimal Cleanup: From searing the onions to simmering the pasta and broiling the cheese topping, the entire dinner comes together in a single deep skillet or Dutch oven. Intense Caramelized Umami: Thinly slicing sweet yellow onions allows them to break down and caramelize evenly, unlocking deep natural sweetness and savory fond in record time. Ultra-Silky Clinging Sauce: Simmering the pasta directly in the seasoned beef broth creates an effortless, restaurant-grade emulsion enriched with heavy cream and aged cheeses. Epic Bistro Cheese Pulls: A generous layer of authentic Gruyère broiled on top delivers that signature golden-crusted, molten cheese experience reminiscent of Parisian brasseries. Key Ingredients & Smart Swaps Wholesome bistro ingredients organized on a clean quartz workstation before starting the caramelization. Sweet Yellow Onions (3 large): Sweet Vidalia or yellow Spanish onions yield the best natural sugars for caramelization. Slice them into uniform 1/4-inch crescents so they soften and brown at an identical pace. European Butter & Olive Oil (3 tbsp butter, 1 tbsp oil): Combining rich European butter (higher butterfat) with olive oil raises the smoke point, preventing the milk solids from scorching while infusing rich nutty flavor. Fresh Thyme & Garlic: Fresh woody garden thyme leaves and minced garlic provide the signature earthy aromatic backbone of French onion soup. Pro Tip: Keep a few extra sprigs aside for a vibrant green garnish before serving. Halal Beef Broth (4 cups): A high-quality, rich beef stock creates the deep amber savory base. You can also use low-sodium rich vegetable broth or mushroom stock for a vegetarian version. Rigatoni Pasta (10 oz): Sturdy tubular pasta shapes like rigatoni, paccheri, or large shells work best because their ridges and hollow cavities trap the rich caramelized onions and cream sauce. Authentic Gruyère Cheese (1 1/2 cups): Gruyère melts like silk and offers a nutty, slightly sweet profile that balances the savory beef fond. Smart Swap: Swiss cheese, Comté, or Fontina make fantastic melting alternatives. Heavy Whipping Cream & Parmigiano-Reggiano: Heavy cream adds luxurious velvet body, while salty aged Parmigiano cuts through the richness with sharp, nutty complexity. Step-by-Step Cooking Walkthrough 1. Caramelize the Onions: Heat 2 tablespoons of butter and 1 tablespoon of olive oil in a deep cast iron skillet over medium heat. Add the sliced onions and a pinch of salt. Cook slowly for 20 to 25 minutes, stirring every few minutes, until the onions wilt down into a rich, golden-brown jam. 2. Bloom Aromatics & Deglaze Fond: Push the onions aside, add the remaining butter, minced garlic, and chopped thyme. Cook for 60 seconds until fragrant. Pour in your deglazing broth and Worcestershire sauce, scraping every bit of brown caramelized fond from the skillet floor with a wooden spoon. Deglazing the skillet floor with beef broth to dissolve all the rich caramelized onion fond into the sauce. 3. Simmer Rigatoni in Beef Stock: Pour in the 4 cups of beef broth and bring to a boil. Add the uncooked rigatoni, stirring to submerge the noodles. Lower heat to medium-low, cover loosely, and simmer for 12 to 14 minutes, stirring occasionally, until the pasta is perfectly al dente and the liquid has reduced into a glossy glaze. 4. Fold in Cream & Cheeses, then Broil: Turn heat to low. Stir in heavy cream, 1 cup of Gruyère, and Parmigiano-Reggiano until smooth and creamy. Top with the remaining 1/2 cup of Gruyère and slide under the oven broiler on HIGH for 2 to 3 minutes until bubbly and golden. Garnish with fresh thyme and cracked black pepper. 3 Chef Secrets for Perfect Results 1. Slice Onions Evenly & Use the “Water Splash” Hack: Thin, uniform onion slices ensure equal browning. If the bottom of your skillet begins to darken too fast before the onions soften, splash 1 to 2 tablespoons of water or broth to dissolve the fond back into the onions and prevent bitterness. 2. Stir Frequently During the Pasta Simmer: Because one-pot pasta cooks in concentrated starch and broth, stir the rigatoni every 3 to 4 minutes to ensure the noodles cook evenly and don’t stick to the bottom of the pan. 3. Grate Your Own Block of Gruyère: Pre-shredded packaged cheeses contain anti-caking starches (cellulose) that inhibit smooth melting and can turn your sauce gritty. Buying a wedge of genuine Swiss Gruyère and grating it fresh ensures that dreamy, velvety cheese pull. What to Serve With Creamy French Onion Pasta Served restaurant-style with warm garlic French baguette and chilled sparkling water. Toasted French Baguette: Slices of warm crusty baguette rubbed with raw garlic cloves or garlic herb butter provide the ideal crunch for scooping up every drop of silky caramelized sauce. Crisp Peppery Green Salad: A bowl of fresh baby arugula and shaved fennel tossed in a bright lemon Dijon vinaigrette cuts through the rich cream and cheese with crisp, zesty acidity.
Easy Apple Cinnamon Roll Casserole: Cozy Fall Weekend Brunch
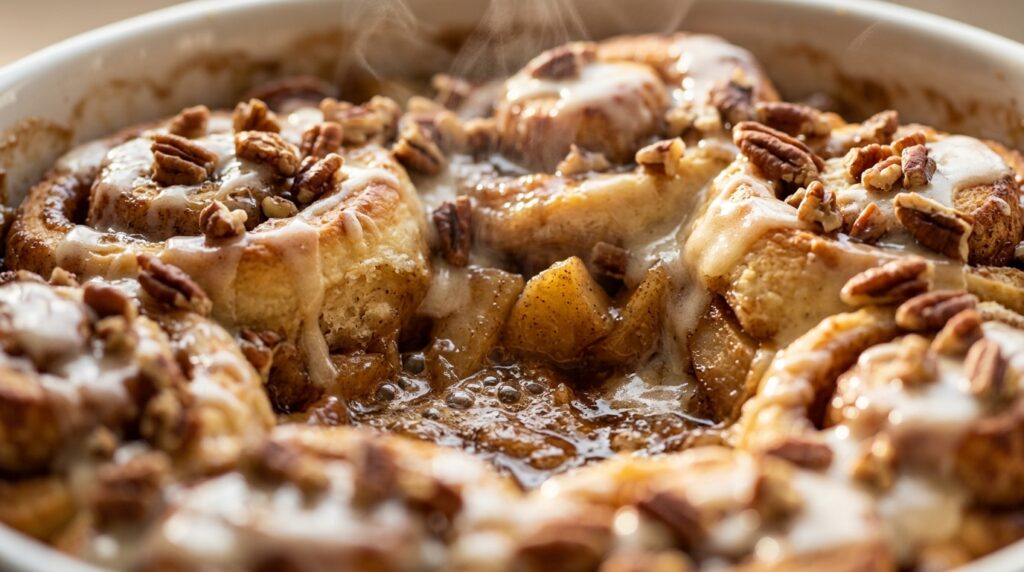
There is no better way to welcome a leisurely autumn weekend morning than with the intoxicating aroma of brown sugar, tart apples, and warm spices wafting from the oven. This apple cinnamon roll casserole transforms ordinary canned cinnamon rolls into an extraordinary, bakery-style breakfast bake that feels like a decadent cross between warm bread pudding, apple crisp, and gooey cinnamon rolls. Tender dough bites puff into golden perfection while simmering alongside caramelized Honeycrisp apples in a rich vanilla custard, all finished with an avalanche of melted cream cheese glaze and toasted pecans. The culinary brilliance of this casserole lies in how it solves the classic brunch dilemma: delivering freshly baked, warm cinnamon rolls for a crowd without the tedious hours of kneading, proofing, and rolling yeast dough at dawn. By cutting store-bought refrigerated cinnamon rolls into quarters and bathing them in a rich egg, milk, and pure maple syrup custard, the dough absorbs moisture from the bottom up while the exposed swirl edges caramelize into shatteringly crisp pastry tops. The diced apples release their natural sweet-tart juices as they bake, balancing the rich sweetness of the cinnamon sugar and creating gooey pockets of spiced fruit in every decadent bite. Why You’ll Love This Recipe 15-Minute Zero-Fuss Assembly: Simply snip refrigerated cinnamon roll dough into quarters, toss with diced apples, pour over the quick whisked custard, and let the oven do the rest. Unbeatable Dual Texture: Pillowy, tender custard-soaked cinnamon roll centers on the bottom with golden-brown, caramelized crunchy edges on top. Foolproof Make-Ahead Option: Assemble the casserole the night before, cover, and chill in the refrigerator. In the morning, pop it directly into the oven for a stress-free holiday or weekend brunch. Crowd-Pleasing Showstopper: Bakes in a standard 9×13-inch pan yielding 8 to 10 hearty servings that effortlessly feed hungry family members and guests with rave reviews. Key Ingredients & Smart Swaps Fresh, wholesome ingredients neatly organized on a clean quartz workstation before baking. Refrigerated Cinnamon Rolls (2 cans): Standard 12.4 oz cans or 17.5 oz Grands work beautifully. The pre-portioned cinnamon sugar swirls distribute flavor throughout the entire dish. Don’t forget to save the icing tubs! Fresh Baking Apples (2 large): Honeycrisp, Granny Smith, or Braeburn apples offer the ideal balance of firm texture and crisp acidity. Dice them into 1/2-inch cubes so they bake to fork-tender perfection. Smart Swap: In a pinch, 1 can of apple pie filling can be substituted for an ultra-gooey dessert-style bake. Farm-Fresh Eggs & Whole Milk (4 eggs, 1/2 cup milk): Forms the luscious custard foundation that holds the casserole together like French toast bake. Pro Hack: Use half-and-half or heavy cream for an even richer, custardy texture. Pure Maple Syrup & Brown Sugar: Maple syrup infuses woodland autumn sweetness into the custard, while packed brown sugar caramelizes with the melted butter around the apple edges. Toasted Pecans (1/2 cup): Adds a nutty crunch that cuts through the sweet custard and glaze. Walnuts or sliced almonds also work wonderfully. Step-by-Step Cooking Walkthrough 1. Prep Pan & Cut Dough: Preheat oven to 375°F (190°C). Butter a 9×13-inch ceramic baking dish. Pop open 2 cans of cinnamon rolls, reserve the icing, and cut each roll into 4 bite-sized pieces with a sharp knife or kitchen scissors. 2. Layer Dough & Diced Apples: Scatter the dough quarters evenly across the baking dish. Scatter the peeled, diced apples all over and between the cinnamon roll chunks so every bite has fruit. Arranging dough pieces and spiced diced apples before bathing them in vanilla maple egg custard. 3. Whisk & Pour Custard: In a mixing bowl, vigorously whisk together eggs, milk, maple syrup, brown sugar, vanilla extract, cinnamon, nutmeg, salt, and melted butter. Pour evenly over the dough and apples, making sure all pieces are coated. Top with chopped pecans. 4. Bake to Golden Perfection & Glaze: Bake uncovered at 375°F (190°C) for 32 to 36 minutes until puffed, golden brown, and set in the center. Warm the reserved icing tubs for 10 seconds in the microwave and drizzle generously over the warm bake before serving. 3 Chef Secrets for Perfect Results 1. Dice Apples Small & Uniform: Chop your apples into small 1/2-inch pieces. Larger chunks won’t soften in the 35-minute baking window and will leave crunchy uncooked fruit in your soft bake. 2. Tent with Foil If Browning Too Fast: Because of the brown sugar and cinnamon swirls, the top can brown quickly. If the top looks deeply golden at the 25-minute mark but the center custard is still jiggly, loosely tent a sheet of foil over the dish for the final 10 minutes. 3. Warm the Icing for Silky Drizzling: Microwaving the canned icing tubs without their foil lids for 10 to 12 seconds transforms thick paste into a glossy, pourable glaze that seeps into every warm nook and cranny. What to Serve With Apple Cinnamon Roll Casserole Served breakfast-style with freshly brewed dark roast coffee and warm maple drizzle. Savory Breakfast Proteins: Crisp halal beef bacon, savory turkey breakfast sausage links, or cheesy scrambled eggs balance the sweet, warm decadence of the casserole. Fresh Tart Berries: Fresh blackberries, raspberries, or sliced strawberries provide a vibrant, acidic fruit contrast that cuts through rich cream cheese icing. Artisan Hot Drinks: Pair alongside freshly brewed French press coffee, a cinnamon spice latte, or warm spiced apple cider. Storage, Freezing & Reheating Instructions Refrigeration: Allow leftover casserole to cool completely, cover tightly with foil or transfer to an airtight container, and store in the refrigerator for up to 4 days. Oven & Microwave Reheating: Reheat individual portions in the microwave for 30 to 45 seconds until warm and gooey. To restore crisp edges, warm in an oven at 350°F (175°C) for 10 minutes. Make-Ahead Overnight Instructions: Assemble through Step 3 (do not bake), cover tightly with plastic wrap, and refrigerate overnight for up to 12 hours. Set on the counter for 15 minutes before baking as directed. Frequently Asked Questions Can I use Grands cinnamon rolls instead
Old-Fashioned Caramel Apple Dumplings: Easy Fall Comfort Baking
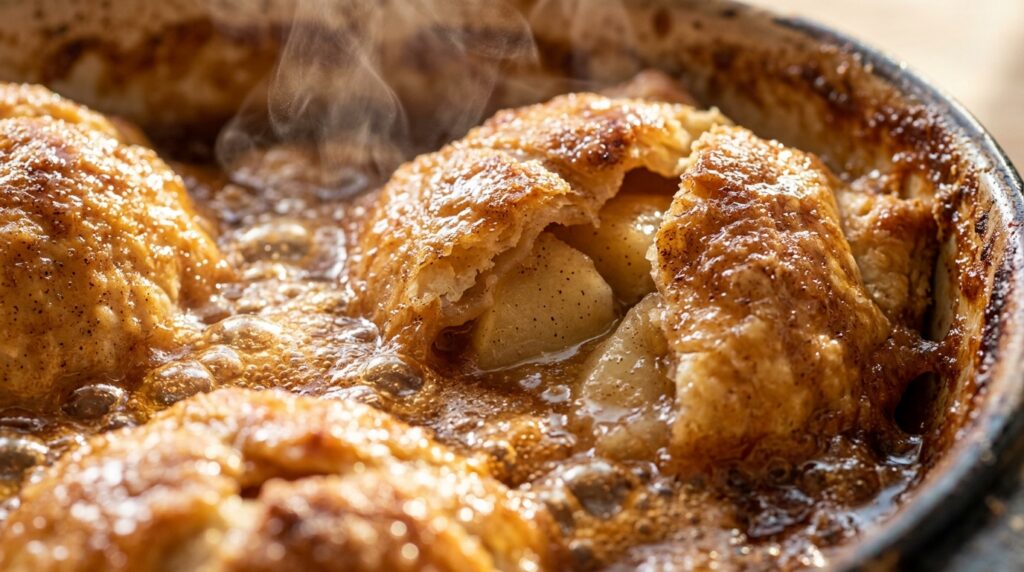
As autumn air turns crisp and apple harvest season reaches its peak, nothing fills a home with pure, nostalgic warmth quite like a bubbling pan of old-fashioned caramel apple dumplings. Crisp, tart Granny Smith apple wedges are lovingly wrapped in flaky, buttery pastry triangles, nestled in a ceramic baking dish, and bathed in a luscious brown sugar cinnamon butter caramel that bubbles into pure liquid gold. With tender, caramelized baked apples tucked inside and golden, flaky pastry crusts on top, this classic Southern bakery dessert tastes like hours of intricate pastry work yet comes together effortlessly in just twenty minutes of prep. The culinary magic of this time-honored recipe lies in its ingenious two-texture baking process. Pouring the warm brown sugar cinnamon butter directly over the pastries infuses the dough with rich caramelized flavor, while pouring sparkling lemon-lime soda around the base creates an aromatic steam bath in the oven. The bottom halves of the dumplings simmer gently in the bubbling syrup, becoming pillowy, custard-like, and deeply infused with spiced apple caramel, while the exposed tops bake in dry heat until puffed, flaky, and shatteringly crisp. When paired with a scoop of slow-melting vanilla bean ice cream, every bite offers an irresistible contrast of hot and cold, tart and sweet, silky and crunchy. Why You’ll Love This Recipe Effortless 20-Minute Prep: Utilizing high-quality refrigerated crescent dough or puff pastry sheets means zero dough chilling or pastry rolling—simply wrap, pour, and bake. Dual Pastry Perfection: Enjoy the best of both worlds: golden, crackling pastry on top and soft, melt-in-your-mouth caramelized dumpling goodness on the bottom. Self-Saucing Caramel Syrup: The butter, brown sugar, and sparkling soda meld together during baking to create an intoxicating, homemade spiced caramel syrup that requires zero stovetop reduction. Ultimate Crowd-Pleasing Dessert: Baked in a 9×13-inch pan yielding 16 generous dumplings, this dessert is built for family gatherings, Thanksgiving feasts, and autumn weekend celebrations. Key Ingredients & Smart Swaps Fresh, seasonal ingredients neatly arranged on a clean kitchen workstation before baking. Granny Smith Apples (2 large): The absolute gold standard for baked apple desserts. Their firm flesh holds up beautifully to prolonged heat without collapsing into mush, and their sharp acidity cuts through the sweetness of the caramel sauce. Smart Swap: Honeycrisp or Braeburn apples offer a delicious balance of crisp texture and natural honey sweetness. Flaky Crescent Dough or Puff Pastry (2 cans, 16 triangles): Classic crescent roll dough bakes into tender, buttery layers that expand around each apple wedge. Pro Hack: High-butter puff pastry cut into triangles creates an even flakier, bakery-style French croissant finish. European Unsalted Butter (1 cup / 2 sticks): Higher butterfat content ensures a silky, glossy caramel sauce that coats the back of a spoon without separating. Light Brown Sugar & Warm Spices: Packed brown sugar provides essential molasses depth, complemented by pure ground Ceylon cinnamon and a pinch of freshly grated nutmeg. Lemon-Lime Sparkling Soda (1 1/4 cups): The classic Southern secret ingredient. The carbonation and natural citrus acidity balance the rich butter while lifting the pastry dough to achieve its signature airy texture. Smart Swap: Spiced apple cider or ginger ale can be used for an even more autumnal fruit flavor profile. Step-by-Step Cooking Walkthrough 1. Prep Apples & Baking Dish: Preheat oven to 350°F (175°C). Butter a 9×13-inch ceramic baking dish. Peel, core, and slice 2 large Granny Smith apples into 8 uniform wedges each (16 wedges total). 2. Wrap the Apple Wedges: Unroll 16 crescent dough triangles. Place one apple wedge at the wide end of each triangle and roll tightly toward the pointed tip. Place the wrapped dumplings seam-side down in two parallel rows in the buttered dish. Wrapping tender apple wedges in buttery pastry dough and draping them with rich spiced brown sugar glaze. 3. Whisk & Pour Spiced Butter Glaze: In a bowl, whisk melted European butter with brown sugar, cinnamon, nutmeg, and vanilla until smooth and aromatic. Spoon this rich glaze generously over each wrapped dumpling. 4. Add Sparkling Soda & Bake to Perfection: Gently pour the lemon-lime soda around the edges of the dish and down the center between the dumplings (avoid pouring over the tops to preserve crispiness). Bake uncovered at 350°F (175°C) for 38 to 42 minutes until puffed, deep golden brown, and bubbling vigorously. Rest 10 minutes before serving warm. 3 Chef Secrets for Perfect Results 1. Cut Uniform Apple Wedges: Cutting the apples into consistent 1/8-slice wedges ensures that every single apple piece bakes to tender perfection in the exact same timeframe—neither crunchy nor mushy. 2. Pour Soda Around the Perimeter Only: To ensure the pastry tops develop a shatteringly crisp, golden-brown crust, always pour your liquid soda into the open spaces and around the edges of the pan rather than directly over the dumplings. 3. Give the Caramel 10 Minutes to Settle: Straight out of the oven, the caramel sauce will be thin and boiling hot. Allowing the casserole to rest on a wire rack for 8 to 10 minutes lets the butter and sugars thicken into a luxurious, spoonable glaze that clings to each dumpling. What to Serve With Caramel Apple Dumplings Served warm with a generous scoop of vanilla bean ice cream and toasted chopped pecans. Premium Vanilla Bean Ice Cream: The quintessential accompaniment. The cold, sweet vanilla cream melts into the warm, spiced brown sugar sauce, creating an incomparable dessert experience. Freshly Whipped Cinnamon Cream: Whisk heavy whipping cream with a touch of powdered sugar and pure ground cinnamon for an airy, cloud-like topping. Autumn Warm Beverages: Pair alongside freshly brewed dark roast coffee, hot spiced chai latte, or a steaming mug of hot mulled apple cider. Storage, Freezing & Reheating Instructions Refrigeration: Cool leftover dumplings completely, transfer to an airtight container or cover the baking dish with foil, and store in the refrigerator for up to 4 days. Oven Reheating (Best Method): Place dumplings in an oven-safe dish with a spoonful of caramel sauce, cover loosely with foil, and warm at 350°F (175°C)
Cozy Maple Pecan Pumpkin Baked Oatmeal
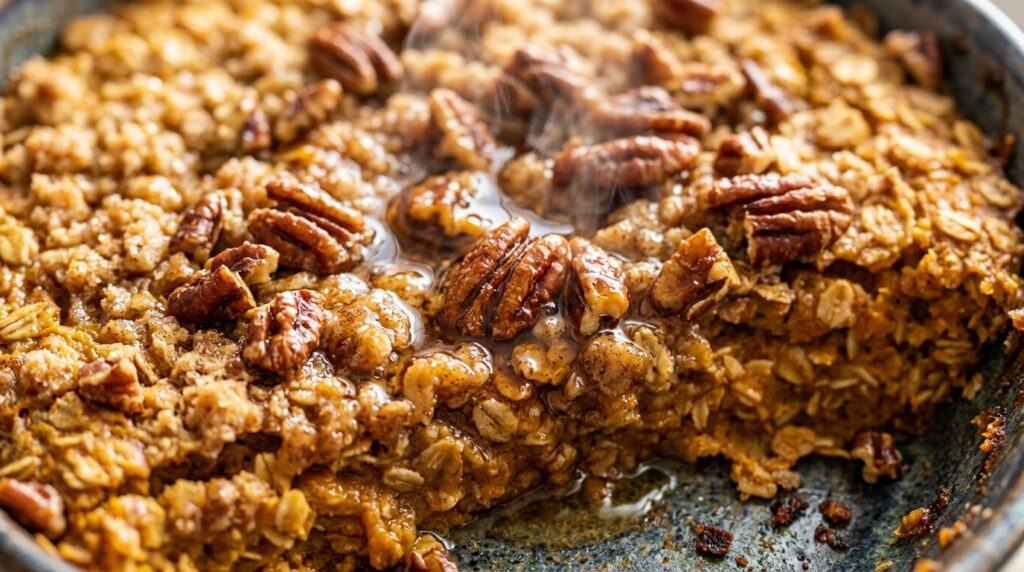
There is no cozier way to greet a crisp autumn morning than with the intoxicating aroma of cinnamon, nutmeg, toasted pecans, and pure maple syrup wafting from your oven. This cozy maple pecan pumpkin baked oatmeal transforms humble pantry rolled oats and velvety pumpkin puree into a tender, cake-like morning breakfast that tastes like an indulgent slice of pumpkin pie yet delivers clean, wholesome, sustained energy to power your entire day. Unlike standard stovetop porridge that can turn gluey or require continuous stirring, baked oatmeal is a culinary marvel: as the oats bake in rich milk, pure pumpkin, and eggs, they fluff up and absorb every drop of autumn spice, yielding a delightfully custard-like interior with crisp, buttery caramelized edges. Studded generously with crunchy toasted pecans and naturally sweetened with pure maple syrup, this foolproof one-dish recipe is destined to become your household’s favorite fall weekend tradition and weekly meal-prep lifesaver. Why You’ll Love This Recipe Effortless One-Dish Meal Prep: Stir, pour into your baking dish, and slide into the oven for 35 minutes. Portion into individual containers for quick, stress-free gourmet breakfasts all week long. Nutrient-Dense & Sustaining: Packed with complex carbohydrates, 6g of dietary fiber, healthy fats from pecans, and a massive boost of natural Vitamin A from real pure pumpkin puree. Tastes Like Pumpkin Bread: Soft, moist, and cake-like in texture, satisfying your sweet tooth while keeping added sugars minimal through pure Grade A maple syrup. 100% Wholesome & Halal: Naturally clean, vegetarian, and easily adapted to dairy-free or gluten-free diets with certified gluten-free rolled oats and oat milk. Key Ingredients & Smart Swaps Old-fashioned rolled oats, pure pumpkin puree, Grade A maple syrup, farm eggs, and autumn spices on white quartz. Old-Fashioned Rolled Oats: Thick rolled oats absorb liquid beautifully while retaining a satisfying, hearty chew. Avoid instant or quick oats, which absorb liquid too quickly and result in a mushy texture. 100% Pure Pumpkin Puree: Ensure you purchase canned solid-pack pure pumpkin puree rather than pumpkin pie mix, which contains artificial stabilizers and heavy refined sugar. Pure Grade A Maple Syrup: Imparts deep, rich caramel notes that complement pumpkin and cinnamon perfectly. Smart Swap: Raw honey or coconut sugar works equally well. Autumn Warm Spice Blend: A balanced medley of ground Ceylon cinnamon, ground ginger, fragrant nutmeg, and a pinch of ground cloves creates that signature bakery warmth. Buttery Chopped Pecans: Folding half the pecans into the batter provides buttery texture in every bite, while scattering the rest over the top yields a crunchy, caramelized praline-like crust. Walnuts or slivered almonds make fantastic alternatives. Whole Milk & Farm Eggs: Whole milk creates a tender, creamy crumb, while two eggs bind the oats into neat, sliceable squares. For dairy-free diets, barista-blend oat milk or unsweetened almond milk works flawlessly. Step-by-Step Cooking Walkthrough 1. Blend the Dry Aromatics: In a large mixing bowl, whisk together the rolled oats, pumpkin pie spice, ground cinnamon, baking powder, fine sea salt, and half of the chopped pecans until evenly dispersed. 2. Whisk the Spiced Pumpkin Custard: In a separate bowl or measuring pitcher, vigorously whisk the pumpkin puree, milk, maple syrup, beaten eggs, melted butter, and vanilla extract until completely silky and uniform. Pouring the fragrant spiced pumpkin custard evenly over the rolled oats and pressing gently to submerge. 3. Assemble & Rest: Pour the dry oats into your greased baking dish, then pour the wet pumpkin mixture evenly over top. Gently press down with a spatula so every oat flake is submerged, let rest for 3 minutes, then scatter the remaining pecans on top. 4. Bake to Golden Perfection: Bake at 375°F (190°C) for 32 to 38 minutes until the edges are golden, the top is lightly springy to the touch, and a toothpick inserted in the center comes out clean. Rest for 10 minutes before slicing. 3 Chef Secrets for Perfect Results 1. Let the Oats Submerge Before Baking: Giving the assembled dish a 3-minute rest on the counter before sliding it into the oven allows the dry oats to begin soaking up the liquid, guaranteeing an evenly moist bake from top to bottom without dry pockets. 2. Toast the Pecans in Melted Butter: For a show-stopping praline flavor, toss the chopped pecans with a teaspoon of melted butter and a pinch of cinnamon before sprinkling them over the top—they will roast into crunchy, fragrant gold. 3. Honor the 10-Minute Resting Window: Cutting into baked oatmeal immediately out of the oven will result in a crumbly mess. Letting the dish cool for 10 minutes allows the egg proteins to set, giving you clean, bakery-style squares that lift out effortlessly. What to Serve With Pumpkin Baked Oatmeal Served warm in stoneware with whipped Greek yogurt, toasted pecans, pure maple syrup, and a steaming latte. Toppings & Dollops: Top each warm square with a generous spoonful of thick vanilla Greek yogurt, a drizzle of almond butter, or a splash of cold heavy cream poured right around the slice. Brunch Table Companions: If hosting family for autumn brunch, serve alongside our Fluffy Spiced Apple Cider Pancakes and our reader-favorite Cozy Lemon Blueberry Baked Oatmeal for an unforgettable seasonal breakfast spread. Morning Beverages: Pair with a rich homemade spiced chai latte, hot pumpkin spice drip coffee, or fresh-pressed apple cider. Storage, Freezing & Reheating Instructions Refrigeration: Allow the baked oatmeal to cool completely to room temperature. Slice into individual portions and store in an airtight glass container in the refrigerator for up to 5 days. Gentle Reheating: Reheat individual portions in the microwave for 45 to 60 seconds with a splash of milk to restore moisture, or warm in a 350°F (175°C) toaster oven for 7 to 8 minutes until heated through and crisp on top. Freezing Guidelines: Wrap individual slices tightly in parchment paper and aluminum foil, then store in a freezer-safe zip-top bag for up to 3 months. Thaw overnight in the refrigerator or reheat directly from frozen in the oven at 350°F for 15 minutes. Frequently Asked Questions
Soft & Chewy Pumpkin Snickerdoodle Cookies
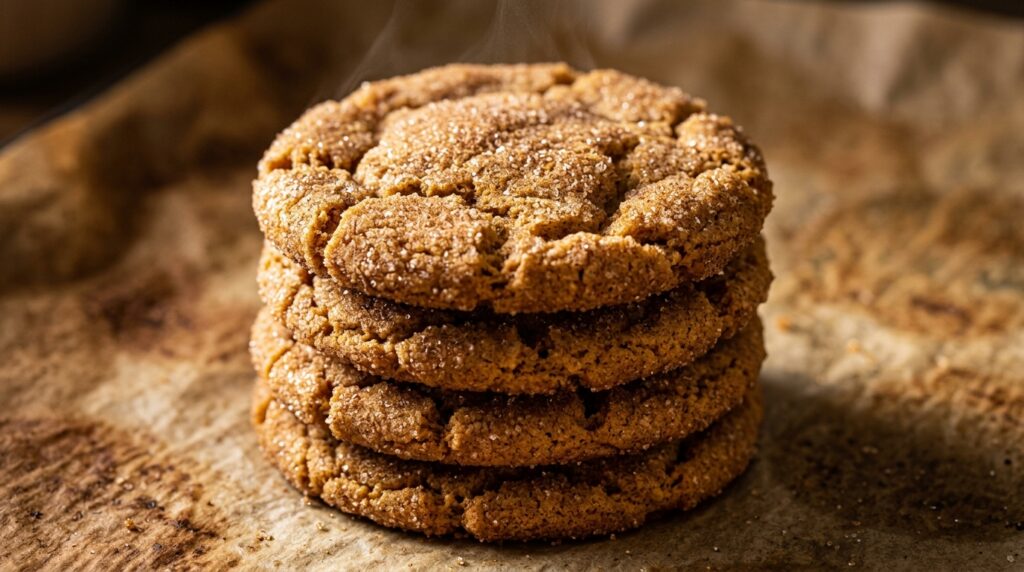
When the autumn season arrives and your kitchen calls for the comforting warmth of fresh-baked holiday cookies, these Soft & Chewy Pumpkin Snickerdoodles are the ultimate fall indulgence. Thick, buttery, and rolled generously in a sparkling coat of cinnamon pumpkin spice sugar, every single cookie boasts deeply crinkled, pillowy tops with tender toasted edges and a melt-in-your-mouth chewy center that stays soft for days. Most home bakers find that adding pumpkin puree to cookie dough turns their cookies into puffy, spongy little cakes rather than genuinely chewy cookies. The baker’s secret behind these viral snickerdoodles is simple but transformative: blotting the canned pumpkin puree with paper towels to remove excess water before mixing. By concentrating the pumpkin flesh, you infuse maximum real pumpkin flavor while preserving the buttery richness that creates a dense, chewy crumb. Paired with cream of tartar for that signature snickerdoodle tang and crinkle, these cookies stand alongside our autumn favorites like Pecan Pie Cheesecake Bars and Bakery-Style Pumpkin Cream Cheese Muffins as the definitive bake of the season. Why You’ll Love This Recipe Truly Chewy (Not Cakey!): Thanks to our pumpkin blotting technique and using melted butter with an egg yolk, these cookies achieve true bakery-style chewiness. Double Cinnamon Pumpkin Crust: Rolling the dough balls in a generous blend of granulated sugar, Ceylon cinnamon, and pumpkin pie spice produces a crunchy, sparkling exterior that contrasts the soft center. Classic Snickerdoodle Crinkle: Authentic cream of tartar reacts with baking soda to give these cookies their signature pillowy crinkled tops and subtle tangy finish. 100% Halal Wholesome: Made with pure pumpkin, sweet cream butter, unbleached flour, real vanilla, and wholesome whole-food spices with zero artificial extracts. Key Ingredients & Smart Swaps Pure Canned Pumpkin Puree: Ensure you use 100% pure pumpkin puree (like Libby’s), NOT pre-sweetened pumpkin pie mix. Blotting 1/2 cup down to 1/3 cup removes excess moisture that causes cookies to turn into muffin tops. Melted Butter: Using melted butter rather than creamed softened butter yields a denser, significantly chewier texture reminiscent of bakery cookies. Egg Yolk (Skip the White): Egg whites contain water and albumin that puff up cookies into cakey sponges. By omitting the white and using only the rich yolk, we introduce fat and richness for a fudgy chew. Cream of Tartar: The hallmark ingredient of classic snickerdoodles. This acidic powder gives snickerdoodles their subtle tangy flavor and prevents sugar from crystallizing, resulting in that pillowy soft bite. Dark or Light Brown Sugar: Brown sugar provides moisture and rich caramel undertones that complement the earthy pumpkin and warm spices. Ceylon Cinnamon & Pumpkin Pie Spice: Infuses the dough and coats the outside in a fragrant, cozy spice blanket. Step-by-Step Cooking Walkthrough 1. Blot the Pumpkin Puree: Spread 1/2 cup pumpkin puree across a paper towel-lined plate. Firmly press top paper towels down to squeeze out excess liquid. Repeat twice until you have about 1/3 cup of thick, paste-like concentrated puree. 2. Whisk Dough & Chill: In a bowl, whisk melted butter, brown sugar, and granulated sugar. Add blotted pumpkin, egg yolk, and vanilla; whisk until glossy. Fold in flour, cream of tartar, baking soda, cinnamon, nutmeg, and salt. Chill dough for 30 minutes in the fridge. 3. Roll & Sugar Coat: In a small bowl, whisk 1/3 cup granulated sugar, cinnamon, and pumpkin pie spice. Scoop 1.5-tablespoon portions of dough, roll into smooth balls, and roll generously in the spiced sugar until coated on all sides. 4. Bake to Crinkly Perfection: Place dough balls 2 inches apart on parchment-lined baking sheets. Bake at 350°F (175°C) for 10 to 11 minutes until edges are set and tops are puffed and crinkled. Rest on the baking sheet for 5 minutes before cooling completely on a wire rack. 3 Chef Secrets for the Best Pumpkin Cookies 1. Blotting is Non-Negotiable: Pure canned pumpkin is nearly 90% water! If you dump raw pumpkin puree directly into cookie dough, that water creates steam during baking, turning your cookies into mini cakes. Blotting takes just 2 minutes and is the single most important step for chewy cookie success. 2. Don’t Skip the 30-Minute Chill: Because the dough is made with warm melted butter, chilling allows the fats to firm up and the flour starches to hydrate. This prevents the cookies from spreading too thin in the oven, ensuring tall, thick cookies with gorgeous crinkled fissures. 3. The Pan-Bang Trick for Deep Crinkles: For bakery-style crinkles, take the baking sheet out at the 9-minute mark and firmly tap it twice flat against your stovetop, then return to the oven for the final minute. This gently collapses the puffed center, creating deep, dramatic cinnamon fissures! What to Serve With Pumpkin Snickerdoodles Tall Glass of Cold Milk: The classic pairing. Dunking a warm, spiced snickerdoodle into cold whole milk is the ultimate cozy childhood pleasure. Warm Spiced Chai or Pumpkin Spice Latte: The creamy cardamom, clove, and cinnamon notes in a hot chai latte amplify the baked pumpkin spices in every bite. Holiday Dessert Platters: Serve on a festive cookie tray alongside our Pecan Pie Cheesecake Bars and Cinnamon Roll Apple Crisp for holiday cookie exchanges! Storage, Freezing & Make-Ahead Instructions Room Temperature Storage: Store cooled cookies in an airtight container at room temperature with a slice of plain white bread. The cookies will absorb moisture from the bread and stay incredibly soft and chewy for up to 5 days! Freezing Baked Cookies: Store baked cookies in a freezer-safe container with parchment paper between layers for up to 3 months. Thaw at room temperature for 15 minutes before enjoying. Freezing Raw Cookie Dough: Scoop and roll dough balls in the cinnamon sugar coating, place on a baking sheet, and flash freeze for 1 hour. Transfer frozen dough balls to a zip-top freezer bag. Bake directly from frozen at 350°F (175°C) for 12 to 13 minutes whenever fresh cookie cravings strike! Frequently Asked Questions Can I make these without cream of tartar?If you don’t have cream of tartar, replace both the cream
Fluffy Spiced Apple Cider Pancakes (Cinnamon Butter)
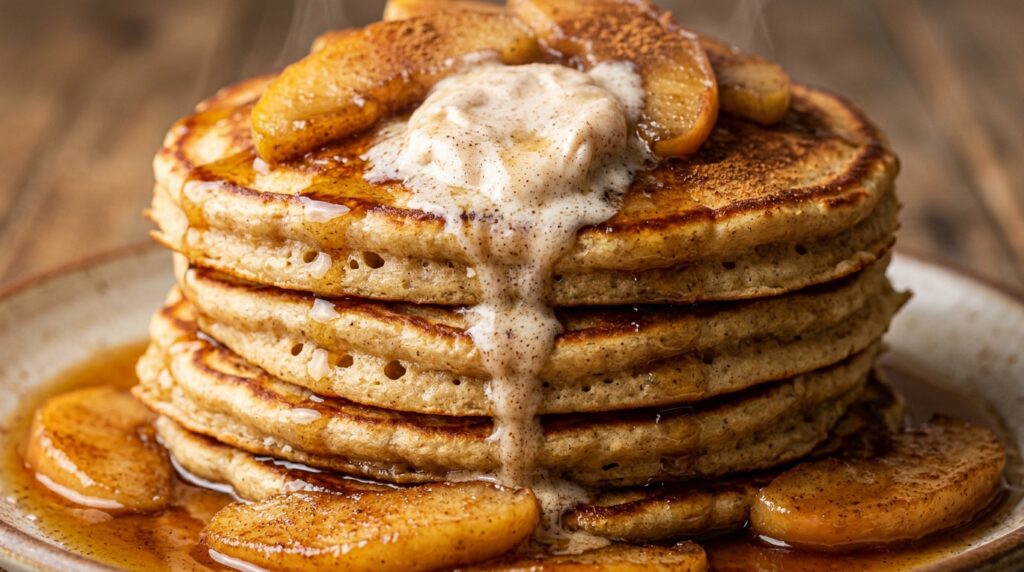
When crisp autumn air fills the morning and your breakfast table yearns for a comforting, restaurant-worthy stack that tastes like freshly fried cider donuts from a country apple orchard, these Fluffy Spiced Apple Cider Pancakes are the undisputed champions of fall brunch. Towering, pillowy, and griddled to golden perfection, these pancakes are infused with intensely concentrated reduced apple cider, warm Ceylon cinnamon, and freshly grated nutmeg, then crowned with a melting dollop of whipped cinnamon honey butter and a glistening cascade of pure amber maple syrup. Most homemade apple pancake recipes suffer from a common pitfall: adding watery apple cider directly into the batter dilutes the buttermilk and yields flat, rubbery cakes with faint apple flavor. The pastry chef secret that elevates this recipe into viral morning glory is reducing fresh, sweet apple cider down by two-thirds. This creates a thick, aromatic apple syrup that packs ten orchard apples’ worth of intense sweet-tart flavor into every single bite without watering down the leaveners. Joining our reader-favorite morning repertoire alongside our cozy Overnight Baked French Toast Casserole and wholesome Lemon Blueberry Baked Oatmeal, this recipe brings cozy New England orchard charm straight to your weekend kitchen. Why You’ll Love This Recipe Maximum Concentrated Apple Flavor: Reducing the cider transforms sweet juice into a potent, caramel-like essence that flavors every crumb without thinning your batter. Cloud-Like Pillowy Texture: The reaction between acidic buttermilk, baking soda, and baking powder generates giant air pockets for pancakes that puff up to an inch thick on the griddle. Melting Whipped Cinnamon Butter: Whipping softened sweet butter with pure honey and cinnamon creates an artisan topping that slowly melts down the warm pancake ridges. 100% Halal Wholesome: Crafted exclusively with pure sweet farm cider, wholesome unbleached flours, rich dairy, and fragrant spices with zero artificial syrups or alcohol. Key Ingredients & Smart Swaps Pure Fresh Apple Cider: Always look for unfiltered, cloudy brown apple cider from the refrigerated produce aisle (not clear filtered apple juice). Boiling 1 1/2 cups down to 1/2 cup concentrates natural malic acid and fruit sugars into a rich syrup. Cultured Buttermilk: Essential for ultra-fluffy pancakes. The lactic acid reacts instantly with baking soda to produce light carbon dioxide bubbles while tenderizing flour proteins. If you don’t have buttermilk, stir 1 tablespoon fresh lemon juice into 1 cup of whole milk and rest 5 minutes. Warm Autumn Spice Quartet: Ground Ceylon cinnamon, freshly grated nutmeg, ground ginger, and allspice replicate the nostalgic aroma of hot spiced cider and warm apple donuts. Light Brown Sugar: Swapping white granulated sugar for brown sugar introduces subtle molasses moisture that enhances the deep caramel notes of the reduced cider. Unsalted Butter & Farm Eggs: Melted butter folded into the batter creates a tender, melt-in-your-mouth crumb with crisp griddled edges. Honeycrisp Apples (Compote): Sweet, crisp Honeycrisp or Gala apples hold their shape when sautéed in butter and maple syrup for a chunky restaurant-style topping. Step-by-Step Cooking Walkthrough 1. Reduce the Apple Cider: Simmer 1 1/2 cups of fresh apple cider in a small saucepan over medium heat for 12 to 14 minutes until reduced to exactly 1/2 cup. Let cool for 10 minutes so it doesn’t scramble the eggs. 2. Whisk & Fold the Batter: In a large bowl, whisk flour, brown sugar, baking powder, baking soda, cinnamon, nutmeg, ginger, and sea salt. In a separate bowl, whisk buttermilk, eggs, melted butter, vanilla, and the cooled reduced cider. Fold wet into dry until just combined—leave small lumps for maximum fluffiness! Let batter rest 8 minutes. 3. Cook on the Griddle: Heat a cast-iron skillet or griddle to medium heat (350°F / 175°C) and grease lightly with butter. Pour 1/3 cup portions of batter. Cook for 2 to 3 minutes until bubbles burst across the top and edges look dry. Flip carefully and cook 1 to 2 minutes more until golden brown and puffed. 4. Whip Cinnamon Butter & Assemble: Beat softened butter with honey and cinnamon until fluffy. Sauté sliced apples in a skillet with butter and maple syrup for 5 minutes. Stack your hot pancakes, crown with a dollop of whipped cinnamon butter, spoon warm apples over the top, and drizzle with maple syrup! 3 Chef Secrets for the Fluffiest Apple Pancakes 1. Boil Down the Cider (Never Skip!): Adding raw cider brings too much moisture and dilutes the batter. Reducing the cider evaporates water while intensifying the natural sugars and pectin, giving your pancakes deep spiced apple flavor without making the crumb soggy. 2. Respect the 8-Minute Batter Rest: Once you mix the wet and dry ingredients, leave the bowl alone on the counter for 8 to 10 minutes. This gives the flour starches time to hydrate and allows the baking powder and buttermilk to activate, resulting in an airy batter that puffs dramatically the second it hits the hot griddle. 3. Never Press Down with the Spatula: After flipping your pancakes, resist the urge to press them down with your spatula! Pressing expels all the delicate steam bubbles trapped inside the crumb, turning light, cloud-like pancakes into dense discs. What to Serve With Apple Cider Pancakes Crispy Halal Beef Bacon: Smoky, salty strips of crispy halal beef bacon provide the ultimate savory contrast to sweet maple syrup and spiced apple compote. Fresh Morning Brews: Serve alongside a dark roast French press coffee, hot cinnamon tea, or a steaming cup of warm mulled apple cider. Weekend Brunch Feasts: Pair with savory morning hits like our Loaded Sweet Potato Bacon Hash or grab-and-go treats like Bakery-Style Pumpkin Cream Cheese Muffins. Storage, Freezing & Reheating Instructions Refrigerator Storage: Let leftover pancakes cool completely on a wire rack. Store in an airtight container lined with parchment paper in the fridge for up to 4 days. Freezer Meal Prep: Flash freeze cooked pancakes on a baking sheet for 1 hour until solid, then stack in a zip-top freezer bag with squares of parchment paper between each pancake. Keeps fresh for up to 3 months! Toaster Reheating: Pop frozen or
Creamy French Onion Chicken Skillet (Gruyère Melt)
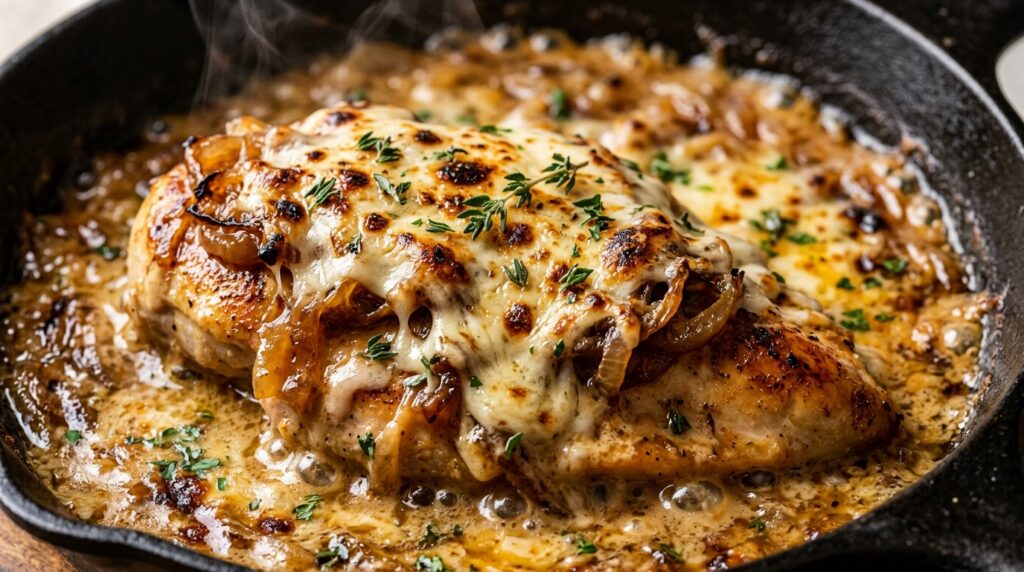
When brisk autumn nights call for an ultra-cozy, bistro-style skillet dinner that fills your kitchen with the intoxicating, sweet aroma of melting butter and caramelized Vidalia onions, this Creamy French Onion Chicken Skillet is pure culinary luxury. Featuring golden pan-seared chicken cutlets smothered in velvety thyme garlic pan sauce, heaped with deeply browned sweet onions, and blanketed under a blistered, gooey crown of broiled Gruyère and Swiss cheese, every single bite captures the timeless soul of classic French onion soup in a hearty, high-protein weeknight masterpiece. While traditional French onion soup requires hours of slow simmering, this skillet dinner delivers all that rich, complex umami flavor in just 35 minutes flat. By searing thinly cut chicken breasts first to establish a savory fond on the bottom of a heavy cast-iron skillet, the sliced onions cook down rapidly in sweet butter, absorbing pan juices as their natural sugars break down into rich caramel. Deglazing with savory beef broth, balsamic vinegar, and a swirl of heavy cream creates a luxurious sauce that ties the crisp chicken and earthy melted Gruyère together. Alongside our reader-favorite comfort classics like Creamy Garlic Parmesan Chicken Skillet and holiday staples like Garlic Herb Butter Roasted Chicken, this one-pan dinner brings upscale restaurant magic to your weeknight table. Why You’ll Love This Recipe One-Pan Simplicity: From searing the chicken and caramelizing the onions to broiling the bubbling cheese, everything happens in a single oven-safe cast-iron skillet for effortless cleanup. High-Protein Gourmet Comfort: Delivering a massive 46 grams of lean protein per serving with only 14 grams of carbs, making it nourishing and satisfying without feeling heavy. Deep Bistro Flavors in 35 Minutes: Strategic thin-slicing of sweet Vidalia onions drastically cuts caramelization time while developing that deep mahogany sweetness you crave. 100% Halal Wholesome: Replaces traditional culinary wine with rich halal beef broth, aromatic garlic, fresh garden thyme, and aged balsamic vinegar for authentic gourmet depth. Key Ingredients & Smart Swaps Boneless Skinless Chicken Breasts: Cut horizontally into thin cutlets. Thinner cutlets sear in minutes, remaining incredibly juicy and tender without requiring extended oven baking. Boneless chicken thighs can be substituted 1:1. Yellow & Sweet Vidalia Onions: A blend of pungent yellow onions and sweet Vidalia onions creates the ideal flavor profile: yellow onions provide sharp umami while sweet onions caramelize into jammy golden sweetness. Gruyère & Swiss Cheese: Gruyère is the undisputed star of French onion dishes, offering a nutty, earthy profile and unmatched melting capabilities. Shredding a block fresh rather than buying pre-shredded cheese ensures silky, clumpless melting under the broiler. Aged Balsamic Vinegar: Our 100% Halal secret weapon. A single tablespoon of balsamic vinegar deglazes the pan, adding acidity, subtle sweetness, and rich dark color that mimics hours of wine reduction. Low-Sodium Beef Broth & Heavy Cream: Beef broth brings classic soup depth, while heavy cream mellows the sharpness, yielding a velvety pan sauce that clings to every bite. Fresh Thyme Leaves: Fresh thyme releases herbal essential oils that cut through the richness of the cheese and cream. Dried thyme can be used in a pinch (use 1 tsp). Step-by-Step Cooking Walkthrough 1. Dredge & Sear the Chicken: Pat chicken cutlets dry and season with garlic powder, salt, and pepper. Lightly dredge in flour. Heat olive oil in a 12-inch cast-iron skillet over medium-high heat. Sear cutlets for 4 to 5 minutes per side until golden brown. Transfer to a plate. 2. Caramelize the Onions: Melt butter in the same hot skillet. Add all sliced onions with a pinch of salt. Sauté over medium heat for 15 to 18 minutes, stirring frequently, until the onions collapse into a dark golden, fragrant, jammy consistency. 3. Build the Creamy Pan Sauce: Add minced garlic, fresh thyme, and balsamic vinegar to the caramelized onions. Cook 1 minute, then pour in beef broth and Dijon mustard. Simmer 3 minutes until slightly reduced, then stir in heavy cream to form a velvety sauce. 4. Assemble, Blanket & Broil: Return chicken cutlets to the pan, mounding caramelized onions over each piece. Generously top with shredded Gruyère and Swiss cheese. Broil in the oven on high for 3 to 4 minutes until the cheese is bubbling, gooey, and speckled with toasted brown spots! 3 Chef Secrets for Perfect French Onion Chicken 1. Thinly Slice Your Onions Uniformly: Thick onion slices take 40+ minutes to caramelize and often burn on the edges before softening in the middle. Using a sharp chef’s knife or mandoline to slice onions uniformly to 1/8-inch thickness ensures rapid, even caramelization in half the time. 2. The Light Flour Dusting Trick: Lightly dredging your chicken cutlets in flour before searing does double duty: it locks in internal juices to keep the breast tender, and the starches release into the pan sauce later, naturally thickening it into a luxurious velouté consistency. 3. Watch the Broiler Closely: Gruyère cheese has a high butterfat content that transforms from gorgeously blistered to charred in seconds. Keep your oven door cracked or watch through the oven window during the 3-minute broil step to catch that perfect golden-speckled bubbly finish. What to Serve With French Onion Chicken Buttery Garlic Mashed Potatoes: The ultimate vessel to catch every spoonful of the rich caramelized onion cream sauce. Toasted Crusty French Baguette: Warm baguette slices rubbed with garlic butter recreate the crouton experience of classic French onion soup right on your plate. Roasted Green Beans or Asparagus: Crisp, lemon-garlic roasted greens provide a fresh, vibrant crunch that balances the decadent cheese and cream. Storage, Freezing & Reheating Instructions Refrigeration: Cool leftover chicken completely. Store in an airtight glass container in the refrigerator for up to 4 days. The caramelized onion flavors deepen and taste even better the next day! Gentle Reheating: For best results, place chicken and sauce in a baking dish, cover with foil, and warm at 350°F (175°C) for 12 to 15 minutes. Alternatively, microwave on 50% power in 60-second intervals to avoid breaking the cream sauce. Freezing: We recommend freezing the cooked chicken cutlets and
Caramel Pecan Upside-Down Bundt Cake: Cozy Fall Dessert
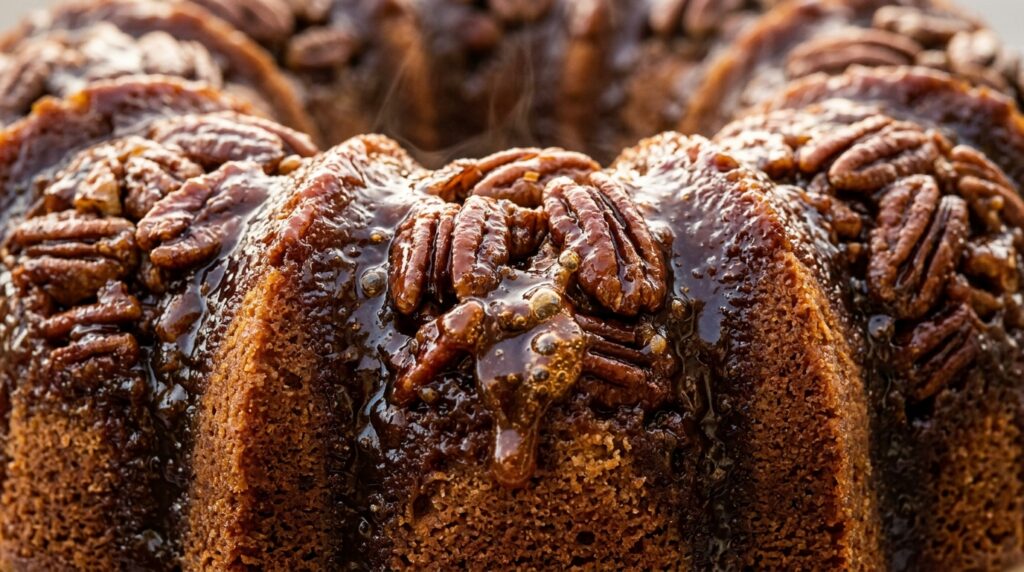
When golden autumn afternoons give way to chilly evenings and your kitchen calls for a show-stopping dessert that fills your home with the intoxicating aromas of browned butter, roasted pecans, and warm Ceylon cinnamon, this Caramel Pecan Upside-Down Bundt Cake is the crowned jewel of fall baking. Inverting from the oven into a breathtaking cascade of buttery brown sugar caramel dripping down deep fluted ridges over whole toasted Texas pecans, every single slice offers an irresistible textural contrast between sticky, crunchy praline topping and an impossibly moist, tender sour cream crumb that melts on your tongue. While traditional layer cakes demand tedious leveling, crumb coats, and meticulous frosting techniques, the culinary magic of an upside-down bundt cake lies in its effortless self-glazing architecture. By pouring a luscious brown sugar caramel butter foundation into the base of the pan and tucking whole toasted pecans along the flutes, the cake creates its own decadent praline glaze right in the oven as it bakes. The natural steam generated by the sour cream batter keeps the crumb luxurious and velvety, while the bubbling caramel infuses the top crust with deep toffee notes. Joining our beloved autumn dessert repertoire alongside our viral Caramel Apple Pecan Dump Cake and melt-in-your-mouth Pecan Pie Cheesecake Bars, this dessert represents Southern hospitality and holiday celebration at its finest. Why You’ll Love This Recipe Self-Glazing Elegance: Zero fussy frostings or piping bags needed—the rich caramel sauce and pecan crown form naturally as the cake bakes, revealing a breathtaking centerpiece the instant you invert it. Ultra-Moist Sour Cream Crumb: The combination of real butter, eggs, and full-fat sour cream guarantees a tender, rich crumb that stays exceptionally moist for up to 4 days. Warm Autumn Spices: Ground Ceylon cinnamon and freshly grated nutmeg provide subtle warmth that balances the decadent sweetness of the sticky brown sugar caramel. 100% Halal Gourmet Comfort: Crafted with pure natural extracts, sweet cream butter, whole nuts, and zero artificial flavorings or alcohol, delivering wholesome dessert luxury for every holiday gathering. Key Ingredients & Smart Swaps Raw Texas Pecan Halves: Whole pecan halves form the decorative crown in the pan flutes, while chopped pecans add crunch in every bite. Always pre-toast them for 6 to 8 minutes at 350°F to unlock rich nutty essential oils. Walnuts or sliced almonds can be swapped for a different flavor profile. Dark Brown Sugar & Pure Butter: The cornerstone of rich caramel. Dark brown sugar contains deeper molasses flavor than light brown sugar, which produces a richer, darker toffee glaze when simmered with melted butter. Full-Fat Sour Cream: The secret weapon for ultra-plush cakes. The natural acidity breaks down gluten strands for a delicate, melt-in-your-mouth crumb, while the fat keeps it moist for days. Full-fat plain Greek yogurt is an outstanding 1:1 substitute. Pure Madagascar Vanilla Extract: Adds deep floral aromatic notes that tie the caramel and warm cinnamon together. Avoid artificial vanillin for the best bakery-quality aroma. All-Purpose Unbleached Flour: Provides the perfect structural balance to hold the weight of the sticky caramel and nuts without turning dense. Spoon and level your flour rather than scooping directly from the bag to avoid a dry batter. Step-by-Step Cooking Walkthrough 1. Prep the Bundt Pan & Caramel Base: Preheat your oven to 350°F (175°C). Generously grease a 10-12 cup fluted bundt pan using baking spray with flour (or softened butter coated with flour). In a bowl, whisk melted butter, dark brown sugar, heavy cream, and sea salt until smooth. Pour into the bottom of the pan, arrange whole pecan halves facing down along the flutes, and scatter chopped pecans evenly. 2. Whisk Dry Ingredients & Cream Butter: In a medium bowl, whisk together flour, baking powder, baking soda, ground cinnamon, nutmeg, and salt. In a stand mixer, cream softened butter, granulated sugar, and brown sugar on medium speed for 3 to 4 minutes until pale and fluffy. Beat in eggs one at a time, followed by pure vanilla. 3. Alternate & Fill the Pan: Whisk sour cream and milk together. Alternate adding the dry flour mixture (in 3 additions) and sour cream mixture (in 2 additions) on low speed, mixing just until combined. Spoon the batter gently over the pecan caramel layer and smooth the surface with a spatula. 4. Bake & The 10-Minute Inversion Rule: Bake at 350°F (175°C) for 48 to 52 minutes until a wooden skewer comes out clean. Transfer the pan to a wire rack and cool for exactly 10 minutes. Invert onto a rimmed cake stand in one smooth motion, let rest 1 minute, and gently lift the pan off to reveal your glistening caramel pecan crown! 3 Chef Secrets for the Best Upside-Down Cake 1. Respect the 10-Minute Inversion Window: This is the golden rule of upside-down bundt cakes! If you attempt to invert immediately after removing from the oven, the hot cake structure is too fragile and will tear. If you wait longer than 12 minutes, the cooling caramel will begin to firm up and cement the pecans to the pan. Set a kitchen timer for 10 minutes the moment the cake leaves the oven. 2. Pre-Toast the Pecan Halves: Raw pecans will soften in the hot caramel sauce, resulting in a soggy texture. Spreading raw pecan halves on a baking sheet and roasting at 350°F for 7 minutes before assembling ensures they remain delightfully crunchy and release rich, fragrant nutty aromatics that penetrate the caramel. 3. Spoon and Dollop the Batter: When filling the bundt pan, never dump all the cake batter into one central spot, as the force will displace your carefully arranged pecans and push the caramel up the sides. Instead, use a large spoon or silicone spatula to dollop small mounds of batter evenly over the nuts, then gently smooth the surface. What to Serve With Caramel Pecan Bundt Cake Madagascar Vanilla Bean Ice Cream: The absolute gold standard pairing. The contrast between warm, spiced cake and cool, velvety melting cream creates pure culinary harmony. Spiced Warm Drinks: Serve alongside
Cozy Lemon Blueberry Baked Oatmeal (Maple Glaze)
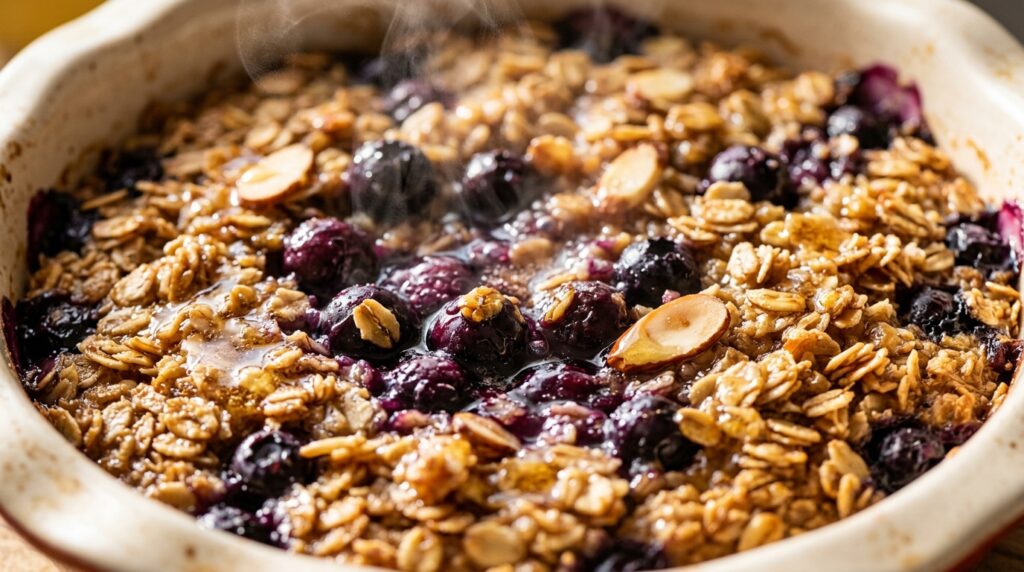
When crisp morning air calls for a wholesome, soul-warming breakfast that tastes like an artisan bakery blueberry muffin yet fuels your day with sustained whole-grain nutrition, this Cozy Lemon Blueberry Baked Oatmeal is your ultimate morning savior. Featuring old-fashioned rolled oats baked into a custardy, golden-crusted casserole studded with bursting sweet blueberries, aromatic lemon zest, and crunchy toasted almonds, this easy make-ahead breakfast brings luxury to your morning table in just 10 minutes of hands-on prep. Unlike gummy stovetop oatmeal that requires constant stirring or sugary boxed cereals that leave you crashing by mid-morning, baked oatmeal transforms humble oats into a sliceable, soft cake-like texture with irresistible toasted edges. The natural brightness of fresh lemon zest cuts through the rich maple sweetness, creating a vibrant breakfast experience. Alongside our reader-favorite brunch staples like Bakery-Style Pumpkin Cream Cheese Muffins and savory weekend hits like Loaded Sweet Potato Bacon Hash, this baked oatmeal stands as the gold standard of healthy morning meal prep. Why You’ll Love This Recipe 10-Minute Wholesome Prep: Simply whisk the wet and dry ingredients, layer with fresh berries in a baking dish, and slide it into the oven. Meal Prep Masterpiece: Bakes 6 generous portions that keep fresh in the refrigerator all week long for effortless grab-and-go weekday mornings. Fiber-Rich Sustained Energy: Delivering 6 grams of prebiotic dietary fiber and 8 grams of protein per square to keep blood sugar stable and cravings away. Naturally Sweetened & Halal: 100% wholesome whole-food ingredients sweetened solely with pure maple syrup and antioxidant-rich wild berries. Key Ingredients & Smart Swaps Fresh ingredients flat-lay: rolled oats, fresh blueberries, organic lemons with zest, pure maple syrup, almond milk, and sliced almonds. Old-Fashioned Rolled Oats: Whole rolled oats provide chewy texture and absorb the vanilla egg custard evenly. Avoid instant quick oats, which turn mushy when baked. Fresh Plump Blueberries: Fresh sweet blueberries burst in the heat of the oven, releasing sweet, jammy purple pockets throughout the dish. Frozen blueberries can also be used (do not thaw before adding to avoid turning the batter completely grey). Fresh Lemon Zest & Juice: Grating the vibrant yellow zest directly into the dry oats distributes fragrant essential citrus oils throughout every bite. Pure Amber Maple Syrup: Real grade A maple syrup provides natural woodsy sweetness without refined sugars or corn syrup. Almond Milk & Pasture Eggs: Creates a light, creamy custard that binds the oats into sliceable squares while keeping the interior moist and tender. Oat milk or dairy milk can be swapped 1:1. Toasted Sliced Almonds: Sprinkled across the top right before baking, sliced almonds toast to golden crunchiness to contrast the soft, custardy baked oats. Step-by-Step Cooking Walkthrough 1. Mix Dry Ingredients: Preheat oven to 375°F (190°C) and lightly grease your ceramic baking dish. In a large bowl, whisk rolled oats, baking powder, cinnamon, sea salt, chia seeds, and grated lemon zest. 2. Whisk Custard: In a separate bowl, whisk together almond milk, maple syrup, eggs, melted coconut oil, vanilla extract, and fresh lemon juice until silky and combined. Active baking action: gently folding fresh blueberries and lemon zest into the spiced oat mixture before baking. 3. Layer & Top: Spread 1.5 cups of blueberries across the bottom of the dish, cover with the oat mixture, and slowly pour the milk custard over the top. Scatter the remaining blueberries and sliced almonds across the surface. 4. Bake Golden: Bake at 375°F (190°C) for 32 to 35 minutes until the top is golden-brown, edges are set, and berries are bubbling. Let rest 10 minutes, slice into squares, and serve warm! 3 Chef Secrets for the Best Baked Oatmeal 1. Rub Lemon Zest into the Oats: Before adding liquids, use your fingertips to gently rub the grated lemon zest into the dry rolled oats. The friction releases volatile citrus oils from the zest, infusing every oat flake with mouthwatering lemon aroma. 2. Layer Berries on Top and Bottom: Don’t just dump all the berries in one layer! Placing two-thirds of the berries on the bottom creates a jammy fruit compote layer under the oats, while reserving one-third for the top creates gorgeous blistered jewel-toned pockets. 3. Let It Rest for 10 Minutes: As tempting as it is to scoop immediately, letting the baked oatmeal cool slightly allows the custard proteins to firm up so you can slice clean, neat bakery-style squares. What to Serve With Lemon Blueberry Baked Oatmeal Plated morning luxury: warm square of lemon blueberry baked oatmeal served with Greek yogurt, fresh mint, and maple syrup. Greek Yogurt or Coconut Cream: A cool dollop of plain whole-milk Greek yogurt adds protein and luscious creamy contrast to the warm baked oats. Pure Maple Drizzle: Pouring an extra tablespoon of warm pure maple syrup over the warm slice makes every bite taste like dessert for breakfast. Morning Brew Pairings: Pairs exquisitely with a hot cup of Earl Grey tea with lemon, fresh green tea, or a creamy oat milk latte. Storage, Freezing & Reheating Instructions Refrigeration: Allow the baked casserole to cool completely. Cover tightly with foil or slice into individual squares and store in airtight glass containers for up to 5 days. Quick Morning Reheating: Microwave individual squares for 45 to 60 seconds with a splash of almond milk to restore tender fluffiness. For crisp edges, reheat in a 350°F toaster oven for 6 to 8 minutes. Freezing: Wrap individual cooled squares tightly in parchment paper and aluminum foil, then store in a freezer bag for up to 3 months. Thaw overnight in the fridge or reheat directly from frozen in the microwave for 90 seconds! Frequently Asked Questions Can I make this baked oatmeal vegan?Yes! Swap the eggs for two “flax eggs” (2 tablespoons ground flaxseed mixed with 5 tablespoons warm water, rested for 5 minutes) and ensure you use plant-based milk and coconut oil. It bakes up wonderfully moist and tender. Can I make this the night before?Yes! Assemble the entire dish, cover tightly with foil, and store in the refrigerator overnight. In
Loaded Garlic Herb Stuffed Mushrooms (Halal Beef)
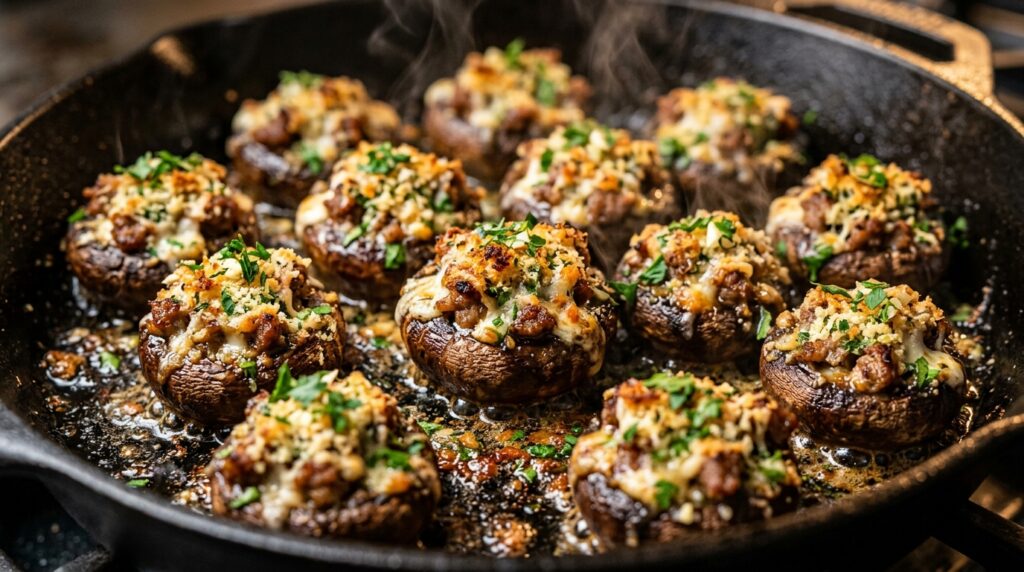
When holiday entertaining demands an irresistible finger food that disappears from platters in seconds, nothing commands attention like these Loaded Garlic Herb Stuffed Mushrooms. Featuring plump, earthy baby bella mushroom caps overflowing with a rich, velvety filling of seasoned halal beef sausage, creamy garlic cheese, and fresh Italian herbs, finished under a crackling golden parmesan-panko crust, this 20-minute baked appetizer delivers pure bite-sized luxury. Unlike watery stuffed mushroom recipes that turn soggy or bland cream-only variations, our secret lies in utilizing the mushroom stems. By sautéing the diced stems with sweet shallots, garlic, and savory browned beef sausage until completely dry, every ounce of concentrated earthy umami is locked directly into the creamy filling. Alongside our festive holiday favorites like Cranberry Pecan Brie Bites and party-sized Creamy Warm Spinach Artichoke Dip, these stuffed caps represent the pinnacle of holiday cocktail hour sophistication. Why You’ll Love This Recipe 20-Minute Fast Bake: Assemble ahead of time, chill, and bake straight from the refrigerator in just 20 minutes right before guests arrive. Zero-Waste Stem Magic: Finely mincing and sautéing the mushroom stems infuses deep earthy mushroom flavor into the filling while eliminating food waste. Perfect Textural Contrast: Plump, juicy mushroom bite on the outside with a velvety rich center and a crunchy, buttery golden panko parmesan top. 100% Halal Wholesome: Crafted with seasoned halal beef sausage, rich natural cheeses, and garden-fresh herbs—guaranteed safe and wholesome for all guests. Key Ingredients & Smart Swaps Fresh ingredients flat-lay: whole baby bella mushrooms, ground halal beef sausage, cream cheese block, parmesan, garlic, and fresh parsley. Baby Bella (Cremini) Mushrooms: Cremini mushrooms have firmer structure and deeper earthy flavor than plain white button mushrooms, allowing them to hold rich fillings without collapsing during baking. Seasoned Halal Beef Sausage: Italian-spiced halal beef sausage (or lean ground beef seasoned with fennel, garlic, and paprika) adds irresistible savory bite. Halal turkey sausage works equally well. Full-Fat Cream Cheese: Softened block cream cheese provides the luscious binding foundation that keeps the meat juicy and melt-in-your-mouth tender. Fresh Parmigiano-Reggiano: Freshly grated parmesan melts into the filling for nutty richness and creates a blistered, golden-brown crust when mixed with panko. Fresh Italian Flat-Leaf Parsley: Fresh herbs brighten the rich dairy and meat filling. Chopped fresh thyme or chives can also be folded in. Panko Breadcrumbs: Japanese panko flakes stay crispier than standard breadcrumbs. For gluten-free guests, substitute gluten-free panko or crushed pork-free porkless rinds. Step-by-Step Cooking Walkthrough 1. Prep the Mushrooms: Wipe mushroom caps clean with a damp towel. Pop out the stems; finely dice the stems and set aside. Toss caps with 1 tablespoon olive oil and arrange cavity-side up on a parchment-lined baking sheet. 2. Brown the Savory Filling: In a skillet over medium heat, cook the halal beef sausage until browned and crumbly (5 minutes). Transfer to a plate. In the same skillet, sauté the diced mushroom stems and onion for 4 minutes until moisture evaporates; add garlic for 60 seconds. Active prep action: generously mounding the savory cream cheese, beef sausage, and herb filling into each mushroom cap before baking. 3. Combine & Stuff: Stir softened cream cheese, cooked sausage, sautéed mushroom stems, parmesan, and fresh parsley in a bowl until smooth. Mound a generous tablespoon of filling into each cap. Top with buttered panko and parmesan crumbs. 4. Bake Golden: Bake at 375°F (190°C) for 18 to 20 minutes until the caps are tender, juices bubble at the base, and breadcrumbs turn golden crisp. Rest for 5 minutes and serve warm! 3 Chef Secrets for Perfect Stuffed Mushrooms 1. Never Submerge Mushrooms in Water: Mushrooms are culinary sponges! If soaked in water, they absorb liquid and release soggy pools of grey water onto the baking sheet. Always wipe them clean with a slightly damp paper towel to maintain a firm, caramelized texture. 2. Cook Out the Stem Moisture Completely: Raw mushroom stems contain up to 90% water. Sautéing them in the skillet until all liquid has completely cooked off ensures that your filling stays rich and creamy rather than soupy. 3. Generously Mound the Tops: Don’t be shy when stuffing! The mushroom caps shrink slightly during baking as they caramelize, while the filling holds its shape. Mounding the filling high creates a gorgeous restaurant-style dome with maximum crunchy topping. What to Serve With Loaded Stuffed Mushrooms Plated party-style: sizzling stuffed mushrooms served on a dark slate board garnished with fresh parsley and sea salt. Holiday Charcuterie & Cheese Boards: Pair these warm savory bites with sharp aged white cheddar, kalamata olives, dried figs, and artisan water crackers. Steak & Roast Dinners: Serve as an indulgent gourmet side dish alongside our Garlic Butter Steak Bites or roast whole beef tenderloin. Festive Beverages: Complement with sparkling apple cider, chilled ginger mocktails, or bold unsweetened iced tea with fresh lemon. Storage, Freezing & Make-Ahead Instructions Make-Ahead Hosting Hack: Assemble the stuffed mushrooms completely on the baking sheet up to 24 hours in advance. Cover tightly with plastic wrap and refrigerate. When ready to party, uncover and bake at 375°F for 22 to 24 minutes straight from the fridge! Refrigeration: Store leftover baked mushrooms in an airtight container in the refrigerator for up to 3 days. Reheat in a 350°F toaster oven for 8 minutes to restore the crispy breadcrumb crust. Freezing: Unbaked stuffed mushrooms can be flash-frozen on a baking sheet for 2 hours, then transferred to a freezer bag for up to 2 months. Bake directly from frozen at 375°F for 28 to 30 minutes! Frequently Asked Questions Can I make these vegetarian?Yes! Omit the beef sausage and substitute 1/2 cup of finely chopped walnuts or sun-dried tomatoes, plus 1/2 teaspoon of smoked paprika and dried oregano for savory complexity. Why do my stuffed mushrooms turn watery?Two reasons: either the mushrooms were washed under running water instead of wiped clean, or the diced stems were not cooked long enough to evaporate their internal water before mixing with the cream cheese. Can I use white button mushrooms instead?Yes, standard white