
Roasted Butternut Squash Soup with Crispy Sage

When brisk autumn winds whistle outside and you long for a soothing, deeply nourishing bowl of comfort that tastes like pure restaurant elegance, this Roasted Butternut Squash Soup with Crispy Sage is the ultimate seasonal indulgence. Featuring sweet butternut squash oven-roasted until caramelized, roasted garlic, sweet Honeycrisp apple, and savory shallots puréed into liquid velvet, this vibrant soup delivers cozy gourmet bliss to your table in under an hour. Unlike bland boiled squash soups that end up watery and thin, oven-roasting the vegetables first is non-negotiable. High-heat roasting concentrates the natural sugars and creates rich, caramelized Maillard browning that transforms humble squash into a complex, nutty masterpiece. Along with our reader-adored autumn comforts like Cozy Creamy White Bean and Spinach Soup and Cozy Creamy Chicken and Wild Rice Soup, this squash soup stands as the pinnacle of wholesome cold-weather dining. Why You’ll Love This Recipe Intense Caramelized Flavor: Roasting the squash and aromatics at 400°F unlocks rich, natural sweetness without needing excess sugar. Liquid Silk Texture: Puréeing roasted apple and squash creates an impossibly velvety consistency that requires only a small splash of cream. Nutrient-Dense Powerhouse: Delivering over 18,000 IU of vitamin A, 42 mg of vitamin C, and 5 grams of fiber per bowl to strengthen autumn wellness. Effortless Entertaining: Beautiful vibrant golden presentation topped with crunchy butter-fried sage and pepitas that looks like a five-star culinary magazine cover. Key Ingredients & Smart Swaps Fresh ingredients flat-lay: whole and cubed butternut squash, Honeycrisp apple, shallots, garlic, fresh sage, pepitas, and broth. Fresh Butternut Squash: Select a heavy, smooth-skinned squash with a thick neck (where the solid meat is concentrated). Pre-cut butternut squash cubes from the produce section can be used to shave 10 minutes off prep time. Honeycrisp or Gala Apple: A sweet-tart apple roasted alongside the squash adds bright natural acidity that cuts through the earthy starchiness of the squash. Shallots & Whole Garlic Cloves: Sweeter and milder than yellow onions, roasted shallots and whole garlic cloves melt into caramelized sweetness in the oven. Rich Vegetable or Chicken Bone Broth: Opt for low-sodium vegetable broth for a vegetarian soup, or rich chicken bone broth for maximum savory protein body. Warm Autumn Spices: Freshly grated whole nutmeg and a pinch of cinnamon impart the quintessential cozy warmth of fall holidays. Fresh Sage & Raw Pepitas: Quickly sizzling fresh sage leaves in foaming butter crisps them into delicate herb chips, while crunchy toasted pumpkin seeds add irresistible textural contrast. Step-by-Step Cooking Walkthrough 1. Caramelize on the Sheet Pan: Toss cubed butternut squash, chopped apple, halved shallots, and garlic cloves with olive oil, sea salt, and black pepper on a parchment-lined baking sheet. Roast at 400°F (200°C) for 30 to 35 minutes until edges are tender and deeply caramelized. 2. Combine in Pot: Transfer the caramelized squash and aromatics into a large Dutch oven. Pour in broth, nutmeg, cinnamon, and a splash of maple syrup. Simmer gently over medium heat for 8 minutes. Active soup making: puréeing roasted squash and broth with an immersion blender into silky golden velvet. 3. Blend to Liquid Velvet: Submerge an immersion hand blender directly into the Dutch oven and blend on high for 2 to 3 minutes until completely smooth and creamy. Stir in the cream and adjust seasoning with sea salt to taste. 4. Crisp the Sage & Serve: Melt butter in a small skillet over medium heat. Fry whole sage leaves for 60 seconds until crisp. Ladle warm soup into bowls, swirl with cream, top with crispy sage chips and toasted pepitas, and enjoy! 3 Chef Secrets for the Best Squash Soup 1. Don’t Crowd the Baking Sheet: If squash cubes overlap on the roasting pan, they will steam in their own moisture rather than caramelize. Use a large half-sheet pan and spread the squash into a single spaced layer to achieve those crucial caramelized brown edges. 2. The Secret Power of Apple: Butternut squash can sometimes taste flat or one-dimensional. Roasting a single tart-sweet apple alongside the vegetables provides gentle pectin and natural fruit acids that elevate the entire soup into four-star dining territory. 3. Blend Longer Than You Think: For true restaurant-level silkiness, don’t stop blending the moment the chunks disappear. Let the immersion blender run for an extra 90 seconds to aerate and emulsify the squash fibers into an ultra-luxurious, velvety texture. What to Serve With Roasted Butternut Squash Soup Plated autumn perfection: warm bowl of roasted butternut squash soup served with crusty artisan sourdough and salted butter. Toasted Sourdough or Garlic Croutons: Thick, crusty sourdough bread slathered with salted butter is mandatory for dipping into the velvety golden soup. Gourmet Grilled Cheese: A gooey grilled cheese made with sharp white cheddar, gruyère, or brie on artisan bread turns this soup into an unforgettable autumn feast. Harvest Autumn Salad: A crisp side salad tossed with shaved honeycrisp apples, baby arugula, goat cheese, and balsamic vinaigrette provides refreshing acidic contrast. Storage, Freezing & Reheating Instructions Refrigeration: Allow the soup to cool completely before transferring to airtight glass containers. Keeps fresh in the refrigerator for up to 5 days. Reheat on the stovetop over medium-low heat. Freezing: This soup freezes magnificently! If freezing for extended periods, we recommend freezing before adding the final cream swirl. Store in freezer-safe containers for up to 3 months. Thaw overnight in the fridge and warm gently on the stove. Meal Prep Tip: Make a double batch on Sunday; the flavors deepen and become even more complex and delicious on day two and three! Frequently Asked Questions Can I make this soup completely vegan / dairy-free?Yes! Simply use vegetable broth, swap the heavy cream for full-fat canned coconut milk, and fry the sage leaves in extra virgin olive oil instead of butter. The coconut cream pairs exceptionally well with the roasted squash! Can I use a stand blender instead of an immersion blender?Absolutely. If using a stand blender (such as a Vitamix), transfer the roasted squash and broth in two batches. Be sure to remove the
Creamy Tuscan Garlic Salmon Skillet (20 Minutes)

When you crave an elegant, restaurant-caliber dinner that feels deeply decadent yet comes together in a single skillet in just 20 minutes, this Creamy Tuscan Garlic Salmon Skillet is your ultimate culinary triumph. Featuring crisp, golden pan-seared salmon fillets bathed in a velvety garlic parmesan cream sauce studded with tart-sweet sun-dried tomatoes, wilted baby spinach, and aromatic ribbons of fresh basil, this quick weeknight dinner transforms fresh pantry staples into pure Italian-inspired bliss. Unlike baked salmon recipes that often risk drying out in the oven, pan-searing on the stovetop creates an unbeatable contrast between a crackling, golden-brown exterior and a meltingly tender, flaky center. The pan juices left behind in the skillet provide an instant flavor foundation for our silky garlic sauce. Along with our reader-favorite skillet classics like Creamy Garlic Parmesan Chicken Skillet and cozy pasta comforts like Creamy Butternut Squash Pasta, this salmon skillet proves that weeknight gourmet cooking requires minimal time and zero complicated techniques. Why You’ll Love This Recipe 20-Minute Magic: From initial prep to golden sear and velvety sauce, dinner is ready to plate in just 20 minutes on active heat. Flawless Texture Contrast: Perfectly seared crispy salmon crust on the outside with juicy, flaky tender center bathed in luscious cream. High-Protein & Omega-3 Rich: Delivering 39 grams of lean protein and essential heart-healthy omega-3 fatty acids in every wholesome serving. 100% Halal Wholesome: Free of alcohol deglazing and pork; relying on fresh lemon, rich broth, and premium garlic for deeply savory restaurant-style complexity. Key Ingredients & Smart Swaps Fresh ingredients flat-lay: fresh salmon fillets, sun-dried tomatoes, baby spinach, parmesan cheese, garlic, heavy cream, and fresh basil. Fresh Salmon Fillets: Center-cut fillets of wild-caught salmon (such as Coho or Sockeye) or buttery Norwegian salmon cook evenly and hold their shape beautifully. Skin-on or skinless both work seamlessly. Sun-Dried Tomatoes: Oil-packed sun-dried tomatoes offer intense concentrated umami sweetness that balances the rich dairy sauce. Drain well and julienne into thin bite-sized ribbons. Fresh Baby Spinach: Three generous cups wilt gently into the hot cream in just 90 seconds, adding fresh vibrant color and essential vitamins A, C, and iron. Freshly Grated Parmigiano-Reggiano: Always grate fresh from the block! Pre-shredded cheese contains cellulose anti-caking agents that make cream sauces grainy rather than silky. Heavy Whipping Cream: Full-fat heavy cream creates that luxurious velvety glaze without requiring cornstarch or flour thickeners. Full-fat canned coconut milk can be swapped for a dairy-free variation. Fresh Basil & Lemon Juice: A squeeze of fresh lemon juice cuts through the rich sauce at the very end, while sweet fresh basil infuses authentic Mediterranean aromatics. Step-by-Step Cooking Walkthrough 1. Prep & Dry the Salmon: Use paper towels to pat the salmon fillets completely dry on all sides (this is essential for a golden crust). Season generously with garlic powder, fine sea salt, and black pepper. 2. Golden Pan-Sear: Heat olive oil and 1 tablespoon of butter in a large skillet over medium-high heat until hot. Place salmon flesh-side down and sear undisturbed for 4 to 5 minutes until deeply golden. Flip gently and sear for 3 more minutes. Transfer to a plate. Active skillet cooking: spooning velvety garlic parmesan cream sauce, sun-dried tomatoes, and wilted spinach over the seared salmon fillets. 3. Build the Tuscan Sauce: Lower heat to medium. Add butter, minced garlic, and sun-dried tomatoes; sauté for 60 seconds until fragrant. Pour in broth to deglaze the skillet. Whisk in heavy cream and grated parmesan, simmering gently for 2 minutes until glossy and slightly reduced. 4. Wilt Greens & Combine: Fold in baby spinach and fresh lemon juice until greens just wilt. Return the seared salmon to the skillet, spooning warm velvety sauce over the top. Simmer for 90 seconds, scatter with fresh basil, and serve immediately! 3 Chef Secrets for Restaurant-Style Salmon 1. Thoroughly Dry the Fillets: Moisture is the enemy of a golden sear! If the surface of the salmon is damp, it will steam rather than sear, leaving the crust pale and soggy. Press firmly with double layers of paper towels before seasoning. 2. Don’t Move the Fish Too Early: Once the salmon hits the hot skillet, leave it completely undisturbed for the full 4 minutes. As the protein forms a crisp caramelized crust, the fillet naturally releases itself from the pan with zero tearing. 3. Gentle Simmer Prevents Sauce Separation: Never let heavy cream boil vigorously over high heat! Keep the flame at medium-low to maintain a gentle, lazy bubble that keeps the emulsion glossy, smooth, and lump-free. What to Serve With Creamy Tuscan Garlic Salmon Plated restaurant perfection: flaky pan-seared salmon smothered in velvety Tuscan garlic cream sauce with artisan bread. Warm Artisan Sourdough: Thick, crusty sourdough bread or garlic focaccia is essential for mopping up every last drop of the decadent sun-dried tomato garlic sauce. Tossed Angel Hair or Fettuccine: Serve the salmon and sauce over a bed of al dente pasta for an ultra-satisfying Italian bistro feast. Low-Carb Bases: For a keto or lighter option, pair with steamed jasmine rice, garlic butter cauliflower rice, or roasted asparagus spears. Storage, Freezing & Reheating Instructions Refrigeration: Allow salmon and sauce to cool to room temperature. Store in an airtight container in the refrigerator for up to 3 days. Gentle Skillet Reheating: Avoid the microwave, which turns salmon rubbery and can break cream sauce. Reheat gently in a non-stick skillet over low heat, adding a tablespoon of broth or milk to loosen the sauce as it warms. Freezing: Because heavy dairy cream sauces can separate upon freezing and thawing, we do not recommend freezing this finished dish. Freshly prepared is infinitely superior! Frequently Asked Questions Can I use frozen salmon fillets?Yes! Thaw frozen salmon completely in the refrigerator overnight. Pat them thoroughly dry with paper towels to eliminate all excess moisture before searing. Can I use half-and-half or whole milk instead of heavy cream?Half-and-half can be used, but because of its higher water content, simmer it for an extra 3 to 4 minutes or whisk in
Loaded Sweet Potato Bacon Hash (Breakfast Skillet)

When brisk autumn mornings call for a hearty, energizing breakfast that balances wholesome nutrition with bold savory satisfaction, nothing rivals this Loaded Sweet Potato Bacon Hash. Featuring tender, caramelized sweet potato cubes seared to golden perfection in a cast-iron skillet, crispy savory halal beef bacon, sweet sautéed peppers, wilted greens, and rich sunny-side-up eggs with velvety runny yolks, this 30-minute skillet miracle transforms simple whole-food staples into weekend brunch luxury. Unlike traditional diner breakfast hashes that rely on greasy processed hash browns or heavy frozen potatoes, sweet potatoes deliver complex carbohydrates, gut-friendly fiber, and an intoxicating natural caramelized sweetness that pairs exquisitely with smoky spices and salty bacon. Along with our sweet morning crowd-pleasers like Overnight Baked French Toast Casserole and Bakery-Style Pumpkin Cream Cheese Muffins, this savory skillet breakfast provides the ultimate nutrient-dense fuel to power through busy weekdays or leisurely autumn gatherings. Why You’ll Love This Recipe One-Pan Simplicity: From crisping the bacon to searing the sweet potatoes and poaching the eggs, everything cooks in a single cast-iron skillet for lightning-fast cleanup. Balanced Sweet & Savory Nutrition: Packed with over 14,000 IU of vitamin A, 18 grams of clean protein, and 6 grams of dietary fiber to keep you full and energized for hours. Customizable Whole-Food Comfort: 100% Halal and naturally gluten-free; easily adapted for dairy-free or whole-food meal prep routines. 30-Minute Efficiency: Using our quick uniform-dicing method, the sweet potato cubes cook tender with crispy edges in under 12 minutes. Key Ingredients & Smart Swaps Fresh ingredients flat-lay: diced orange sweet potatoes, halal beef bacon, diced red bell pepper, yellow onion, baby spinach, eggs, and warm spices. Vibrant Orange Sweet Potatoes: Beauregard or Jewel sweet potatoes offer rich caramelized sweetness and hold their shape during skillet searing without turning mushy. Peel and cut into uniform 1/2-inch dice. Halal Beef Bacon or Turkey Bacon: Thick-cut halal beef bacon renders delicious savory richness that seasons the potatoes deeply. Turkey bacon or halal chicken breakfast sausage can also be substituted. Aromatics (Bell Pepper & Onion): Crisp red bell pepper adds subtle sweetness and vibrant color, while yellow onion provides essential savory depth. Baby Spinach: Tender baby spinach wilts into the hot skillet in seconds, boosting iron and leafy green nutrients. Chopped kale or Swiss chard work equally well. Fresh Pasture-Raised Eggs: Rich orange yolks create a luscious natural sauce that coats the crispy potatoes when pierced. Smoky Spice Blend: Smoked Spanish paprika, ground cumin, and freshly ground black pepper accentuate the natural sweetness of the potatoes with warm Texan barbecue undertones. Step-by-Step Cooking Walkthrough 1. Crisp the Bacon: In a 12-inch seasoned cast iron skillet over medium heat, cook chopped beef bacon until crispy and browned (about 5 minutes). Transfer bacon to a plate, leaving 1 tablespoon of savory drippings in the skillet. 2. Caramelize the Potatoes: Swirl in olive oil and add diced sweet potatoes in an even layer. Let cook undisturbed for 4 minutes to form a crisp crust, then toss and sauté for another 8 minutes until tender. Active skillet cooking: tossing crispy sweet potato cubes, sizzling bacon, and creating wells for sunny-side-up eggs. 3. Sauté Aromatics & Greens: Push potatoes slightly to the perimeter; add diced onions, bell peppers, and minced garlic to the center. Sauté for 3 minutes, sprinkle with smoked paprika and cumin, and fold in fresh baby spinach until just wilted. 4. Steam the Eggs & Garnish: Return crisp bacon to the pan. Use the back of a spoon to create 4 wells in the hash. Crack an egg into each well. Cover with a lid and cook on medium-low for 3 to 5 minutes until egg whites are set and yolks remain deliciously runny. Top with sliced avocado and scallions! 3 Chef Secrets for Crispy Sweet Potato Hash 1. Cut Uniform 1/2-Inch Cubes: Sweet potatoes are denser than Russet potatoes. Slicing them too large means the outside browns before the interior cooks through. Keeping them to precise half-inch cubes guarantees a crispy caramelized exterior with a creamy, fluffy center in just 10 to 12 minutes. 2. Don’t Stir Too Frequently: The secret to restaurant-style diner hash is patience! When the sweet potatoes first hit the hot skillet, leave them completely undisturbed for 3 to 4 minutes. This allows direct pan contact to trigger the Maillard reaction and form a crunchy golden crust. 3. Trap Steam to Set Egg Whites: Covering the skillet with a tight-fitting lid or sheet pan during the final 3 minutes traps convection steam. This gently cooks the egg whites from above without overcooking the delicate runny yolk beneath. What to Serve With Sweet Potato Breakfast Hash Plated morning comfort: hearty scoop of loaded sweet potato hash served with sliced avocado, green onions, and warm crusty sourdough. Toasted Artisan Sourdough: Thick crusty bread or warm buttery biscuits are essential for mopping up every drop of rich golden egg yolk and smoky skillet spices. Fresh Sliced Avocado & Herbs: Creamy avocado slices and fresh chopped cilantro or parsley provide refreshing coolness against the savory warm skillet heat. Morning Beverages: Pair with fresh-squeezed orange juice, hot spiced chai tea, or a bold dark-roast French press coffee. Storage, Freezing & Reheating Instructions Meal Prep Refrigeration: You can prepare the sweet potato and bacon hash ahead of time without the eggs. Store in an airtight container in the refrigerator for up to 4 days. Reheating to Restore Crispness: Reheat leftovers in a lightly oiled skillet over medium-high heat for 4 to 5 minutes to restore the crispy edges, then fry fresh eggs to top. Freezing: The cooked vegetable and bacon hash freezes exceptionally well for up to 2 months. Thaw in the fridge overnight and crisp up in a hot cast iron skillet before adding eggs. Frequently Asked Questions Can I make this sweet potato hash in the oven?Yes! Toss the diced sweet potatoes, onions, bell peppers, oil, and spices on a large sheet pan. Roast at 400°F (200°C) for 20 minutes until tender. Create 4 indentations, crack the eggs directly onto
Caramel Apple Pecan Dump Cake (Warm Skillet)

When the crisp autumn breeze rolls in and your kitchen fills with the mouthwatering aromas of warm cinnamon, browned butter, and sweet vanilla, nothing delivers instant cozy comfort like this warm skillet Caramel Apple Pecan Dump Cake. Featuring tender Honeycrisp apples bubbling in rich salted caramel sauce beneath a golden, buttery cake crust studded with toasted crunchy pecans, this viral autumn dessert comes together in just 10 minutes of hands-on prep! Unlike finicky traditional apple pies that require rolling homemade pastry dough or chilling pie crusts for hours, a skillet dump cake relies on smart baking alchemy. By layering fresh spiced fruit, luscious caramel, dry cake mix, and melted butter directly in a seasoned cast-iron skillet, the oven transforms humble pantry staples into an irresistible hybrid between a southern fruit cobbler and a decadent butter cake. Along with our reader-favorite Cinnamon Roll Apple Crisp and holiday-beloved Pecan Pie Cheesecake Bars, this skillet bake is destined to become your household’s most requested fall dessert. Why You’ll Love This Recipe 10-Minute Effortless Prep: No pastry cutters, no mixer, and zero dough rolling required—simply slice, layer, dump, and bake! Scratch-Baked Flavor with Fresh Apples: While many shortcuts use cloying canned apple pie filling, using real crisp Honeycrisp apples provides authentic tart-sweet freshness and tender bite. Crispy, Gooey Contrast: The bottom layer melts into thick, spiced caramel apple goodness while the top forms a crisp, crunchy pecan streusel crust. Skillet Showstopper: Baking in a classic cast-iron skillet creates rustic charm that goes straight from oven to dining table for effortless entertaining. Key Ingredients & Smart Swaps Fresh ingredients flat-lay: crisp Honeycrisp apple slices, yellow cake mix, thick salted caramel sauce, chopped pecans, and fresh butter. Fresh Baking Apples: Honeycrisp, Granny Smith, or Pink Lady apples hold their shape beautifully during baking without turning into mush. A blend of sweet Honeycrisp and tart Granny Smith offers the perfect balanced flavor profile. Thick Salted Caramel Sauce: Choose a premium jarred caramel sauce or homemade salted caramel. The touch of sea salt cuts through the sweetness and balances the richness. Yellow Cake Mix: A standard 15.25-ounce box of yellow cake mix creates that nostalgic, golden butter-cake topping. For an extra festive autumn touch, spice cake mix or French vanilla mix also work spectacularly. Chopped Pecans: Southern pecans add earthy nuttiness and indispensable crunch to contrast the tender apples. Walnuts or slivered almonds can be swapped if preferred. Real Unsalted Butter: Melting 1.5 sticks of butter and pouring it evenly over the dry cake mix hydrates the flour and creates rich, crackly golden crumb clusters. Warm Autumn Spices: Ground cinnamon, a whisper of freshly grated nutmeg, and pure vanilla extract tie the caramel and apples together seamlessly. Step-by-Step Cooking Walkthrough 1. Season the Apples: In a mixing bowl, toss your thinly sliced fresh apples with brown sugar, cinnamon, nutmeg, and vanilla extract until every slice is fragrant and well coated. Layer them evenly across the bottom of your buttered cast-iron skillet. 2. Caramel Infusion: Warm your salted caramel sauce slightly so it streams easily, then drizzle 3/4 cup generously across the spiced apples to create the luscious bubbling sauce base. Active baking action: slowly streaming melted golden butter evenly across the dry yellow cake mix and pecan layer before sliding into the oven. 3. Layer the Cake & Pecans: Dump the dry yellow cake mix directly over the apples, gently smoothing it with an offset spatula into an even blanket. Scatter the chopped pecans evenly over the top. 4. Butter Drizzle & Golden Bake: Slowly drizzle the melted butter evenly over the entire surface, ensuring minimal dry spots remain. Bake at 350°F (175°C) for 42 to 45 minutes until the topping is deeply golden, pecans are toasted, and caramel bubbles vigorously at the skillet edges. 3 Chef Secrets for Perfect Results 1. Slice Apples Thinly & Uniformly: Aim for 1/4-inch slices. Slicing too thick prevents the apples from softening fully in the 45-minute bake time; slicing too thin causes them to break down completely. Uniform quarter-inch wedges ensure a tender, luscious bite. 2. Distribute the Butter Methodically: The number one pitfall of dump cakes is dry, powdery flour patches. Use a glass measuring cup with a pour spout to slowly zigzag the melted butter across the surface. If you see any large dry islands, simply dab a thin pat of cold butter over that spot before baking. 3. Let the Caramel Settle for 10 Minutes: As tempting as it is to scoop immediately, letting the skillet rest on the counter for 10 minutes allows the bubbling molten caramel juices to thicken and cling perfectly to each warm spoonful. What to Serve With Caramel Apple Pecan Dump Cake Plated autumn perfection: warm caramel apple dump cake crowned with a melting scoop of vanilla bean ice cream and extra caramel drizzle. Vanilla Bean Ice Cream: The contrast of scorching hot spiced caramel cake against melting cold vanilla cream is quintessential comfort food perfection. Fresh Whipped Cream: A cloud of lightly sweetened cinnamon whipped cream or mascarpone cream provides an elegant, lighter finish. Autumn Beverage Pairings: Serve alongside warm mulled apple cider, fresh brewed French press dark roast coffee, or a cozy chai latte. Storage, Freezing & Reheating Instructions Refrigeration: Allow the dump cake to cool completely, then cover the skillet tightly with foil or transfer leftovers into an airtight glass container. Keeps beautifully in the refrigerator for up to 5 days. Reheating to Restore Crispness: Reheat individual portions in the microwave for 30 to 45 seconds for instant gooeyness. To restore the crackly crispy topping, warm in a 325°F oven or toaster oven for 10 to 12 minutes. Freezing: Bake the cake in a disposable aluminum foil pan, cool completely, wrap tightly with double layers of plastic wrap and heavy-duty foil, and freeze for up to 3 months. Thaw in the fridge overnight and bake at 350°F for 20 minutes until bubbling. Frequently Asked Questions Can I use canned apple pie filling instead of fresh apples?Yes! If you are
Cozy Creamy Chicken and Wild Rice Soup

When crisp autumn winds begin to blow and you crave the comforting warmth of a slow-simmered home-cooked meal, nothing satisfies quite like this Cozy Creamy Chicken and Wild Rice Soup. Featuring tender, succulent shredded chicken, earthy nutty wild rice grains, and sweet sliced carrots simmered in an herb-infused velvety cream broth, this restaurant-worthy comfort classic transforms humble pantry ingredients into liquid gold in under an hour. Unlike thin brothy soups that leave you hungry an hour later or overly heavy canned condensed versions, this scratch-made recipe strikes the flawless balance of rich creaminess and wholesome nutrition. A gentle roux built upon aromatic mirepoix thickens the chicken bone broth naturally, while nutty wild rice adds delightful chew and texture. Along with our reader-beloved Cozy Creamy White Bean and Spinach Soup and holiday favorite Garlic Herb Butter Roasted Whole Chicken, this soup represents the gold standard of wholesome cold-weather comfort. Why You’ll Love This Recipe Velvety Comfort Without Clumping: Our simple butter-and-flour roux technique creates an impossibly smooth, rich broth that never separates or feels heavy. Nutty, Chewy Texture: Long-grain wild rice retains its distinct bite even after simmering, giving every spoonful an irresistible rustic mouthfeel. High-Protein & Nutrient-Dense: Delivering 32 grams of lean protein and over 2,000 IU of vitamin A per bowl, it warms and nourishes the whole family. Leftover & Meal Prep Magic: The flavors meld and deepen overnight in the refrigerator, making next-day lunches even more decadent than dinner. Key Ingredients & Smart Swaps Fresh ingredients flat-lay: shredded cooked chicken, wild rice blend, diced carrots, celery, onion, herbs, butter, and rich chicken broth. Wild Rice Blend: Use a blend of cultivated wild rice and long-grain brown or white rice. 100% pure black wild rice can take up to 55 minutes to cook; a quality blend softens in just 30 to 35 minutes while maintaining a fantastic nutty chew. Shredded Chicken Breast: Leftover roasted chicken, poached chicken breasts, or shredded rotisserie chicken breast work seamlessly and shave 15 minutes off active cooking time. Mirepoix (Onion, Carrots & Celery): The aromatic holy trinity that establishes the deep savory foundation of traditional French and American soup making. Chicken Bone Broth: Opt for rich, low-sodium chicken bone broth for maximum gelatinous body and deep poultry flavor. Low-sodium vegetable broth can also be used. Fresh Thyme & Rosemary: Earthy woody herbs infuse the simmering broth with quintessential autumnal warmth. Dried herbs can be substituted at 1/3 the quantity. Heavy Cream or Half-and-Half: Just 1 cup stirred in at the very end imparts that luxurious coffee-cream color and silky mouthfeel without turning the soup greasy. Full-fat canned coconut milk provides an equally creamy dairy-free option. Step-by-Step Cooking Walkthrough 1. Sauté the Mirepoix: Melt butter and olive oil in a Dutch oven over medium heat. Sauté the diced onions, sliced carrots, and celery for 7 minutes until tender and fragrant. 2. Build the Roux: Add minced garlic, thyme, and rosemary. Sprinkle in the flour and stir continuously for 90 seconds to coat the vegetables and eliminate raw flour flavor. Active cooking action: stirring tender shredded chicken and dark wild rice grains into the simmering velvety soup on active heat. 3. Simmer Broth & Rice: Slowly whisk in the chicken bone broth until smooth. Add the wild rice blend and bay leaf. Cover and simmer gently on low for 30 to 35 minutes until the rice is tender. 4. Add Chicken & Cream: Discard the bay leaf. Fold in the shredded chicken, heavy cream, sea salt, and black pepper. Simmer uncovered for 5 minutes, garnish with fresh parsley, and serve warm! 3 Chef Secrets for Perfect Results 1. Whisk Broth Gradually into the Roux: Never dump all 6 cups of broth into the hot flour mixture at once! Pour in one cup first while whisking vigorously to create a smooth paste, then stream in the rest. This guarantees a zero-lump, restaurant-smooth consistency. 2. Keep the Heat at a Gentle Simmer: High heat will scorch the bottom of the Dutch oven as the starch from the wild rice releases. Maintain a gentle, lazy bubble on medium-low heat with the lid closed. 3. Add the Cream at the Very End: Boiling heavy cream over high heat for extended periods can cause it to break or curdle. Always stir the cream in during the final 5 minutes over gentle low heat. What to Serve With Creamy Chicken and Wild Rice Soup Plated autumn-style: steaming bowl of creamy chicken and wild rice soup served with warm crusty sourdough and fresh butter. Warm Artisan Breads: A thick slice of toasted sourdough boule, warm garlic focaccia, or homemade buttermilk biscuits are mandatory for dunking into the velvety broth. Crisp Autumn Salads: A refreshing green salad tossed with crisp apple slices, dried cranberries, goat cheese, and a light balsamic vinaigrette offers great acidic contrast. Beverage Pairings: Pair with hot spiced apple cider, iced unsweetened lemon tea, or sparkling mineral water with fresh lime. Storage, Freezing & Reheating Instructions Refrigeration: Cool the soup completely before sealing in airtight containers. Keep in the refrigerator for up to 4 days. Note: wild rice continues to absorb liquid as it sits, so the soup will thicken into a stew-like consistency. Reheating to Restore Silkiness: Warm on the stovetop over medium-low heat, stirring in a splash of chicken broth or milk to loosen the broth to your desired consistency. Freezing: If freezing, we recommend freezing the soup before adding the heavy cream (cream can separate slightly upon thawing). Freeze for up to 3 months, thaw overnight in the fridge, and stir in warm cream upon reheating. Frequently Asked Questions Can I make this soup in a Slow Cooker / Crockpot?Yes! Add mirepoix, garlic, raw chicken breasts, wild rice, herbs, and broth to your slow cooker. Cook on LOW for 6 to 7 hours. Shred the chicken, return to the pot, whisk 3 tablespoons of flour with the cream in a cup, stir into the soup, and cook on HIGH for 30 minutes until thickened. Can I use
Bakery-Style Pumpkin Cream Cheese Muffins
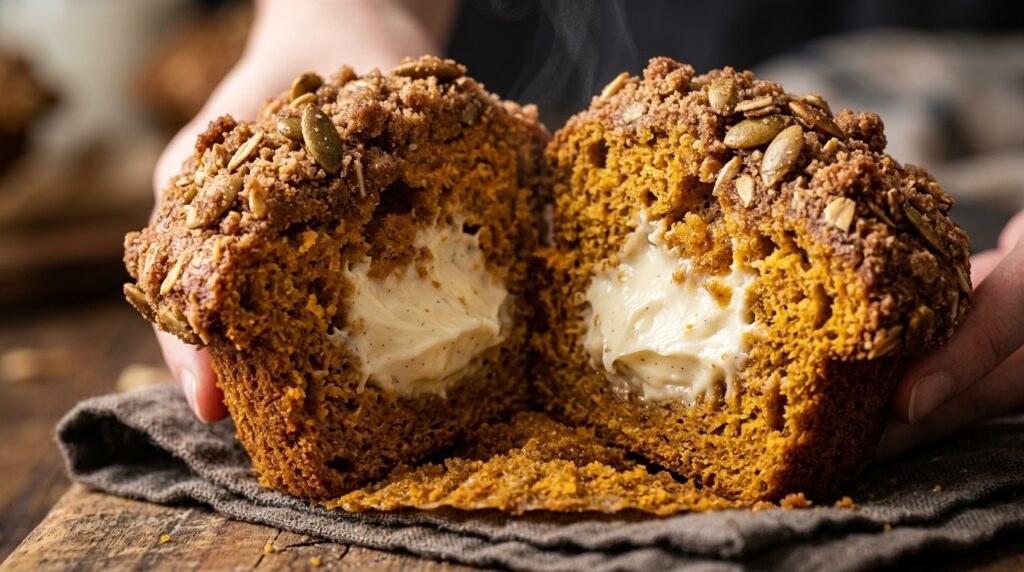
There is no morning ritual that captures the crisp warmth of autumn quite like biting into one of these towering Bakery-Style Pumpkin Cream Cheese Muffins. Featuring an impossibly moist pumpkin crumb richly spiced with cinnamon, ginger, and nutmeg, crowned with a crunchy brown sugar pepita streusel, and harboring a hidden molten center of sweet vanilla cream cheese, these bakery-worthy showstoppers turn everyday weekend breakfasts and holiday brunch tables into a gourmet autumn celebration. Too many homemade muffin recipes turn out flat, dense, or dry. This foolproof recipe achieves giant, coffee-shop-style domed crowns by utilizing our secret temperature-burst baking method: starting at a blazing 425°F before reducing heat to lock in maximum moisture. Along with our morning favorite Overnight Baked French Toast Casserole and cozy desserts like our Cinnamon Roll Apple Crisp, these muffins fill your entire home with the irresistible aromas of a boutique autumn bakery. Why You’ll Love This Recipe Explosive High-Domed Muffin Tops: The dual-temperature baking technique triggers rapid steam expansion, creating that dramatic, sky-high bakery silhouette. Luscious Sweet Cream Cheese Center: Every single muffin conceals a creamy, cheesecake-like vanilla pocket that stays velvety soft even after chilling. Triple-Texture Autumn Crunch: Tender spiced crumb, silky cream cheese filling, and a crunchy brown sugar streusel studded with toasted pepitas in every single bite. Effortless 35-Minute Timeline: Simple pantry ingredients come together in two bowls with zero complicated equipment required. Key Ingredients & Smart Swaps Fresh baking ingredients flat-lay: 100% pure pumpkin puree, brick cream cheese, dark brown sugar, warm baking spices, flour, butter, and pepitas. 100% Pure Canned Pumpkin: Ensure you buy pure canned pumpkin puree and not pre-spiced canned pumpkin pie filling, which contains unwanted added sugars and thickeners. Brick Cream Cheese: Full-fat block cream cheese is mandatory. Spreadable tub varieties contain excess water and emulsifiers that will cause the cheesecake center to dissolve into the batter. Pumpkin Pie Spice & Cinnamon: A rich blend of cinnamon, ginger, nutmeg, allspice, and cloves provides that signature cozy coffee-shop spice aroma. Dark Brown Sugar: Delivers essential moisture and rich caramel undertones to both the muffin crumb and the crunchy streusel topping. Oil vs. Melted Butter: While melted butter adds rich flavor, neutral oil (like avocado or vegetable oil) guarantees that the muffins remain incredibly moist for days without drying out. You can also use a 50/50 blend for the best of both worlds! Raw Pepitas (Pumpkin Seeds): Sprinkled over the streusel before baking, they toast into nutty, emerald jewels that signal true artisan craftsmanship. Step-by-Step Cooking Walkthrough 1. Whisk Wet & Dry Batters: In one bowl, whisk flour, baking soda, baking powder, spices, and salt. In a second large bowl, whisk pumpkin puree, sugars, oil, eggs, and vanilla until glossy. Gently fold the dry ingredients in just until incorporated. 2. Mix Cream Cheese & Streusel: Beat softened cream cheese, sugar, and vanilla until silky smooth. In a separate dish, cut cold butter into flour, brown sugar, cinnamon, and raw pepitas until crumbly. Active baking action: piping rich vanilla cream cheese filling directly into the spiced pumpkin batter and crowning with streusel. 3. Fill & Swirl: Fill lined muffin cups almost to the rim with pumpkin batter. Pipe a tablespoon of cream cheese filling directly into the heart of each muffin, then crown with generous pinches of pepita streusel. 4. High-Heat Rise & Bake: Bake at 425°F (220°C) for 5 minutes to trigger the dramatic bakery dome rise, then reduce heat to 350°F (175°C) for 15 to 17 minutes until cooked through. Cool slightly on a wire rack and enjoy warm! 3 Chef Secrets for Perfect Results 1. The 425°F Initial Heat Blast: Professional bakeries always start muffins at high heat. The intense initial temperature turns the liquids into steam rapidly, lifting the batter upward before the crust sets, creating that iconic sky-high crown. 2. Fill the Muffin Cups to the Top: Unlike cupcakes which should only be filled 2/3 full, bakery muffins require filling the cups 3/4 to nearly full. This gives the expanding batter enough volume to spill gracefully over the rim into gorgeous domed muffin tops. 3. Do Not Overmix the Flour: When folding dry flour into the wet pumpkin mixture, stop stirring the moment no dry flour streaks remain. Over-stirring activates gluten, which causes dense, rubbery muffins rather than a tender, pillowy crumb. What to Serve With Bakery-Style Pumpkin Muffins Plated morning-style: golden domed pumpkin cream cheese muffins served warm with a steaming cinnamon-dusted cafe latte. Morning Coffee & Tea: Pair with a rich espresso latte, pumpkin spice chai tea, or a steaming pour-over dark roast coffee. Brunch Spreads: Serve alongside scrambled farm eggs, crispy breakfast potatoes, and fresh sliced seasonal fruit for a complete weekend feast. Warm Butter & Honey: Split in half and slather with salted whipped butter or a light drizzle of raw clover honey. Storage, Freezing & Reheating Instructions Refrigeration: Because these muffins contain a real cream cheese center, store cooled muffins in an airtight container in the refrigerator for up to 5 days. Reheating to Fresh-Baked Warmth: Warm individual muffins in the microwave for 15 to 20 seconds, or pop them in a toaster oven at 300°F (150°C) for 5 minutes to restore the crispy crunch of the streusel topping. Freezing: Wrap completely cooled muffins individually in plastic wrap and store inside a freezer bag for up to 3 months. Thaw on the kitchen counter for 30 minutes before enjoying. Frequently Asked Questions Why did my cream cheese swirl sink to the bottom?If the cream cheese is too heavy or placed on an empty cup, it can sink. Always fill the muffin cups at least halfway with pumpkin batter first before piping the cream cheese into the center. Can I make mini muffins with this recipe?Yes! Use a 24-cup mini muffin tin. Bake at 400°F (200°C) for 3 minutes, then reduce to 350°F (175°C) for 10 to 12 minutes until done. Can I make these gluten-free?Yes, simply substitute the all-purpose flour with a high-quality 1:1 gluten-free baking flour blend containing xanthan
Creamy Butternut Squash Pasta: Cozy 30-Minute Fall Dinner

When brisk autumn evenings call for comforting bowls of pure indulgence, nothing satisfies the soul quite like this Creamy Butternut Squash Pasta. Featuring al dente penne noodles smothered in a velvety, golden-orange roasted squash and parmesan cream sauce infused with crisp fried sage and a whisper of nutmeg, this 30-minute weeknight dinner brings five-star Italian bistro luxury straight to your family dinner table. Unlike heavy cream-based sauces that leave you feeling weighed down, this vibrant recipe gets its luxurious body from naturally sweet, fiber-rich butternut squash simmered in fragrant aromatics until tender enough to blend into liquid gold. Similar to the rich textures in our Cozy Creamy White Bean and Spinach Soup and high-protein favorites like our Garlic Butter Steak Bites, this recipe celebrates simple, whole-food ingredients crafted with timeless culinary techniques. Why You’ll Love This Recipe 30-Minute One-Pan Sauce: The squash simmers and blends in minutes while your pasta boils, making this an effortlessly fast weeknight meal. Naturally Creamy & Nutrient-Packed: Packed with vitamin A, vitamin C, and fiber, achieving a rich, velvety texture with just a fraction of the cream used in traditional Alfredo. Pure Autumn Flavor Harmony: Earthy fresh sage, savory roasted garlic, sharp nutty parmesan, and warm freshly grated nutmeg create the ultimate cozy flavor profile. Family-Friendly & Versatile: Kids adore the naturally sweet, macaroni-and-cheese-like golden hue, while adults love the refined gourmet herbal finish. Key Ingredients & Smart Swaps Fresh ingredients flat-lay: cubed orange butternut squash, penne pasta, fresh sage, Parmigiano-Reggiano, heavy cream, broth, and garlic. Fresh Butternut Squash: Peel and cube a fresh squash, or grab pre-cut cubes from the produce section to shave 10 minutes off prep time. Frozen squash cubes also work seamlessly! Penne Rigate or Rigatoni: Tubular pastas with exterior ridges are ideal because the thick, velvety sauce clings to the outside while filling the hollow centers with every bite. Fresh Sage Leaves: Frying fresh sage in olive oil unlocks herbal aromatics that define classic autumn Italian cuisine. Dried sage does not yield the same delicate crispness. Parmigiano-Reggiano: Always grate aged parmesan fresh from the block. Pre-grated container cheeses contain anti-caking starches that prevent the sauce from achieving a mirror-smooth sheen. Vegetable Broth & Cream: Simmering the squash in savory broth builds deep flavor. A small splash of heavy cream rounds out the acidity; full-fat canned coconut milk provides an equally rich plant-based alternative. Freshly Grated Nutmeg: A tiny pinch of nutmeg is the classical secret weapon that complements winter squash and dairy sauces without tasting like dessert. Step-by-Step Cooking Walkthrough 1. Crisp the Fresh Sage: Sizzle whole sage leaves in hot olive oil for 90 seconds until translucent and brittle. Remove to a paper towel, preserving the herbaceous flavored oil in the skillet. 2. Simmer Squash to Fork-Tender: Sauté shallot and minced garlic in the infused oil for 2 minutes. Add cubed butternut squash and broth. Cover and simmer gently for 12 to 14 minutes until the squash collapses under a fork. Active cooking action: tossing al dente penne into the simmering golden-orange roasted squash cream sauce on active heat. 3. Blend to Velvet Perfection: Transfer cooked squash and broth to a high-speed blender. Add heavy cream, grated parmesan, nutmeg, and black pepper. Blend on high for 60 seconds until impossibly smooth and glossy. 4. Toss & Emulsify: Pour the golden sauce back into the skillet. Fold in boiled al dente penne pasta with a splash of reserved starchy cooking water. Toss for 2 minutes until each noodle is cloaked in glossy sauce. 3 Chef Secrets for Perfect Results 1. Don’t Skip the Starchy Pasta Water: Reserve at least one cup of salted cooking water before draining the noodles. The starch and salt act as a natural emulsifier, helping the squash puree cling tightly to the pasta instead of pooling at the bottom of the bowl. 2. Cut Squash Into Uniform Cubes: Cutting squash into even 1/2-inch pieces ensures uniform tenderness within 12 minutes. Irregular large pieces leave fibrous lumps that prevent a mirror-like velvet texture in the blender. 3. Fry Sage in Shimmering, Not Smoking Oil: Sage crisps quickly. Keep heat at medium to medium-low so the delicate leaves dehydrate into crispy herb chips without scorching or developing bitterness. What to Serve With Creamy Butternut Squash Pasta Plated bistro-style: creamy golden penne pasta garnished with crispy sage, shaved parmesan, and toasted pepitas alongside warm crusty bread. Artisan Breads: Serve alongside warm crusty sourdough or homemade garlic herb focaccia to swipe up every drop of velvety squash sauce. Crisp Seasonal Salads: A peppery arugula salad tossed with shaved honeycrisp apples, candied pecans, and a light lemon-shallot vinaigrette cuts through the creamy richness beautifully. Beverage Pairings: Pair with chilled sparkling apple cider, iced botanical teas with lemon, or sparkling mineral water infused with rosemary sprigs. Storage, Freezing & Reheating Instructions Refrigeration: Store leftover pasta in an airtight glass container in the refrigerator for up to 4 days. The sauce thickens as it cools. Reheating on Stovetop: Warm gently in a skillet over medium-low heat with a splash of milk, broth, or water. Stir frequently for 3 to 4 minutes until the sauce loosens into its original silky consistency. Freezing the Sauce: The blended butternut squash sauce freezes phenomenally well on its own for up to 3 months. Thaw overnight in the fridge and toss with freshly boiled pasta for an instant 10-minute dinner! Frequently Asked Questions Can I make this dairy-free or vegan?Yes, easily! Swap the heavy cream for full-fat canned coconut milk or cashew cream, use vegetable broth, and replace the parmesan with 3 tablespoons of nutritional yeast or dairy-free parmesan. Can I roast the squash instead of simmering it?Absolutely. If you have extra time, roast squash cubes on a baking sheet at 400°F (200°C) for 25 minutes for deeper caramelized notes, then blend with warm broth and cream. What proteins pair well with butternut squash pasta?Sautéed spicy Italian chicken sausage, pan-seared garlic shrimp, or crispy grilled chicken breast make fantastic high-protein additions to this dish. Pin This Recipe
Cinnamon Roll Apple Crisp: Easy 30-Minute Fall Dessert

When the autumn breeze kicks up and the craving for fresh-baked bakery warmth strikes, nothing captures the cozy magic of the season quite like this viral Cinnamon Roll Apple Crisp. Combining pillowy bites of buttery cinnamon rolls, bubbling brown sugar spiced apples, and a thick, crunchy golden oat streusel, this dessert bridges the best of warm bakery rolls and classic apple cobbler in one effortless 30-minute bake. Traditional homemade apple crisps can sometimes lack texture contrast, while homemade cinnamon rolls demand hours of yeast proofing and rolling. This genius mash-up solves both dilemmas. By cutting refrigerated cinnamon roll dough into bite-sized nuggets that puff directly beneath tender Honeycrisp apples, you get soft, doughy cinnamon swirls soaked in bubbling caramel cider juices, balanced by an irresistible brown sugar oat crunch on top. Why You’ll Love This Recipe The Ultimate Fall Mash-Up: Fluffy cinnamon rolls meet brown butter spiced apples and crunchy oat streusel in every single forkful. Effortless 15-Minute Prep: No yeast proofing, no pie crust rolling, and zero culinary stress—simple pantry staples deliver bakery-quality luxury. Dual-Purpose Perfection: Rich enough to serve as a show-stopping holiday dessert with ice cream, yet cozy enough for Thanksgiving morning brunch. Irresistible Texture Trio: Fluffy, tender-baked cinnamon roll pockets underneath, tender caramel apples in the middle, and shatteringly crisp buttery oats on top. Key Ingredients & Smart Swaps Fresh Honeycrisp apples, cinnamon roll dough, rolled oats, sweet spices, and pure creamery butter. Refrigerated Cinnamon Rolls: Jumbo cinnamon roll dough (like Pillsbury Grands) works best. The individual swirls expand in the oven, creating tender dough pockets that absorb bubbling spiced apple juice. The Apple Duo (Honeycrisp + Granny Smith): Combining sweet-crisp Honeycrisp with tart Granny Smith creates the ultimate flavor balance and prevents the dessert from becoming overly sweet. They hold their shape beautifully during baking without turning mushy. Rolled Old-Fashioned Oats: Whole rolled oats are crucial for that signature rustic crisp texture. Avoid quick-cooking oats, which absorb butter too quickly and turn soggy. Light Brown Sugar & Cinnamon: Provides that deep caramel-molasses autumn spice foundation. Dark brown sugar can be used for an even more intense toffee undertone. Cornstarch: Just one tablespoon tossed with the fresh apples mingles with their natural juices as they cook, turning thin liquid into a luscious, glossy caramel glaze. Vanilla Cream Cheese Icing: Use the icing packet included in the cinnamon roll can, warmed with a splash of cream or milk, to drizzle generously across the golden crust right before digging in. Step-by-Step Cooking Walkthrough 1. Prepare the Baking Dish & Dough: Preheat your oven to 375°F (190°C). Generously grease a 9×13-inch baking dish with butter. Pop open the cinnamon roll can, set the icing aside, and cut each roll into 6 bite-sized pieces. Scatter the pieces evenly across the bottom of the dish. 2. Toss the Spiced Caramel Apples: Peel, core, and slice your apples into 1/4-inch slices. In a large bowl, toss the apples with brown sugar, cornstarch, ground cinnamon, nutmeg, vanilla extract, and lemon juice. Layer the glistening spiced apples over and around the cinnamon roll pieces. Evenly scattering the buttery brown sugar oat streusel over the spiced apple and cinnamon roll base. 3. Build the Crunchy Oat Streusel: In a separate bowl, whisk together rolled oats, flour, brown sugar, cinnamon, and a pinch of salt. Pour in melted unsalted butter and toss with a fork until crumbly clusters form. Scatter the streusel evenly over the apple layer. 4. Bake, Drizzle & Serve: Bake uncovered at 375°F (190°C) for 32 to 36 minutes until the cinnamon roll base is cooked through and golden, the apples are bubbling, and the oat topping is deeply crunchy. Rest 5 minutes, drizzle with the warm cream cheese icing, and serve warm with cold vanilla ice cream. 3 Baker Secrets for the Best Apple Crisp 1. Slice Apples to Uniform Thickness: Keep your apple slices at a consistent 1/4-inch thickness. If cut too thin, they dissolve into applesauce; if cut too thick, the cinnamon roll dough will finish baking before the apples have fully softened. 2. Melted Butter for Streusel Clusters: While traditional pie crusts demand ice-cold butter, crisp toppings achieve the crunchiest golden texture when made with warm melted butter tossed with oats and flour to form distinct pebbles that toast in the oven. 3. Rest Before Glazing: Let the dish sit for 5 minutes after pulling it from the oven before drizzling the cream cheese glaze. If drizzled immediately onto the sizzling streusel, the icing will liquefy and run to the bottom rather than settling into decadent ribbons across the surface. What to Serve With Cinnamon Roll Apple Crisp Served warm in a handcrafted ceramic bowl crowned with melting vanilla bean ice cream and caramel. Melting Ice Cream & Sauces: A giant scoop of rich vanilla bean ice cream, salted caramel drizzle, or a dollop of fresh cinnamon whipped cream is non-negotiable! Southern Holiday Feasts: Follow a hearty dinner featuring our Loaded Sweet Potato Casserole with Pecan Streusel with this comforting dessert. Cozy Fruit Bakes: If your family loves comforting baked fruit desserts, try our viral Canned Peach Cobbler as well. Warm Autumn Drinks: Pairs heavenly with fresh hot spiced apple cider, a steaming chai latte, or dark roast French press coffee. Make-Ahead, Storage & Reheating Instructions Make-Ahead (Holiday Brunch Hack): Slice the apples and toss with spices up to 24 hours ahead (refrigerated in an airtight container). Assemble the cinnamon roll dough and streusel right before baking for the freshest puff. Refrigeration: Cover leftovers tightly with foil or store in an airtight container in the refrigerator for up to 4 days. Reheating to Restore Crunch: To bring back the crisp streusel texture, reheat portions in an oven or toaster oven at 350°F (175°C) for 8 to 10 minutes. Avoid prolonged microwaving, which softens the crunchy oat crust. Frequently Asked Questions Can I use homemade cinnamon roll dough instead of canned?Yes! If you have unbaked homemade cinnamon roll dough, simply proof the rolls, cut them into pieces, and proceed
Cozy Creamy White Bean and Spinach Soup: 30-Minute Comfort
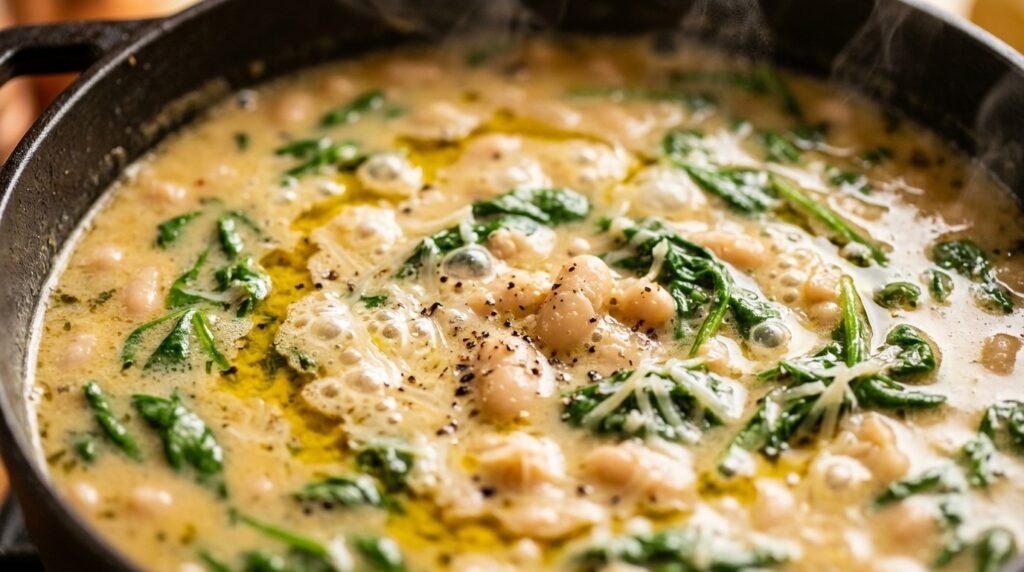
As autumn air settles in and evenings demand wholesome comfort, this Cozy Creamy White Bean and Spinach Soup is the kind of nourishing, soul-soothing dinner you will find yourself craving on repeat. Tender cannellini beans, sweet carrots, and tender ribbons of baby spinach simmer together in an aromatic garlic-rosemary broth that turns naturally velvety without needing a drop of heavy cream—delivering pure rustic Italian comfort in just 30 minutes. What makes this Tuscan-style soup so extraordinary is its effortless technique. Rather than relying on heavy cream, roux, or heavy dairy, the soup achieves its velvety body by puréeing a portion of the tender cannellini beans directly in the pot. The naturally released starches emulsify with golden olive oil, simmered aromatics, and savory broth to create a rich, silky texture that feels decadent while remaining wonderfully wholesome, fiber-dense, and light. Why You’ll Love This Recipe Effortless 30-Minute One-Pot Meal: Simple pantry staples transform into an artisanal bistro-quality soup with minimal cleanup. Naturally Creamy Without Heavy Cream: Blending a portion of the white beans creates a lush, velvety mouthfeel that is healthy and light on digestion. Plant-Powered Nutrition: Packed with 15 grams of clean protein and 9 grams of dietary fiber per bowl, keeping you satisfied for hours. Budget-Friendly Pantry Winner: Canned beans and everyday root aromatics make this one of the most cost-effective gourmet meals you can cook. Key Ingredients & Smart Swaps Pantry cannellini beans, fresh aromatics, garden herbs, and savory parmesan broth essentials. Cannellini Beans: These classic Italian white kidney beans have a delicate, creamy texture and thin skins that break down beautifully when partially blended. Great Northern or navy beans can be used as a seamless substitute. Mirepoix Base (Onion, Carrots, Celery): Slowly softened in olive oil, this classic aromatic trifecta builds the foundational sweetness that anchors the broth. Fresh Garlic & Herbs: Five cloves of fresh minced garlic bloomed alongside fresh rosemary and thyme infuse every spoonful with rustic Mediterranean perfume. Dried herbs can work in a pinch (use 1 tsp dried rosemary and 1/2 tsp dried thyme). Parmesan Cheese & Rind: Dropping a leftover Parmigiano-Reggiano rind into the simmering broth melts rich savory depth into the liquid. Finished with freshly grated parmesan at the end for savory creaminess. Fresh Baby Spinach: Stirred in during the final minutes to gently wilt without turning soggy, adding bright color, iron, and fresh garden balance. Lacinato (dino) kale also works wonderfully. Fresh Lemon Juice: Just a single tablespoon stirred in right before ladling lifts the earthy beans and brings the whole bowl to life. Step-by-Step Cooking Walkthrough 1. Sauté the Mirepoix Aromatics: Melt olive oil and butter in a heavy-bottomed Dutch oven over medium heat. Toss in the diced onion, carrots, and celery. Cook gently for 6 to 7 minutes, stirring occasionally, until the vegetables are tender and fragrant. 2. Bloom Garlic and Fresh Herbs: Add the minced garlic, chopped fresh rosemary, thyme, red pepper flakes, sea salt, and black pepper. Sauté for 60 seconds until vibrant and aromatic, keeping the heat steady so the garlic does not brown. Partially blending the cannellini beans with an immersion blender to yield a luxurious velvet broth. 3. Simmer Beans & Broth: Pour in the drained cannellini beans, vegetable broth, and nestle the parmesan rind into the pot. Bring to a gentle boil, then turn the heat to medium-low and simmer uncovered for 10 minutes to allow the flavors to marry. 4. Blend & Finish with Greens: Remove the parmesan rind. Insert an immersion blender and pulse 4 to 5 times to purée roughly half the beans into a creamy broth while keeping the rest whole. Turn heat to low, fold in the baby spinach, grated parmesan, and lemon juice. Simmer for 2 minutes until spinach is wilted. Taste and adjust salt and pepper. 3 Chef Secrets for Restaurant-Quality Results 1. The Half-Purée Technique: Never purée the entire pot of soup, as it turns into a dense paste. Blending only one-third to half of the beans leaves tender whole beans and textured vegetables suspended in a velvety broth, giving you the best of both worlds. 2. Save Your Parmesan Rinds: Whenever you finish a block of authentic Parmigiano-Reggiano, stash the hard rind in a freezer bag. Dropping it into simmering soups releases pure natural glutamates and savory umami that broth alone cannot replicate. 3. The Final Finishing Drizzle: Right before serving, drizzle each warm bowl with high-quality, peppery extra virgin olive oil and a shower of freshly cracked black pepper. The residual heat warms the raw olive oil, releasing intoxicating grassy aromatics. What to Serve With Creamy White Bean Soup Served bistro-style with toasted artisan sourdough bread, golden olive oil, and fresh herbs. Crusty Artisan Bread: Nothing pairs better with a velvety soup than thick slices of toasted sourdough, garlic focaccia, or warm herb ciabatta rubbed with raw garlic. Hearty Autumn Pastas: If you are planning a complete Italian comfort feast, follow this starter with our quick Garlic Butter Pasta or cozy Creamy Garlic Chicken Tortellini Soup. Crisp Bistro Salads: A peppery arugula salad tossed with shaved fennel, toasted pine nuts, and lemon vinaigrette provides refreshing contrast. Roasted Sides: Pair alongside roasted garlic mushrooms or roasted root vegetables for a satisfying, wholesome autumn dinner. Storage, Freezing & Reheating Instructions Refrigeration: Allow leftover soup to cool completely, then transfer to an airtight glass container. Keeps beautifully in the refrigerator for up to 5 days. Flavors deepen and taste even better on day two! Gentle Reheating: Reheat over medium-low heat on the stovetop until simmering hot. Because the starch in the beans continues to absorb liquid, stir in a splash of warm broth or water to restore its silky consistency. Freezing: This soup freezes exceptionally well because it contains no heavy cream. Freeze in airtight freezer-safe containers or silicone soup blocks for up to 3 months. Thaw overnight in the fridge and warm gently on the stove. Frequently Asked Questions Can I make this soup completely vegan or dairy-free?Yes! Simply swap the unsalted butter
Loaded Sweet Potato Casserole with Pecan Streusel
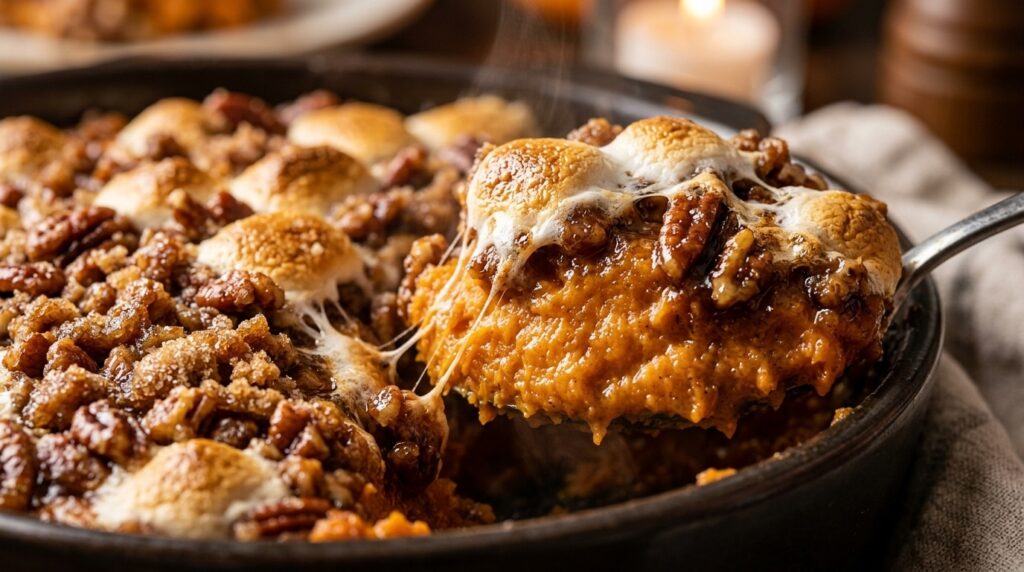
When it comes to holiday feast tables and comforting autumn gatherings, no side dish commands attention quite like a golden Loaded Sweet Potato Casserole. With an ultra-velvety, brown-butter spiced sweet potato purée tucked beneath a thick, crunchy candied pecan streusel and lightly toasted golden marshmallows, this recipe delivers that irresistible contrast of creamy warmth and buttery crunch that disappears before anything else on the table. Unlike traditional holiday casseroles that can taste cloyingly sweet like pie filling, this foolproof recipe strikes the ultimate culinary balance. By infusing the roasted sweet potatoes with melted butter, rich pure vanilla, warm cinnamon, and a delicate pinch of sea salt, the natural earthy sweetness of the potatoes shines through. Paired with our brown sugar pecan crunch topping, every spoonful delivers the ultimate Southern comfort without feeling heavy. Why You’ll Love This Recipe The Ultimate Texture Duo: Silky smooth, cloud-like sweet potato base meets an addictive, buttery candied pecan crumble. Make-Ahead Friendly: Assemble the entire casserole up to 48 hours in advance, refrigerate, and bake fresh on Thanksgiving or feast day. Crowd-Pleasing Dual Topping: Solves the age-old holiday debate by uniting crunchy pecan lovers and toasted marshmallow fans in one baking dish. 100% Halal & Natural: Pure wholesome ingredients, free of synthetic flavorings, gelatins, or additives. Key Ingredients & Smart Swaps Wholesome sweet potatoes, Georgia pecans, brown sugar, spices, and farm-fresh pantry staples. Fresh Sweet Potatoes: Beauregard or Jewel varieties work best for their deep orange hue, creamy texture, and natural moisture. Roasting them in their skins concentrates natural sugars far better than boiling. Chopped Georgia Pecans: The foundation of our crunch topping. Toasting in butter alongside brown sugar creates a candied praline shell that keeps crisp under heat. Light Brown Sugar: Adds caramel molasses warmth without overpowering the sweet potatoes. Can be swapped with coconut sugar or dark brown sugar for a deeper molasses profile. Heavy Cream & Melted Butter: Imparts luxurious silkiness and prevents the baked purée from drying out. Whole milk or evaporated milk makes a lighter substitute. Large Eggs: The secret custard binder that gives the soufflé-like lift, ensuring the casserole scoops cleanly rather than turning runny. Warm Spices & Sea Salt: Ground cinnamon, a whisper of fresh nutmeg, and fine salt are essential to cut through sweetness and elevate the autumn aromatics. Step-by-Step Cooking Walkthrough 1. Roast and Peel the Potatoes: Preheat your oven to 375°F (190°C). Pierce clean sweet potatoes several times with a fork and roast on a foil-lined baking sheet for 45 to 55 minutes until completely tender when pierced with a knife. Let cool until comfortable to handle, then slide the skins off effortlessly. 2. Whip the Custard Base: Lower oven temperature to 350°F (175°C). In a large bowl, mash sweet potatoes until smooth. Beat in melted butter, brown sugar, heavy cream, beaten eggs, pure vanilla extract, ground cinnamon, nutmeg, and sea salt until light and velvety. Smooth evenly into a greased 9×13-inch ceramic baking dish. Evenly spreading the crunchy candied pecan streusel and fluffy marshmallows before baking. 3. Mix the Pecan Streusel: In a separate bowl, toss together chopped pecans, brown sugar, all-purpose flour, and cinnamon. Drizzle in melted butter and toss with a fork until crumbly, fragrant clusters form. 4. Bake to Golden Perfection: Scatter the pecan crumble evenly across the top. Bake uncovered at 350°F (175°C) for 25 minutes. If using mini marshmallows, sprinkle them over the top during the last 8 to 10 minutes of baking until puffed and golden brown. Let rest 10 minutes before serving to allow the casserole to set. 3 Chef Secrets for the Best Sweet Potato Casserole 1. Roast, Don’t Boil: Boiling sweet potatoes waterlogs the flesh, diluting natural sugars and leaving you with a wet, watery casserole. Oven-roasting caramelizes the exterior skins and concentrates rich sweetness. 2. Room Temperature Dairy & Beaten Eggs: Adding cold milk or cold eggs directly to warm sweet potatoes can cause curdling or seize the butter. Bring dairy and eggs to room temperature so they incorporate seamlessly into a glossy emulsion. 3. Time Your Marshmallows Wisely: Marshmallows burn quickly under sustained oven heat. If you love marshmallows with your pecan streusel, only add them during the final 8 to 10 minutes of baking so they turn toasted and gooey rather than charred. What to Serve With Loaded Sweet Potato Casserole A gorgeous slice showing the creamy whipped layer beneath caramelized crunchy pecans. Holiday Centerpieces: Pairs magnificently with roasted whole herb chicken, glazed roast turkey, or braised beef brisket. Savory Potato Sides: Balance this slightly sweet casserole with savory garlic sides like our crunchy Crispy Hasselback Potatoes or juicy seared Garlic Butter Steak Bites with Crispy Potatoes. Green Vegetables: Crisp roasted garlic green beans, shaved Brussels sprouts salad, or roasted asparagus to balance the richness. Artisan Breads: Freshly baked warm cloverleaf yeast rolls or buttery herb cornbread with whipped honey butter. Make-Ahead, Storage & Reheating Instructions Make-Ahead (Best Holiday Hack): Prepare the sweet potato mixture and spread into your baking dish. Mix the pecan streusel separately and store in an airtight container at room temperature. Cover the baking dish tightly with foil and refrigerate up to 48 hours. When ready, top with the pecan streusel and bake (add 5 to 10 extra minutes if baking directly from cold). Refrigeration: Keep baked leftovers covered in an airtight container in the fridge for up to 4 to 5 days. Gentle Reheating: Reheat in a 325°F (165°C) oven covered with foil for 15 minutes, then uncover for 5 minutes to restore the crispy pecan crunch. Individual portions can be warmed in the microwave for 60 to 90 seconds. Freezing: Freeze unbaked casserole base (without toppings) tightly wrapped in foil for up to 2 months. Thaw overnight in the refrigerator, add fresh pecan topping, and bake as directed. Frequently Asked Questions Can I use canned sweet potato purée instead of fresh?Yes, in a pinch you can substitute three 15-ounce cans of pure sweet potato purée (not sweet potato syrup yam cans). Drain thoroughly before mixing.