
Cinnamon Sugar Apple Cider Donut Cake: Cozy Fall Bundt
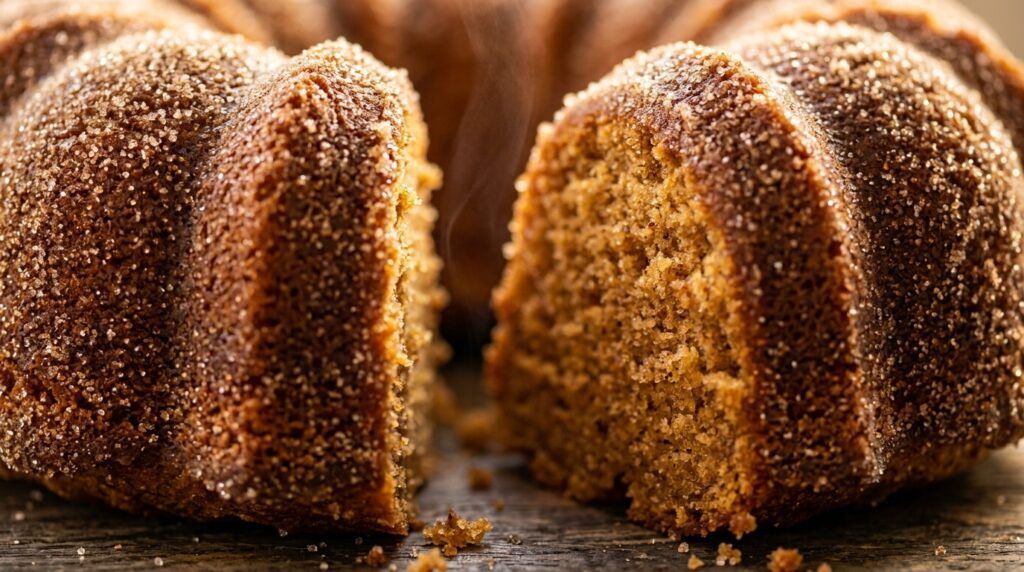
If you have ever stood in line on a brisk autumn morning at a local orchard waiting for hot, fresh cider donuts rolling straight from the fryer into bowls of fragrant cinnamon sugar, this recipe was made for your kitchen. This show-stopping apple cider donut cake captures all that beloved orchard magic inside an ultra-moist, buttery bundt cake, crowned with a crackly, sparkling cinnamon-sugar crust that crunches delightfully with every bite. The secret to achieving authentic bakery-quality apple cider flavor without watering down your cake batter is simple: we simmer pure unfiltered apple cider on the stovetop until it reduces down to a rich, concentrated amber syrup. Paired with tangy buttermilk, freshly grated nutmeg, ground Ceylon cinnamon, and rich European butter, the resulting crumb is impossibly tender, velvety, and fragrant enough to fill your entire home with cozy autumn aromas. Why You’ll Love This Recipe All the Donut Flavor, Zero Frying: Enjoy the iconic taste, tender texture, and spiced sugar crunch of an apple cider donut without heating a vat of messy frying oil. Intense Concentrated Apple Flavor: Reducing the cider on the stovetop concentrates the natural apple sweetness and bright acidity so the flavor shines through bold and clear. Stay-Moist Crumb for Days: Thanks to the combination of brown sugar, butter, and buttermilk, this bundt cake stays exceptionally soft, tender, and moist for up to five days. Show-Stopping Centerpiece: Baked in a fluted bundt pan and generously coated in sparkling cinnamon sugar, it serves as a stunning dessert for autumn gatherings, Thanksgiving brunch, or cozy weekend coffee. Key Ingredients & Smart Swaps Pure apple cider, unbleached flour, autumn spices, farm eggs, butter, and cinnamon sugar. 100% Pure Unfiltered Apple Cider: Opt for cloudy, raw orchard cider rather than clear apple juice. Simmering it down from 1 1/2 cups to 1/2 cup is essential for robust, authentic flavor. Buttermilk: Delivers essential acidity that tenderizes the gluten strands and activates the baking soda, creating a velvety, melt-in-your-mouth crumb. Full-fat sour cream or Greek yogurt is an excellent 1:1 swap. Autumn Spice Trio: A fragrant blend of ground Ceylon cinnamon, freshly grated whole nutmeg, and a pinch of allspice replicates the distinct orchard donut spice blend. Unsalted European Butter: Higher butterfat content ensures supreme moisture and a rich, golden flavor profile in both the batter and the outer glaze. Cinnamon-Sugar Crust: A generous mixture of granulated sugar and fragrant cinnamon adheres to the warm, buttered cake ridges, forming that signature crackly donut exterior. Step-by-Step Cooking Walkthrough 1. Reduce the Apple Cider: Pour 1 1/2 cups of unfiltered apple cider into a small saucepan over medium heat. Simmer gently for 15 to 20 minutes until the liquid reduces by two-thirds to exactly 1/2 cup of deep amber syrup. Pour into a heat-safe cup and let cool completely. 2. Whisk Dry Ingredients & Cream Butter: In a medium bowl, whisk together the flour, cinnamon, nutmeg, allspice, baking powder, baking soda, and fine sea salt. In your stand mixer, cream the softened butter with granulated sugar and brown sugar on medium-high speed for 3 to 4 minutes until pale, fluffy, and light. Brushing the warm fluted bundt cake with melted butter and coating in sparkling cinnamon sugar. 3. Mix Batter & Bake: Add the eggs one at a time, followed by vanilla. Whisk the cooled cider reduction into the buttermilk. Alternate adding the dry ingredients and cider mixture into the butter, mixing on low speed just until combined. Spoon into a thoroughly greased bundt pan and bake at 350°F (175°C) for 42 to 48 minutes until a wooden skewer comes out clean. 4. Invert & Apply Cinnamon-Sugar Crust: Cool in the pan for 10 minutes, then invert onto a wire rack. While the cake is still warm to the touch, generously brush the entire exterior with melted butter using a pastry brush. Immediately spoon and pat the cinnamon sugar all over the fluted ridges until completely encrusted like a fresh warm donut. 3 Chef Secrets for Perfect Results 1. Never Skip the Cider Reduction: Adding straight apple cider without reducing it introduces too much excess moisture into the batter while leaving the apple flavor faint and undetectable. Reducing concentrates the natural malic acids and sugars into a vibrant syrup that makes the cake truly taste like autumn. 2. Grease Every Fluted Ridge Thoroughly: Bundt cakes can be notorious for sticking if pans are not properly prepped. Use a quality baking spray that contains flour (such as Baker’s Joy), or brush the pan with melted shortening and dust lightly with flour or cinnamon sugar before adding the batter. 3. Coat While the Cake is Still Warm: Brushing the cake with melted butter while it is still warm allows the butter to soak into the outer crust, creating the perfect tacky surface for the cinnamon sugar to adhere securely without falling off when sliced. What to Serve With Apple Cider Donut Cake Served bakery-style with a mug of hot spiced apple cider and whipped cream. Warm Beverages: Pair a warm slice with a steaming mug of hot spiced apple cider, a creamy vanilla oat milk latte, or freshly brewed French press dark roast coffee. Sauces & Toppings: Drizzle each slice with warm salted caramel sauce, apple butter, or a generous dollop of freshly whipped cinnamon cream. Vanilla Bean Ice Cream: Serve warm slices à la mode with a scoop of premium vanilla bean ice cream for an irresistible hot-and-cold dessert experience. Storage, Freezing & Reheating Instructions Room Temperature Storage: Store the cooled cake under a cake dome or in an airtight container at room temperature for up to 4 to 5 days. The crumb actually becomes even more moist on day two as the spices meld. Reheating for That Fresh-Donut Warmth: For that just-out-of-the-fryer donut experience, pop an individual slice into the microwave for 12 to 15 seconds or into a 300°F toaster oven for 3 minutes before enjoying. Freezing Guidelines: You can freeze the entire baked cake (before applying the butter and cinnamon sugar coating)
Imagine a vibrant bowl of couscous salad with feta and fresh veggies, bursting with colors and flavors that dance on your palate. Each forkful delivers a delightful crunch from crisp cucumbers and peppers, complemented by the creamy tang of feta that elevates this dish to a refreshing light meal or side that beckons you to savor every bite. I vividly recall summer picnics where this couscous salad was the star, bringing everyone together as we laughed and shared stories under the sun. With its bright hues and zesty flavor, it’s perfect for gatherings or a simple lunch at home, promising an experience that’s not just delicious but also unforgettable. Why Is Couscous Salad with Feta and Fresh Veggies So Irresistibly Good? Bursting with flavor, this salad combines fresh veggies like crisp cucumber and sweet cherry tomatoes for a vibrant dish. Quick to prepare, you can whip it up in just 25 minutes! Versatile and satisfying, it works beautifully as a light meal or side. Plus, the tangy feta adds a delightful finish that everyone will love! Couscous Salad with Feta and Fresh Veggies Ingredients For the Couscous Base 1 cup couscous (uncooked) – This fluffy grain serves as the perfect base, soaking up all the delicious flavors of the salad. 1 cup vegetable broth (or water) – Using vegetable broth adds depth to the couscous, but water works just fine for a lighter taste. For the Vegetables 1 cup cucumber (diced) – Fresh and crunchy, cucumbers add a refreshing bite to your salad. 1 cup cherry tomatoes (halved) – Juicy cherry tomatoes provide vibrant color and a sweet burst of flavor in every bite. 1 cup bell pepper (diced) – Choose your favorite bell pepper for sweetness and a delightful crunch that complements the other veggies. 1/2 cup red onion (finely chopped) – Red onion brings a mild sharpness that enhances the overall flavor profile of the salad. 1/2 cup parsley (chopped) – Fresh parsley not only adds a pop of green but also brightens up the dish with its herbaceous notes. For the Dressing 1/4 cup olive oil – Extra virgin olive oil provides richness and helps bring all ingredients together beautifully. 2 tablespoons lemon juice (freshly squeezed) – The acidity from fresh lemon juice balances the creaminess of the feta and uplifts the flavors. 1 teaspoon salt (to taste) – Adjust salt to enhance all flavors; it’s key for making your Couscous Salad with Feta and Fresh Veggies shine. 1/2 teaspoon black pepper (to taste) – A hint of black pepper adds warmth without overpowering the fresh tastes in this vibrant dish. For the Toppings 1 cup feta cheese (crumbled) – Tangy feta cheese not only adds creaminess but also contrasts beautifully with the crisp veggies for a delightful finish. How to Make Couscous Salad with Feta and Fresh Veggies 1. Boil Broth: In a pot, bring 1 cup of vegetable broth to a boil. Stir in 1 cup of uncooked couscous, cover, and remove from heat. Let it sit for 5 minutes, then fluff with a fork for a light, airy texture. 2. Chop Veggies: While the couscous is resting, chop 1 cup of cucumber, halve 1 cup of cherry tomatoes, dice 1 cup of bell pepper, finely chop 1/2 cup of red onion, and chop 1/2 cup of parsley. Enjoy the vibrant colors as you prepare! 3. Whisk Dressing: In a small bowl, whisk together 1/4 cup of olive oil, 2 tablespoons of freshly squeezed lemon juice, 1 teaspoon of salt, and 1/2 teaspoon of black pepper. This zesty dressing will enhance all the flavors beautifully. 4. Combine Ingredients: In a large mixing bowl, combine the fluffed couscous, chopped vegetables, and the zesty dressing. Toss gently to combine everything into a colorful medley that’s both refreshing and satisfying. 5. Top with Feta: Finally, top your salad with 1 cup of crumbled feta cheese. Serve immediately for a delightful meal or chill in the refrigerator for 30 minutes to let the flavors meld even more. Optional: Garnish with extra parsley for a fresh touch! Exact quantities are listed in the recipe card below. Expert Tips Perfect Broth Ratio: Use vegetable broth instead of water for a richer flavor. It enhances the overall taste of your Couscous Salad with Feta and Fresh Veggies. Fresh Ingredients: Opt for fresh, in-season vegetables like cucumbers and tomatoes. They bring vibrant colors and flavors, making your salad even more appealing. Chop Uniformly: Dice your vegetables into similar sizes to ensure even distribution throughout the salad. This avoids overwhelming bites and enhances presentation. Cooling Couscous: Let the couscous cool completely before mixing with veggies to prevent them from wilting. A chilled salad is refreshing and appetizing! Feta Cheese Tip: Crumble feta cheese just before serving to maintain its texture. This ensures it stays flavorful and doesn’t become too soggy in the salad. Dressing Balance: Adjust lemon juice according to your taste preference; some enjoy a tangier dressing. Taste as you go to find your perfect balance! How to Store and Freeze Couscous Salad with Feta and Fresh Veggies Fridge: Store your Couscous Salad with Feta and Fresh Veggies in an airtight container for up to 3 days to maintain freshness and flavor. Freezer: While not recommended for freezing due to the texture of fresh veggies, you can freeze the couscous base without dressing for up to 1 month. Reheating: If you choose to freeze the couscous base, thaw it in the fridge overnight before mixing it with fresh veggies and dressing for a delightful meal. Ingredients Inspection: Always check fresh ingredients like feta cheese and herbs before storage; they should be consumed sooner, ideally within a week. Make Couscous Salad with Feta and Fresh Veggies Your Own Feel free to add your personal touch to this vibrant dish for a delightful twist! Quinoa Base: Swap couscous for quinoa for a protein-packed, gluten-free alternative that brings a nutty flavor. This change adds a lovely texture and enhances the nutritional profile. Plus, quinoa cooks
Refreshing Fruit Infused Water Recipe for Ultimate Hydration
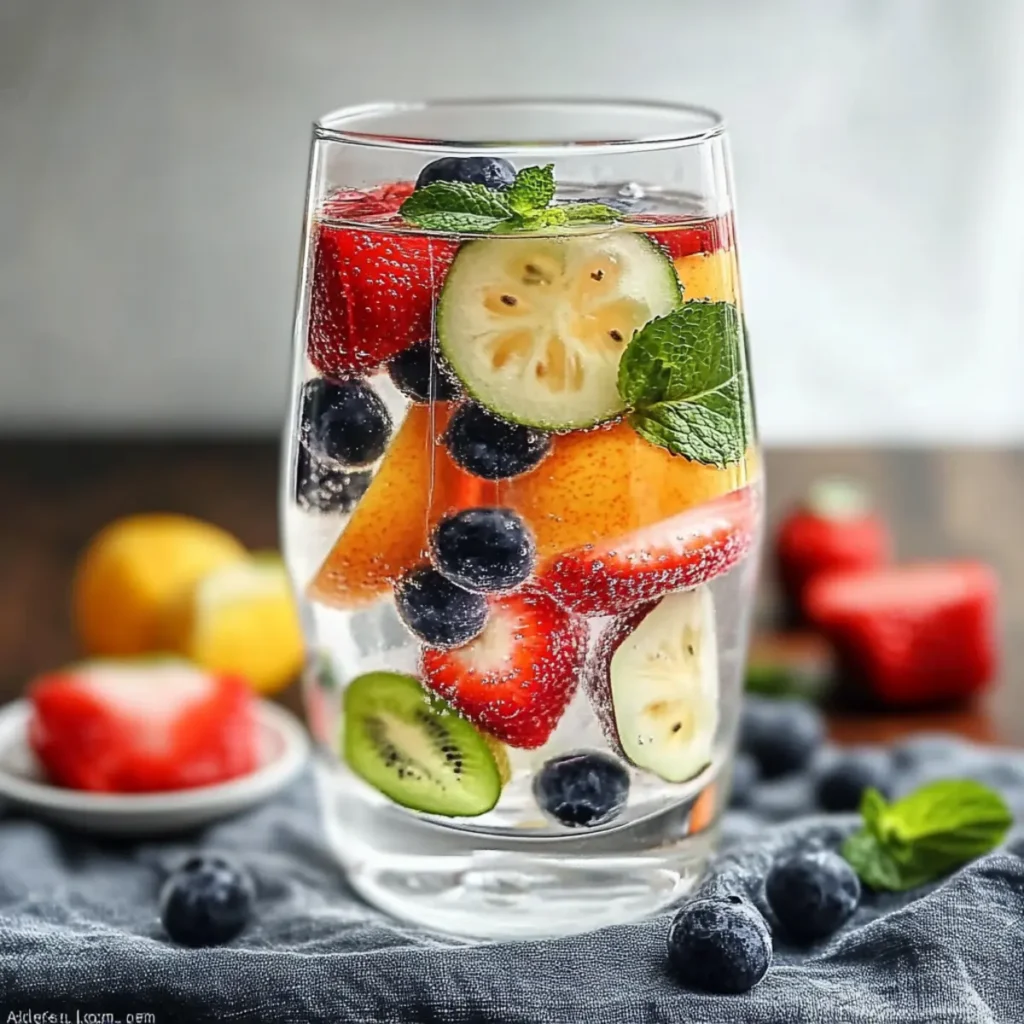
When it comes to the quintessential summertime drink, nothing beats the sparkle of refreshing Fruit Infused Water. Imagine sipping on ice-cold, flavorful water that bursts with the sweetness of berries, the crispness of cucumber, the zesty brightness of citrus, and the invigorating essence of mint. It’s as if every sip takes you to a sun-drenched garden picnic, where hydration meets elegance in a glass. Creating your own Fruit Infused Water is not only incredibly easy but also an adventure in flavor. Whether you’re gearing up for a backyard barbecue, a ladies’ brunch, or just looking to brighten your everyday hydration routine, this delightful concoction promises to elevate your drink game. Plus, who doesn’t love a drink that looks as good as it tastes? Ingredients for Fruit Infused Water Here’s what you’ll need to make this delicious Fruit Infused Water: 1 cup strawberries – Sweet and juicy, strawberries add a delightful flavor to your water while providing a beautiful bubbly red hue. 1 cup cucumber – Crisp and refreshing, cucumber adds a cooling element that balances the sweetness of other fruits. 1 cup mint leaves – Fresh mint infuses your water with an aromatic punch, offering a refreshing herbal note that enhances every sip. 1 cup lemon – Tangy and bright, lemons bring a zesty kick and vibrancy that complements the sweetness of the strawberries and oranges. 1 cup orange – Juicy orange slices add a burst of citrus freshness, rounding out the flavor profile with a sweet undertone. 8 cups water – Use filtered or spring water to ensure your infusion is clean and pure, allowing the flavors to shine through. How to Make Fruit Infused Water Follow these simple steps to prepare this delicious Fruit Infused Water: Step 1: Gather Your Ingredients Before you begin, gather all your fruits, mint, and water. Make sure everything is fresh and cleaned, so each sip is bursting with flavor. Step 2: Prepare the Fruits and Herbs Slice your strawberries and cucumber into thin pieces. Cut your lemon and orange into elegant wedges — they’ll add flair to your infusion. And don’t forget to give those fresh mint leaves a gentle rinse to refresh their aroma. Step 3: Combine Everything in a Pitcher In a large pitcher, combine the sliced strawberries, cucumber, lemon, orange, and the mint leaves. This is where the magic begins, as your fruits and herbs come together in vibrant harmony. Step 4: Add Water Pour 8 cups of filtered or spring water over the colorful mix. This step is crucial as the water serves as the canvas on which all these incredible flavors will paint their masterpiece. Step 5: Stir and Infuse Gently stir the mixture to ensure that the flavors start to intermingle. Then, allow the concoction to chill in the refrigerator for at least 4 hours. This is the hardest part — waiting. But trust me, the anticipation will be worth it! Step 6: Serve and Enjoy Once infused, give it a final gentle stir and serve your beautiful Fruit Infused Water over ice. For an extra touch, garnish with additional mint leaves or fruit slices. Get ready for a refreshing sip that embodies summer itself! Fruit Infused Water is perfect for those hot afternoons when you’re lounging by the pool, or it can be a sophisticated addition to any formal gathering. It would undoubtedly steal the spotlight during dinner parties as your guests marvel at the beautiful pitcher brimming with fresh colors and delightful flavors. This delightful drink not only keeps you hydrated but also kicks plain old water to the curb, bringing a party to every glass. With each flavor offering a little something unique, your taste buds will be served a unique experience with every sip. Add a little sparkle to your day, lift your spirits, and let this Fruit Infused Water be your new go-to companion as you navigate this hot season. Here’s to hydration made fabulous! Perfecting Fruit Infused Water Cooking Process Achieving the ideal Fruit Infused Water requires a methodical approach. Start by washing and slicing your fruits and herbs to release their flavors, followed by combining everything in a pitcher, then simply pour the water over the mixture. Chill and serve. Add Your Touch to Fruit Infused Water Feel free to customize your Fruit Infused Water by swapping fruits or adding ingredients like berries, pineapple, or ginger. You can also adjust the herb selection with basil or rosemary for a unique twist that suits your palate. Storing & Reheating Fruit Infused Water Store Fruit Infused Water in the refrigerator for up to three days. It’s best enjoyed cold, so there’s no need to reheat—simply pour over ice for an instant refreshment! Finding the right combinations for my Fruit Infused Water is like a treasure hunt—my friends adore when I combine strawberries and mint, which makes for a delightful garden party staple! FAQs About Fruit Infused Water What is Fruit Infused Water? Fruit Infused Water, often referred to as fruit-flavored water, is simply water that has been enhanced with fruits, herbs, or vegetables. This refreshing drink is known for its improved flavor compared to plain water, making hydration more enjoyable. By infusing water with ingredients like strawberries, cucumbers, and mint, you can create a vibrant, tasty beverage that encourages you to drink more fluids throughout the day. It’s a fantastic way to stay hydrated while enjoying delightful flavors without any added sugars or artificial ingredients. How long should I let my Fruit Infused Water steep? To get the best flavor from your Fruit Infused Water, it’s recommended to let it steep in the refrigerator for at least four hours. However, you can also let it sit overnight for a more robust flavor. The longer you steep, the more intense the flavors become, allowing the natural oils and essences from the fruits and herbs to fully bloom in the water. Just be cautious; steeping for more than 24 hours may lead to a somewhat bitter taste. Can I use any fruits
Refreshing Tropical Iced Green Tea Recipe for Summer Sips
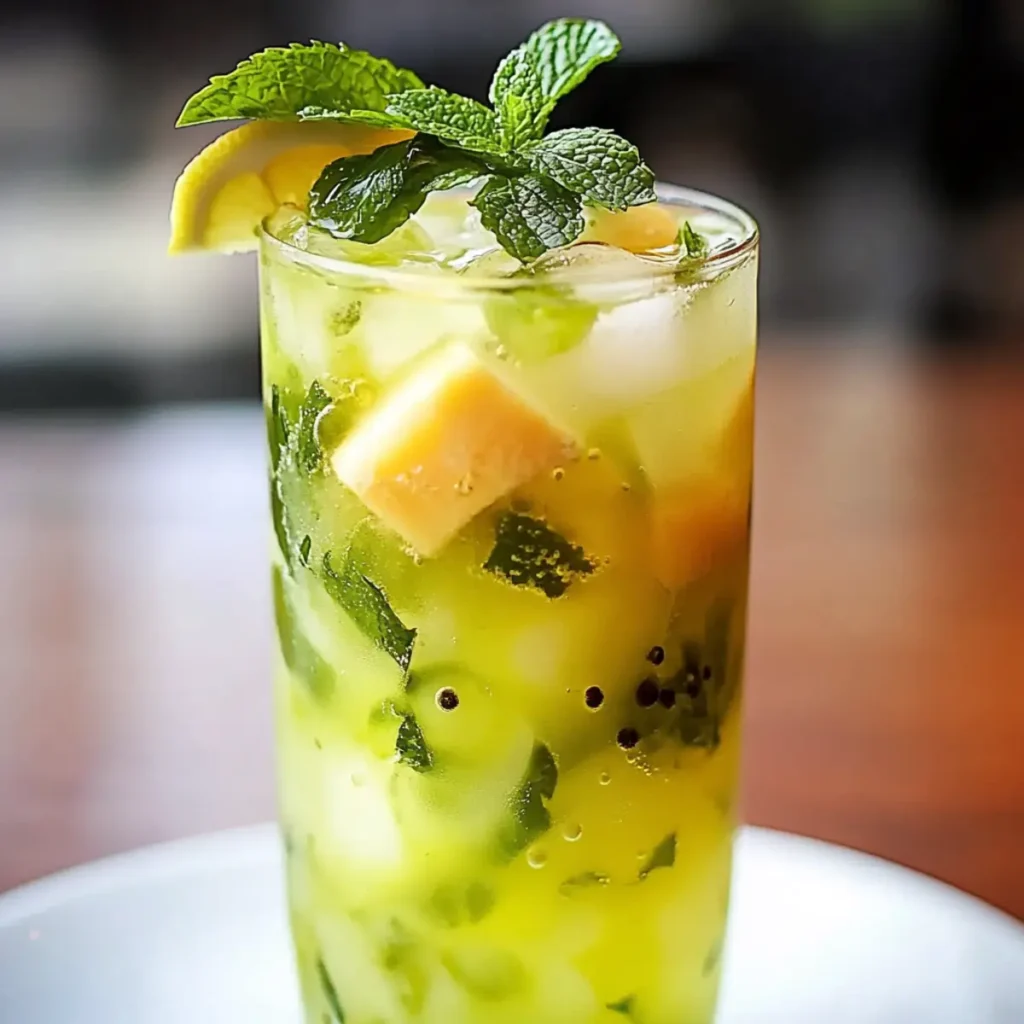
The sun is high, the air is tropical, and there’s nothing like sipping a cold glass of Tropical Iced Green Tea to refresh your soul. Imagine the bright, zesty flavors of ripe pineapple and luscious mango swirling together, capturing the essence of a summer paradise. As you take a sip, the smooth coconut water elevates the experience, making every drop feel like a mini-vacation in a glass. This invigorating drink doesn’t just quench your thirst; it introduces you to a world of vibrant flavors that dance on your palate. Perfect for lazy afternoons, sunny picnics, or just while lounging on your balcony, this recipe is a must-try. Trust me; your taste buds will thank you. Ingredients for Tropical Iced Green Tea Here’s what you’ll need to make this delicious Tropical Iced Green Tea: 4 bags green tea – Use your favorite brand, and opt for organic if possible for a cleaner taste. 1 cup pineapple chunks – Fresh or canned works here; just choose ones that are ripe and sweet for the best flavor. 1 cup mango chunks – Similar to pineapple, fresh is ideal, but frozen can lend a frostier texture and cooler temperature. 1 cup coconut water – This adds a hydrating quality, so choose a brand without added sugar for a healthier option. 2 tablespoons honey – A natural sweetener that can be adjusted based on your taste; feel free to swap out for agave or maple syrup. 1 cup mint leaves – Fresh mint takes this drink to the next level, offering a refreshing aroma and a burst of flavor. How to Make Tropical Iced Green Tea Follow these simple steps to prepare this delicious Tropical Iced Green Tea: Step 1: Brew the Green Tea Start by brewing your green tea. Boil some water and steep the tea bags according to the package instructions. Let the tea bags soak up all that goodness, then remove them, and let the brewed tea cool completely. You want it to be chilled so it doesn’t melt your ice. Step 2: Blend the Tropical Goodness In a blender, throw in the cooled green tea, pineapple chunks, mango chunks, coconut water, and honey. Blend until you achieve a smooth, vibrant mix that resembles a tropical sunset. Step 3: Strain for Smoothness Pour that glorious liquid through a fine mesh strainer into a pitcher to remove any pulp. The goal is a silky, drinkable concoction that glides over your tongue and dances between your taste buds. Step 4: Serve Over Ice Get a glass or two, add some ice cubes, and pour the strained tropical green tea over them. Let the ice chill your drink further while you prepare to sip the sun. Step 5: Garnish with Mint Top your drink with fresh mint leaves for that extra touch. Not only will they look beautiful, but they also add a fragrant aroma that’ll make you feel like you’re lounging on a beach somewhere warm. Step 6: Enjoy the Chill Now it’s time to enjoy this refreshing Tropical Iced Green Tea. Sip it slowly, close your eyes, and transport yourself to a tropical paradise—emails and chores can wait. This delightful concoction not only captures the essence of summer but also invites vibrant memories of beach days and sunshine. You’ll be savoring each sip while wishing summer could last forever. From the first taste you can feel the stress of the day fade away. Your friends might just think you’re a genius for concocting something so tasty and gorgeous. Sharing this drink will give you instant cool points, and you can even claim it as “your own recipe.” Just remember to invite me over when you make it! Perfecting Tropical Iced Green Tea Cooking Process Start by brewing the green tea first so it has time to cool while you prepare the fruit. Next, blend the cooled tea with the fruits and honey, ensuring a smooth consistency before straining. Finally, serve it over ice and garnish with mint for a refreshing finish. Add Your Touch to Tropical Iced Green Tea Feel free to swap in your favorite fruits like kiwi or strawberries for a personalized twist. You can also replace honey with agave syrup or add a splash of lime juice for a zesty kick. Go crazy and experiment with flavors that make your taste buds dance! Storing & Reheating Tropical Iced Green Tea To store Tropical Iced Green Tea, keep it in an airtight pitcher in the fridge for up to three days. For serving, simply pour it over ice; there’s no need for reheating or cooking again. If it settles, just give it a gentle stir! It’s funny how a little green tea can turn a hot summer day into a tropical mini-vacation. I remember the first time I served this iced tea to friends at a backyard barbecue; the compliments just kept pouring out like the tea itself! FAQs About Tropical Iced Green Tea What is Tropical Iced Green Tea? Tropical Iced Green Tea is a refreshing beverage made by blending green tea with tropical fruits like pineapple and mango, along with coconut water and a touch of honey for sweetness. This delightful drink is not only hydrating but also bursting with vibrant flavors. Perfect for summer days, it combines the goodness of green tea antioxidants with the juiciness of fresh fruits, making it a healthy and delicious choice for warm weather sipping. How can I make Tropical Iced Green Tea sweeter? If you prefer a sweeter version of Tropical Iced Green Tea, you can easily adjust the sweetness to your liking. Consider adding more honey or substituting it with agave syrup for a similar taste with less intense sweetness. You might even experiment with flavored syrups like vanilla or coconut to enhance the flavor profile while keeping the tropical essence intact. Can I add more fruits to my Tropical Iced Green Tea? Absolutely! One of the best things about Tropical Iced Green Tea is its versatility. You can mix
Easy Flavorful Herb Butter Spread Recipe for Delicious Dishes
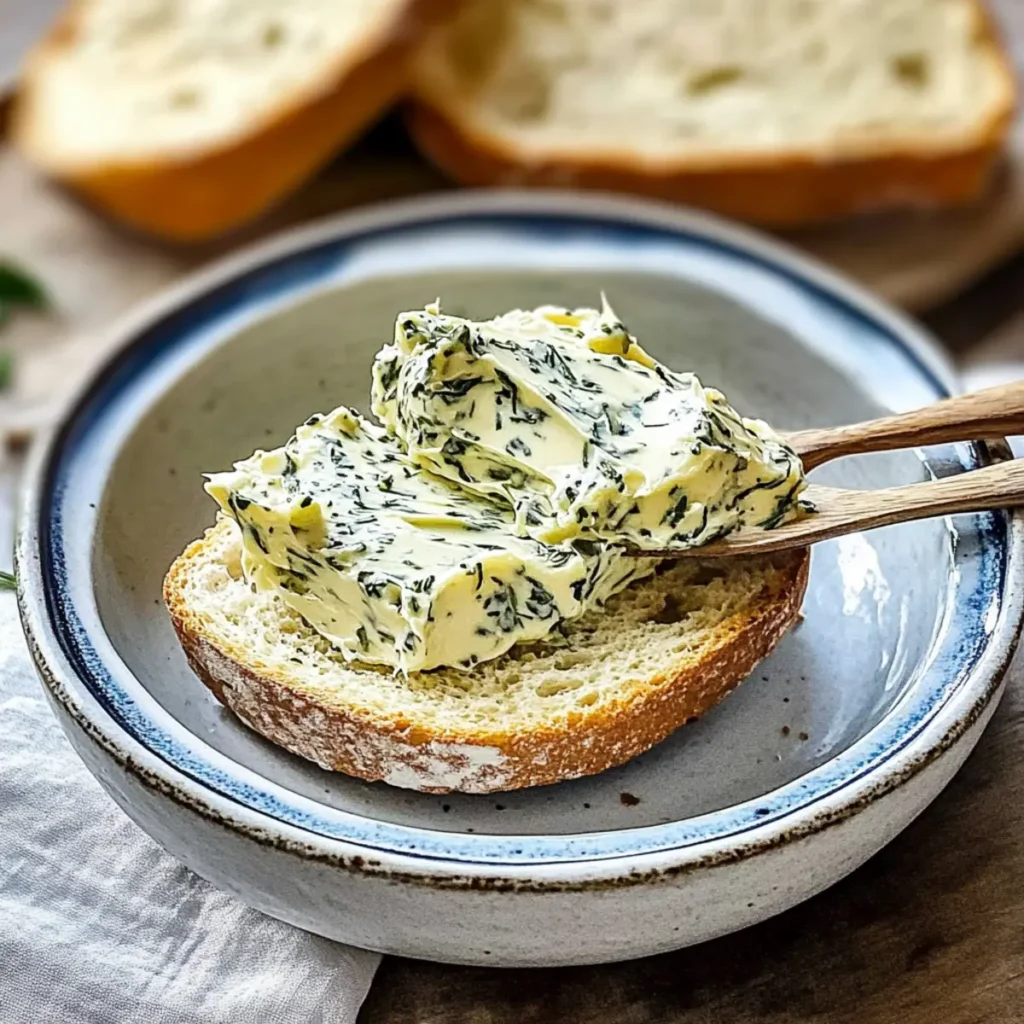
When it comes to elevating your everyday meals, there’s nothing quite like a Flavorful Herb Butter Spread. Imagine slathering this creamy, aromatic delight onto crusty bread, steaming vegetables, or grilled meats, and watch as it transforms your dining experience into something worthy of a restaurant review. This simple yet magical spread tantalizes the taste buds, filling the air with delightful herbaceous aromas, making every bite an adventure, and let’s be honest, who doesn’t love a little extra zing in their life? You know those moments when you’re cozied up in the kitchen, music playing softly, and the scent of fresh herbs wafting through the air? This is where the magic happens. I fondly recall gatherings with friends where the centerpiece wasn’t just the meal but moments sprinkled with laughter, buttery goodness, and this amazing spread. From weeknight dinners to special family occasions, this Flavorful Herb Butter Spread has always been a hit, and trust me, it’s about to become your go-to recipe too. Ingredients for Flavorful Herb Butter Spread Here’s what you’ll need to make this delicious Flavorful Herb Butter Spread: 1 cup unsalted butter – This creamy base provides the perfect richness and texture, so bring it to room temperature before mixing. 2 tablespoons fresh parsley – Adds a burst of vibrant color and a fresh flavor. Choose bright green, perky leaves for the best taste. 1 tablespoon fresh chives – These delicate onion-flavored herbs enhance the flavor profile effortlessly. Snip them right before using for peak freshness. 1 tablespoon fresh thyme – With its earthy aroma, thyme complements the butter beautifully and gives it a rustic charm. Pick the leaves from the stems for a smooth blend. 1 clove garlic – Fresh garlic, minced finely, offers pungency that takes this spread over the top. Use it to taste for a milder flavor. 1 teaspoon lemon juice – A splash of acidity balances the richness of the butter, giving it that zingy lift. Freshly squeezed is always best! 1/2 teaspoon salt – Enhances all the flavors so your spread sings on the palate. Adjust to taste if you’re keeping an eye on sodium. 1/4 teaspoon black pepper – Adds a gentle kick, rounding out the flavor profile perfectly. Freshly cracked is ideal for the best results. How to Make Flavorful Herb Butter Spread Follow these simple steps to prepare this delicious Flavorful Herb Butter Spread: Step 1: Gather your ingredients Make sure all your ingredients are ready and waiting. This includes softening that butter to a creamy texture—no one likes a lumpy spread, right? Step 2: Mix the herbs In a medium-sized bowl, combine the fresh parsley, chives, thyme, minced garlic, lemon juice, salt, and black pepper. Use a fork or a spatula to get those flavors dancing together! Step 3: Combine with the butter Add the softened unsalted butter to your herb mixture. It’s like introducing your friends to each other—give it a good mix until everything is well blended and creamy. Step 4: Taste and adjust Here comes the part where your inner chef shines! Taste your spread and adjust seasoning if necessary. A little extra salt, a sprinkle more of lemon juice—make it your own. Step 5: Chill out Scoop the herb butter onto a piece of parchment paper or into a container. If using parchment paper, roll it up like a log and twist the ends to secure. Refrigerate the spread until firm—about 30 minutes should do the trick. Step 6: Serve and enjoy Once your Flavorful Herb Butter Spread is chilled and firm, it’s time to unleash the magic! Slather it on warm bread, grilled corn on the cob, or melt it over a beautiful steak for that finish that says, “I mean business.” Dip a spoon in it and prepare for compliments at the dinner table. Enjoy the wonders of this simple yet versatile Flavorful Herb Butter Spread. Whether you’re using it for a fancy dinner party or just to add pizazz to your weekday meal, it’s bound to elevate your culinary game! Feel free to play with the ingredients to match your palate; this is your kitchen after all! Now, can we talk about how a butter spread can evoke such joy? It’s like a warm hug on a plate—perfect for sandwiches, grilled veggies, or simply as a luxurious dip for fresh bread. So whip up this easy, flavorful creation and bask in the joys of your culinary expertise. Trust me; your taste buds will thank you! Perfecting Flavorful Herb Butter Spread Cooking Process The best way to make a Flavorful Herb Butter Spread is to start with softened butter and fresh herbs. Combine all ingredients in a bowl, mixing until smooth and creamy. Chill briefly for a firmer texture before serving. This sequence saves time and enhances flavor blending. Add Your Touch to Flavorful Herb Butter Spread Don’t be afraid to get creative with your Flavorful Herb Butter Spread. Try adding a pinch of red pepper flakes for heat, swap out the herbs for your favorites, or incorporate some sun-dried tomatoes for an extra burst of flavor. Storing & Reheating Flavorful Herb Butter Spread To store your Flavorful Herb Butter Spread, keep it in an airtight container in the refrigerator for up to two weeks. If you want to freeze it, wrap it tightly in plastic wrap and then place it in a freezer-safe bag, allowing for longer preservation. Sharing this delicious Flavorful Herb Butter Spread at a family gathering brought everyone together; the compliments I received were like music to my ears, making the effort totally worth it! FAQs About Flavorful Herb Butter Spread What is Flavorful Herb Butter Spread? Flavorful Herb Butter Spread is a delightful combination of softened butter and fresh herbs, resulting in a savory and aromatic condiment that can elevate any dish. This spread features a harmonious blend of parsley, chives, thyme, and garlic, along with a hint of lemon juice, making it an excellent addition to bread, grilled meats, or vegetables. Easy to make
Delicious Cilantro Lime Dressing Recipe for Fresh Salads
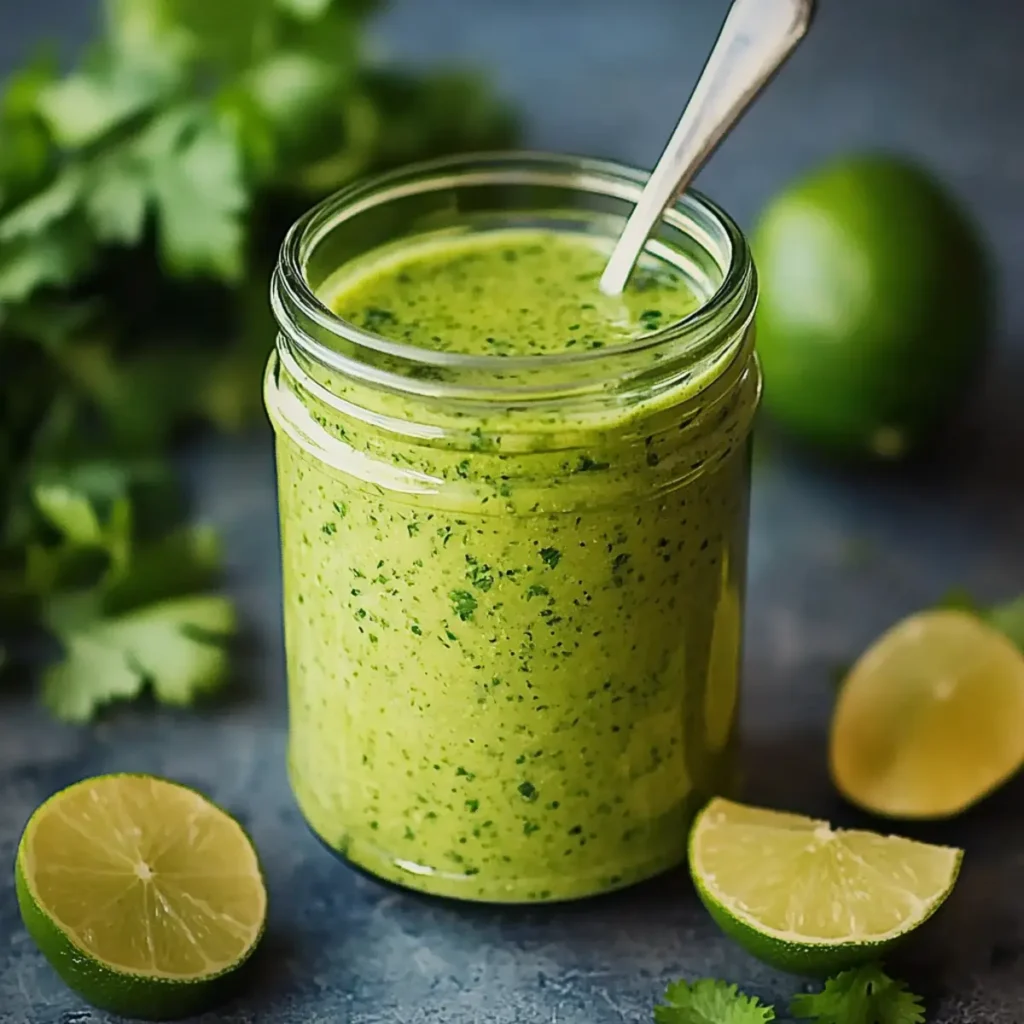
Catch the vibrant aroma of fresh cilantro mixed with zesty lime, and you’ll be immediately transported to your favorite taco stand. This cilantro lime dressing is not just a dressing; it’s a vibrant explosion of flavors that elevates any dish it graces, making salads sing and tacos dance. Picture yourself drizzling this dressing over a fresh bowl of greens or a warm grilled chicken taco. Each bite bursts with a tangy freshness that makes you wonder how a few simple ingredients can create such culinary magic. Whether it’s a summer barbecue or a cozy winter evening, this dressing will add a splash of excitement to your meals. Ingredients for Cilantro Lime Dressing Here’s what you’ll need to make this delicious Cilantro Lime Dressing: 1 cup fresh cilantro leaves – Use tightly packed leaves to ensure a robust herb flavor; fresh is best for vibrant results. 1/4 cup lime juice – Freshly squeezed lime juice provides a bright, tangy element; avoid bottled for the best flavor. 1/2 cup olive oil – A good-quality extra virgin olive oil adds richness while balancing the acidity of the lime. 1 clove garlic – Minced for a kick of flavor; garlic’s zest perfectly complements the herbaceous notes of the cilantro. 1 teaspoon honey – This sweetener rounds out the dressing’s flavors; consider agave syrup for a vegan option. 1/2 teaspoon salt – Enhances all the flavors without overpowering them; adjust according to your taste. 1/4 teaspoon black pepper – Freshly cracked pepper adds a mild heat and depth to the dressing. How to Make Cilantro Lime Dressing Follow these simple steps to prepare this delicious Cilantro Lime Dressing: Step 1: Gather Your Ingredients Before diving into the creation, ensure you have all ingredients ready. Fresh cilantro, ripe limes, olive oil, garlic, honey, salt, and pepper are your key players in this flavorful dressing. Step 2: Blend the Base In a blender or food processor, combine the cilantro, freshly squeezed lime juice, minced garlic, honey, salt, and black pepper. Blend these until they’re finely chopped and starting to come together, creating a fragrant paste. Step 3: Emulsify With the motor running on your blender, slowly drizzle in the olive oil. This step is essential for creating that creamy, emulsified dressing you’re craving. Watch the dressing transform into a gorgeous green elixir before your eyes. Step 4: Taste and Adjust Once blended, take a moment to taste your creation. Do you crave a bit more tanginess? A splash of extra lime juice can do wonders. Adjust the seasoning with salt and pepper according to your preference. Step 5: Serve and Enjoy Transfer your luscious cilantro lime dressing to a jar or bottle. Use it immediately as a delightful dressing for salads or dips, or let it sit in the fridge for flavors to deepen. Perfect for drizzling on grilled vegetables, tacos, or even fish. Step 6: Store Leftovers If you have any dressing left over (which is rare given its deliciousness), store it in the fridge in an airtight container. It should keep for up to a week, though you may need to shake it back into its emulsified form before using again. And there you have it! The perfect Cilantro Lime Dressing to brighten up your meals. Whether you’re entertaining guests or just sprucing up a weeknight salad, this dressing will have everyone begging for the recipe. It’s the secret sauce that makes even the simplest meal feel special. Enjoy your culinary adventure! This showstopping Cilantro Lime Dressing delivers restaurant-quality results using simple ingredients you probably already have at home. The perfect balance of textures and flavors creates an unforgettable dining experience that will have everyone asking for seconds. Picture-perfect presentation with vibrant colors makes this dish absolutely Instagram-worthy and guaranteed to impress any dinner guest. Incredibly versatile recipe that works beautifully for weeknight dinners, meal prep, special occasions, or even outdoor entertaining sessions. Perfecting Cilantro Lime Dressing Cooking Process To get the most out of your cilantro lime dressing, gather all ingredients first. Start by blending the cilantro, lime juice, garlic, honey, and spices together, then drizzle in the olive oil for the perfect emulsification. Add Your Touch to Cilantro Lime Dressing Feel free to experiment with this cilantro lime dressing! Add some diced jalapeños for heat, swap honey for maple syrup for a vegan twist, or even throw in avocado for a creamier texture. Storing & Reheating Cilantro Lime Dressing Store any leftovers in an airtight container in the refrigerator for up to a week. If the dressing separates, simply shake it up before using, and it’ll be as good as fresh! There was a summer BBQ where I whipped up this cilantro lime dressing, and my friends couldn’t get enough. They were practically fighting over the last drops for their salads, and I secretly felt like a culinary rock star. FAQs About Cilantro Lime Dressing What is Cilantro Lime Dressing? Cilantro Lime Dressing is a zesty and vibrant sauce that combines fresh cilantro, lime juice, olive oil, garlic, and a hint of sweetness. This flavorful dressing is perfect for enhancing salads, tacos, grilled vegetables, and much more. It’s easy to whip up at home and adds a refreshing touch to any dish, making it a staple in many kitchens. The key to its deliciousness lies in the balance of fresh herbs and tangy citrus, offering a burst of flavor with every drizzle. How can I use Cilantro Lime Dressing? This dressing is incredibly versatile! Use Cilantro Lime Dressing to elevate your salads, serve as a marinade for chicken or fish, or drizzle over roasted vegetables for a flavorful punch. It can also enhance tacos, burrito bowls, or as a dip for fresh veggies and chips. The possibilities are endless, so feel free to get creative in the kitchen! Can I make a vegan version of Cilantro Lime Dressing? Absolutely! To make a vegan Cilantro Lime Dressing, simply substitute honey with agave syrup or maple syrup. This slight adjustment keeps the sweet flavor
Delicious Raspberry Colada Cocktail Recipe for Summer Sipping

The summer sun is shining, and there’s no better way to cool off than with a delightful Raspberry Colada Cocktail. This drink is a tropical paradise in a glass, bursting with the sweet flavors of fresh raspberries and creamy coconut that makes your taste buds sing. Imagine taking a sip, and the blend of the fruity tang from the raspberries hits you, followed by the luscious coconut cream that wraps around your palate like a warm hug. Perfect for summer barbecues, relaxing afternoons on the porch, or even a cheeky little happy hour while catching up with friends, this cocktail will elevate any occasion. Get ready to blend up something special that promises to bring sunshine directly into your glass! Ingredients for Raspberry Colada Cocktail Here’s what you’ll need to make this delicious Raspberry Colada Cocktail: 1 cup fresh raspberries – Choose plump, juicy berries for the best flavor, and save a few for garnish. 1 cup coconut cream – Use full-fat coconut cream for a rich and creamy texture. You can substitute with coconut milk if desired, but it’ll be less creamy. 1 cup pineapple juice – Opt for 100% juice for a refreshing tropical kick that balances the sweetness of the raspberries. 1/2 cup white rum – A good quality white rum brings depth and a little excitement to your drink. 1 tablespoon lime juice – Freshly squeezed lime juice brightens up the cocktail with a zesty contrast. 2 tablespoons simple syrup – Adjust this to taste; it sweetens the mix, but if you prefer less sweetness, just add less. 4 slices lime – For garnish and a hint of citrus aroma. 4 sprigs mint – Fresh mint elevates the cocktail’s presentation and freshness. How to Make Raspberry Colada Cocktail Follow these simple steps to prepare this delicious Raspberry Colada Cocktail: Step 1: Gather Your Ingredients Before diving into the cocktail-making frenzy, gather all your ingredients. Having everything ready to go makes the process smoother and more enjoyable. You’ll need a blender, a strainer (optional), and some glasses for serving. Step 2: Blend the Base In your blender, combine the fresh raspberries, coconut cream, pineapple juice, white rum, freshly squeezed lime juice, and simple syrup. Blend until everything transforms into a smooth, vibrant mixture that feels like a mini-vacation in a blender. Step 3: Strain for Smoothness (Optional) If you prefer a silky-smooth texture, strain the mixture through a fine mesh sieve to remove the seeds from the raspberries. But if you’re feeling adventurous, leave it as is for that textural fun! Step 4: Serve Over Ice Fill your glasses with ice – and I mean really fill them, because who doesn’t love a good ice-to-cocktail ratio? Pour the blended mixture over the ice in each glass, watching as the gorgeous pink liquid cascades to the top. Step 5: Garnish & Enjoy! Now comes the fun part! Garnish your delicious Raspberry Colada Cocktail with a few fresh raspberries, a slice of lime on the rim, and a sprig of mint for that extra special touch. Grab a straw, if you’re feeling fancy, and dig in! Step 6: Savor Every Sip Take a moment to admire your stunning creation before taking that first sip. Relish the flavors as they dance on your palate, transporting you straight to a sunny beach with every refreshing gulp. This Raspberry Colada Cocktail is not just a drink; it’s an experience. Celebrate the summer, the good times, and the sweetness of life, one sip at a time! Enjoy responsibly, and don’t forget to share (or not!) because this cocktail is made for relaxation and indulgence. Cheers! This showstopping Raspberry Colada Cocktail delivers restaurant-quality results using simple ingredients you probably already have at home. The perfect balance of textures and flavors creates an unforgettable dining experience that will have everyone asking for seconds. Picture-perfect presentation with vibrant colors makes this dish absolutely Instagram-worthy and guaranteed to impress any dinner guest. Incredibly versatile recipe that works beautifully for weeknight dinners, meal prep, special occasions, or even outdoor entertaining sessions. Perfecting Raspberry Colada Cocktail Cooking Process Start by blending fresh raspberries, coconut cream, pineapple juice, white rum, lime juice, and simple syrup. Blend until smooth to ensure optimal flavor integration. Strain if desired for a creamy finish, then pour over ice and garnish beautifully. Add Your Touch to Raspberry Colada Cocktail Feel free to swap coconut cream for Greek yogurt for a lighter take, or experiment with different fruits like strawberries or mango for a unique flavor. Add a dash of coconut rum for an extra tropical twist. Storing & Reheating Raspberry Colada Cocktail Store any leftover mixture in the refrigerator for up to three days. Shake it well before serving. Freeze for a refreshing slushie-style treat later on, perfect for hot summer days. I remember the first time I made a Raspberry Colada Cocktail for friends at a summer BBQ. Their delighted faces were priceless; the drink was a total hit, and I’ve been serving it at get-togethers ever since! FAQs About Raspberry Colada Cocktail What is Raspberry Colada Cocktail? The Raspberry Colada Cocktail is a delightful twist on the classic piña colada, infused with fresh raspberries for an incredibly refreshing blend. Combining coconut cream, pineapple juice, and rum with the tangy sweetness of berries, this cocktail is perfect for summer gatherings or cozy nights in. It’s visually stunning, thanks to its deep pink color, and offers a creamy texture with a fruity kick. Whether served at a party or enjoyed solo, it captures all the tropical vibes in one sip. How do you make a Raspberry Colada Cocktail? Making a Raspberry Colada Cocktail is as easy as pie! Start by tossing fresh raspberries, coconut cream, pineapple juice, white rum, lime juice, and simple syrup into a blender. Blend until you achieve a smooth consistency. If you prefer a silkier drink, strain the mixture before pouring it over ice. Don’t forget to garnish with extra raspberries, lime slices, and mint sprigs for that extra flair.
Delicious Holiday Punch Recipe for Festive Gatherings

Prepare to add a splash of joy to your festive gatherings with this delightful Holiday Punch! Imagine the vibrant colors swirling together, a glass of sparkling cheer that shimmers, enticing everyone with its fruity aromas. Just one sip transports you to a holiday paradise filled with laughter, warmth, and cherished memories. This Holiday Punch is more than just a drink; it’s a symbol of celebration. Whether you’re throwing a holiday party or simply gathering with family, this punch is the sparkling centerpiece that completes the festivities, making every moment a memory in the making. Ingredients for Holiday Punch Here’s what you’ll need to make this delicious Holiday Punch: 2 cups cranberry juice – Choose 100% juice for a natural sweetness and vibrant color, rich in antioxidants. 1 cup orange juice – Fresh-squeezed will add a delightful tang, but bottled juice works too. 1 cup pineapple juice – Opt for the no-sugar-added variety for a healthier twist, adding a tropical flair. 2 cups sparkling water – Use plain or flavored sparkling water to give your punch an effervescent kick that makes it festive. 1 cup fresh cranberries – These add tartness and stunning color; feel free to use frozen if fresh isn’t available. 1 cup orange slices – Enhance the visual appeal and provide a burst of citrus flavor. 1 cup pineapple chunks – Fresh or canned, these will sweeten your punch and look beautiful floating in it. 1 cup vodka (optional) – For adult gatherings, this adds a little zing, but it’s delicious without it too. How to Make Holiday Punch Follow these simple steps to prepare this delicious Holiday Punch: Step 1: Combine the Juices In a large punch bowl, pour in the cranberry juice, orange juice, and pineapple juice. Stir gently as you combine these fruity flavors; it will smell divine! Step 2: Add the Bubbles Slowly stir in the chilled sparkling water, watching the concoction fizz and foam. This is where the fun begins, folks! Step 3: Garnish with Freshness Toss in the fresh cranberries, orange slices, and pineapple chunks, giving it a vibrant look. Trust me, your guests will be impressed by the burst of colors! Step 4: Optional Adult Version If you’re feeling a bit adventurous, add vodka to the punch. It gives the drink a delightful kick while still keeping it refreshing. Step 5: Let it Chill Allow your Holiday Punch to sit in the fridge for a bit. This gives the flavors a chance to mingle and get to know each other better. Step 6: Serve and Enjoy Pour the punch into glasses, adding a few extra cranberries or orange slices as garnish. Cheers to a fantastic holiday gathering! This Holiday Punch is perfect for any celebration, making it a go-to recipe that everyone will adore. Just imagine the compliments that will flow your way as friends and family sip this colorful delight. You might even get crowned the “holiday drink mixologist.” Now, who wouldn’t want that title? This showstopping Holiday Punch delivers restaurant-quality results using simple ingredients you probably already have at home. The perfect balance of textures and flavors creates an unforgettable dining experience that will have everyone asking for seconds. Picture-perfect presentation with vibrant colors makes this drink absolutely Instagram-worthy and guaranteed to impress any dinner guest. Incredibly versatile recipe that works beautifully for festive gatherings, meal prep, or even casual outdoor entertaining sessions. Perfecting Holiday Punch Cooking Process To perfect your Holiday Punch, begin by mixing the juices in a large punch bowl before chilling the sparkling water. This ensures a refreshing and bubbly finish. Stir gently to combine all flavors and add fruits last for a beautiful presentation. Add Your Touch to Holiday Punch Get creative with your Holiday Punch by swapping out juices for other favorites, like apple or pomegranate juice. You could also switch the fresh fruits according to the season, or add herbs like mint for an unexpected flavor twist. Storing & Reheating Holiday Punch Store any leftover Holiday Punch in a sealed pitcher in the refrigerator for up to three days. Avoid freezing, as the sparkling water will lose its fizz when thawed. Just give it a gentle stir before serving again. Sharing a Holiday Punch recipe at a recent family gathering turned into a delightful competition over who could make the best version. Watching my aunt add spicy ginger ale while my cousin experimented with fresh basil was not only entertaining, but it reminded me that this drink is all about personal flair and creativity. FAQs About Holiday Punch What is Holiday Punch? Holiday Punch is a festive beverage typically served during special occasions like Christmas or New Year’s celebrations. Made with a delightful mix of fruity juices—often cranberry, orange, and pineapple—this punch is both refreshing and visually appealing. You can choose to make it a non-alcoholic drink or add vodka for an adult twist. With its vibrant colors and bubbly fizz, Holiday Punch is designed to brighten up any gathering and keep the spirit of celebration alive. Can I make Holiday Punch ahead of time? Absolutely! In fact, preparing your Holiday Punch a few hours in advance allows the flavors to meld beautifully, creating a more harmonious taste. Just follow the recipe and keep the punch in the fridge. Be sure to add the sparkling water just before serving to maintain its fizz. This way, you can spend more time entertaining your guests rather than rushing to mix drinks when they arrive. What can I substitute in Holiday Punch? Feel free to get creative with your Holiday Punch by substituting different juices or adding seasonal fruits. For example, swap cranberry juice for pomegranate juice or add apple juice for a sweeter touch. You can also change the fruits you use in the garnish, opting for seasonal favorites. Adding fresh herbs like mint or basil introduces an unexpected flavor twist that elevates your punch to new heights. How many servings does this Holiday Punch recipe make? This refreshing Holiday Punch recipe typically
Deliciously Crunchy Cinnamon Sugar Pita Chips Recipe to Savor
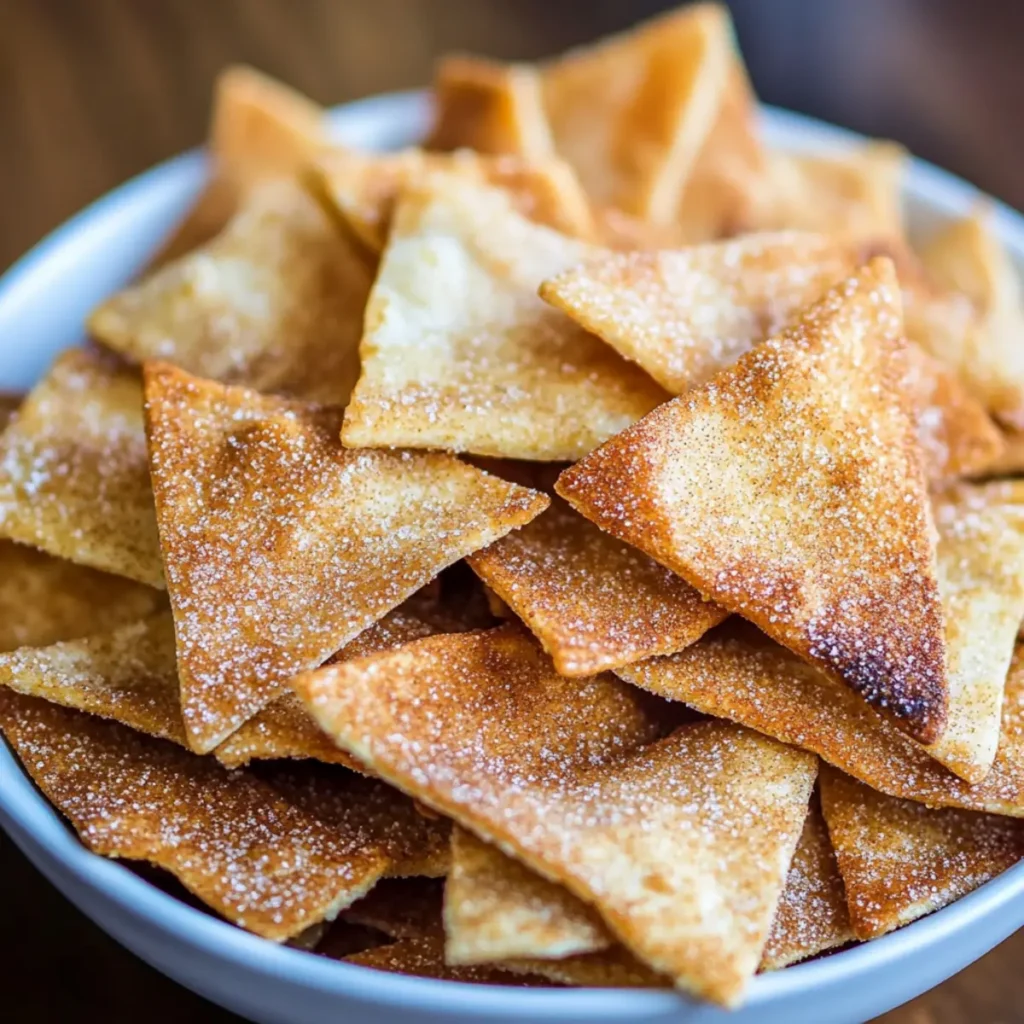
The moment you bite into a warm Cinnamon Sugar Pita Chip, a delightful crunch gives way to a sweet, spiced flavor that dances on your taste buds. Picture this: a light, airy chip, smothered in a comforting blend of cinnamon and sugar, sending out aromas that will have your family wandering into the kitchen like moths drawn to a flame. Ah, homemade snacks have never felt so sumptuous, and with just a handful of ingredients, you will feel like a culinary wizard. This recipe brings together two worlds—the simplicity of ingenious snacking and the rich, comforting flavors that evoke memories of family gatherings or cozy evenings. Whether you’re whipping these up for game night, movie marathons, or simply to treat yourself, these Cinnamon Sugar Pita Chips are here to steal the spotlight and leave an unforgettable impression. Ingredients for Cinnamon Sugar Pita Chips Here’s what you’ll need to make this delicious Cinnamon Sugar Pita Chips: 4 pieces pita bread – Choose whole wheat or regular pita for a soft and tender base that crisps up perfectly in the oven. 2 tablespoons olive oil – This adds not only flavor but also helps the cinnamon sugar adhere, creating that delicious crunch. 1 tablespoon granulated sugar – The foundation of our sweet topping, providing that classic sweet taste that we crave. 1 teaspoon ground cinnamon – Use fresh cinnamon for the best flavor; it brings an aromatic warmth that turns ordinary chips extraordinary. How to Make Cinnamon Sugar Pita Chips Follow these simple steps to prepare this delicious Cinnamon Sugar Pita Chips: Step 1: Preheat Your Oven Begin by preheating your oven to 350°F (175°C). This temperature is perfect for crisping the pita without burning it. While you’re at it, get your baking sheet ready by lining it with parchment paper or a silicone baking mat for easy cleanup. Step 2: Prepare the Pita Bread Take your pita bread and cut each piece into triangles. Think of it like slicing a pizza, and remember not to be stingy; you want enough pieces to share… or not. Brush each triangle with olive oil, ensuring they’re lightly coated to enhance the flavor and help the sugar mixture stick later. Step 3: Mix the Cinnamon Sugar In a small bowl, combine the granulated sugar and ground cinnamon. Give it a good stir—this is where the magic happens! The sweetness of the sugar mingles with the warm, earthy aroma of cinnamon, creating a heavenly mixture that’ll make your mouth water. Step 4: Sprinkle the Cinnamon Sugar Generously sprinkle the cinnamon sugar mixture over your oiled pita triangles. Don’t be shy with this step; you want each chip to have a decent coat of that glorious flavor. Use your fingers to spread it around evenly. Step 5: Bake to Perfection Arrange the coated pita triangles in a single layer on your baking sheet. Bake them in the preheated oven for about 10 minutes, or until they are crispy and golden brown. Keep an eye on them to make sure they don’t overbake—it’s a thin line between deliciously crunchy and overly charred! Step 6: Cool and Serve Once baked, remove your Cinnamon Sugar Pita Chips from the oven and let them cool for a bit. They’ll get even crunchier while cooling! Serve them straight away for the ultimate taste experience, or store them in an airtight container if you’re saving some for later (if they last that long). Cinnamon Sugar Pita Chips might sound bougie, but they’re the perfect snack for any occasion! Dunk them in yogurt or serve them as a standalone treat to impress your friends. Plus, you can try adding adjustments like a sprinkle of nutmeg or even a drizzle of honey if you’re feeling fancy. Regardless of how you serve them, these chips are bound to become a favorite in your household. As you’ve discovered, making your own Cinnamon Sugar Pita Chips is so much fun and way easier than you might think! With their delightful crunch and warm sweetness, these homemade chips invite joy into every snacking moment. So, grab those ingredients, preheat that oven, and get ready for some crunchy, delicious magic! Happy snacking! Perfecting Cinnamon Sugar Pita Chips Cooking Process Start by preheating the oven and prepping the pita bread for the cinnamon sugar transformation. Brush with olive oil first, then mix and sprinkle the cinnamon sugar blend. Finally, bake until crispy perfection awaits you. Add Your Touch to Cinnamon Sugar Pita Chips Experiment with flavored oils or sweeteners like honey or maple syrup. You can also add a pinch of nutmeg or even swap cinnamon for cocoa powder for an unexpected twist. Storing & Reheating Cinnamon Sugar Pita Chips Store any leftovers in an airtight container at room temperature. To regain that crispy texture, reheat in the oven for a few minutes before serving, bringing back the delightful crunch. Making these Cinnamon Sugar Pita Chips reminds me of the joy on my little cousin’s face when I made these for her birthday party. The way she devoured them while giggling made every crumb worth it! FAQs About Cinnamon Sugar Pita Chips What is Cinnamon Sugar Pita Chips? Cinnamon Sugar Pita Chips are a delightful snack that combines the crunch of baked pita bread with a sweet and spicy blend of cinnamon and sugar. This quick and easy recipe transforms everyday pita into a scrumptious treat, perfect for dipping, snacking, or simply enjoying on their own. The combination of crispy texture and the aromatic sweetness makes these chips an irresistible indulgence for any occasion. How do you make Cinnamon Sugar Pita Chips? Making Cinnamon Sugar Pita Chips is incredibly simple! Start by preheating your oven to 350°F. Brush pita bread with olive oil, then mix granulated sugar and ground cinnamon in a bowl. Sprinkle this mixture over the oiled pita, arrange the triangles on a baking sheet, and bake for about 10 minutes until they are golden brown and crispy. It’s a quick process that yields tasty chips everyone will
Delicious Boozy Valentine’s Cherry Bomb Drinks to Impress Your Date

Enjoying a romantic evening filled with laughter and delightful flavors is a perfect way to celebrate love, especially when you’re armed with a batch of Boozy Valentine’s Cherry Bomb Drinks. Imagine biting into a juicy cherry with just the right balance of sweetness and a dash of vodka, all wrapped up in creamy white chocolate and sparkling blue sugar. It’s a flavor explosion that will have you dreaming about this treat long after the last sip! These delightful cherries are not just a treat for your taste buds, they are practically designed for celebration. Whether you’re hosting a cozy Valentine’s date at home or need a charming addition to your Galentine’s gathering, these Boozy Valentine’s Cherry Bomb Drinks will add a fun twist and make guests swoon. Plus, is there anything better than enjoying a cocktail that looks as good as it tastes? I think not! Ingredients for Boozy Valentine’s Cherry Bomb Drinks Here’s what you’ll need to make this delicious Boozy Valentine’s Cherry Bomb Drinks: 10 ounces maraschino cherries – Choose cherries with stems for easy handling, ensuring they are well-drained before use. 1 cup vodka – Your choice of vodka can enhance the flavor; consider a flavored variety for an exciting twist. 6 ounces white chocolate melting discs – Look for high-quality melting discs for the smoothest dipping experience. 1/4 cup blue sanding sugar – This adds a pop of color and fun crunch to your cherries. How to Make Boozy Valentine’s Cherry Bomb Drinks Follow these simple steps to prepare this delicious Boozy Valentine’s Cherry Bomb Drinks: Step 1: Infuse the Cherries Drain the maraschino cherries thoroughly in a jar and then refill the jar with vodka. This infusion process allows the cherries to soak up the spirit, increasing their flavor intensity. Seal the jar tightly and refrigerate for 2 days. That’s right, patience is key to this delicious endeavor, and trust me; it will be worth the wait! Step 2: Prepare for the Dipping After your cherries have marinated in the vodka, remove them from the jar (feel free to save that vodka for cocktails later). Pat them down gently with paper towels to ensure they’re dry. This helps the chocolate adhere better for that perfect bite. Step 3: Melt the White Chocolate In a microwave-safe bowl, add the white chocolate melting discs. Microwave them at 50 percent power in 30-second increments, stirring after each interval until the chocolate is fully melted and smooth. This method avoids burning and keeps your chocolate silky, which is just what you want! Step 4: Get Sugary While your chocolate is melting, pour the blue sanding sugar into a small bowl. This vibrant crunch will crown your cherries beautifully and make them Insta-worthy. Trust me, your friends will be begging you for the recipe once they see the finished product! Step 5: Dip and Decorate Once your chocolate is smooth and ready, it’s time to dip! With one hand, hold a cherry by the stem and dip it halfway into the white chocolate. Then, dip the lower half of the chocolate in the blue sanding sugar, ensuring a sparkling finish. Place the dipped cherries gently on a lined baking sheet. Press down slightly to create a stable base so they don’t tip over before hardening. Step 6: Let Them Set Allow the dipped cherries to harden for about 20 minutes. This is the moment where the excitement builds as you eagerly await tasting your creation. Once set, they’re gleaming, gorgeous, and ready to be devoured! Transfer your stunning Boozy Valentine’s Cherry Bomb Drinks onto a serving platter and enjoy! These beauties are perfect for sharing with that special someone or as an eye-catching centerpiece for your next gathering. And remember, good things come to those who wait. So, pour yourself a glass of champagne, savor the tantalizing aroma wafting from your kitchen, and relax—your delightful cherry creations are a sure way to make this season of love unforgettable! Perfecting Boozy Valentine’s Cherry Bomb Drinks Cooking Process Start by draining the maraschino cherries and letting them soak in vodka for two full days. Meanwhile, gather your white chocolate and blue sanding sugar. When ready, melt the chocolate, dip the cherries, and let them harden for a fabulous finish. Add Your Touch to Boozy Valentine’s Cherry Bomb Drinks Feel free to experiment with different types of vodka to create unique flavor combinations. You could also swap out the blue sanding sugar for other vibrant colors to match any festive theme. Adding a splash of flavored liqueur to the vodka could elevate your cherry explosions! Storing & Reheating Boozy Valentine’s Cherry Bomb Drinks These delightful cherries are best enjoyed fresh, but you can store them in an airtight container in the refrigerator for up to a week. Avoid reheating them as the chocolate may lose its smooth texture and glossy finish. Creating these Boozy Valentine’s Cherry Bomb Drinks brings me back to a vividly fun party where everyone raised their glasses and squealed at the color and the surprise of the flavors. Memories were made, and laughter echoed, all thanks to these delightful little treats! FAQs About Boozy Valentine’s Cherry Bomb Drinks What is Boozy Valentine’s Cherry Bomb Drinks? Boozy Valentine’s Cherry Bomb Drinks are delightful, vodka-soaked maraschino cherries dipped in white chocolate and embellished with colorful sanding sugar. They combine the sweetness of cherries with the richness of chocolate and the kick of vodka, making them an exciting and playful treat for any celebration. Perfect as a fun party snack or a romantic dessert for Valentine’s Day, these little cherry bombs explode with flavor and charm in every bite! How long should I soak the cherries for the Boozy Valentine’s Cherry Bomb Drinks? To achieve maximum flavor infusion, soak the maraschino cherries in vodka for at least 48 hours. This allows the cherries to absorb the alcohol, enhancing their taste and adding a fun element to your drinks. After soaking, the cherries will be ready to dip in white chocolate and