
Delicious Bundt Pan Nachos Recipe for Game Day Entertaining
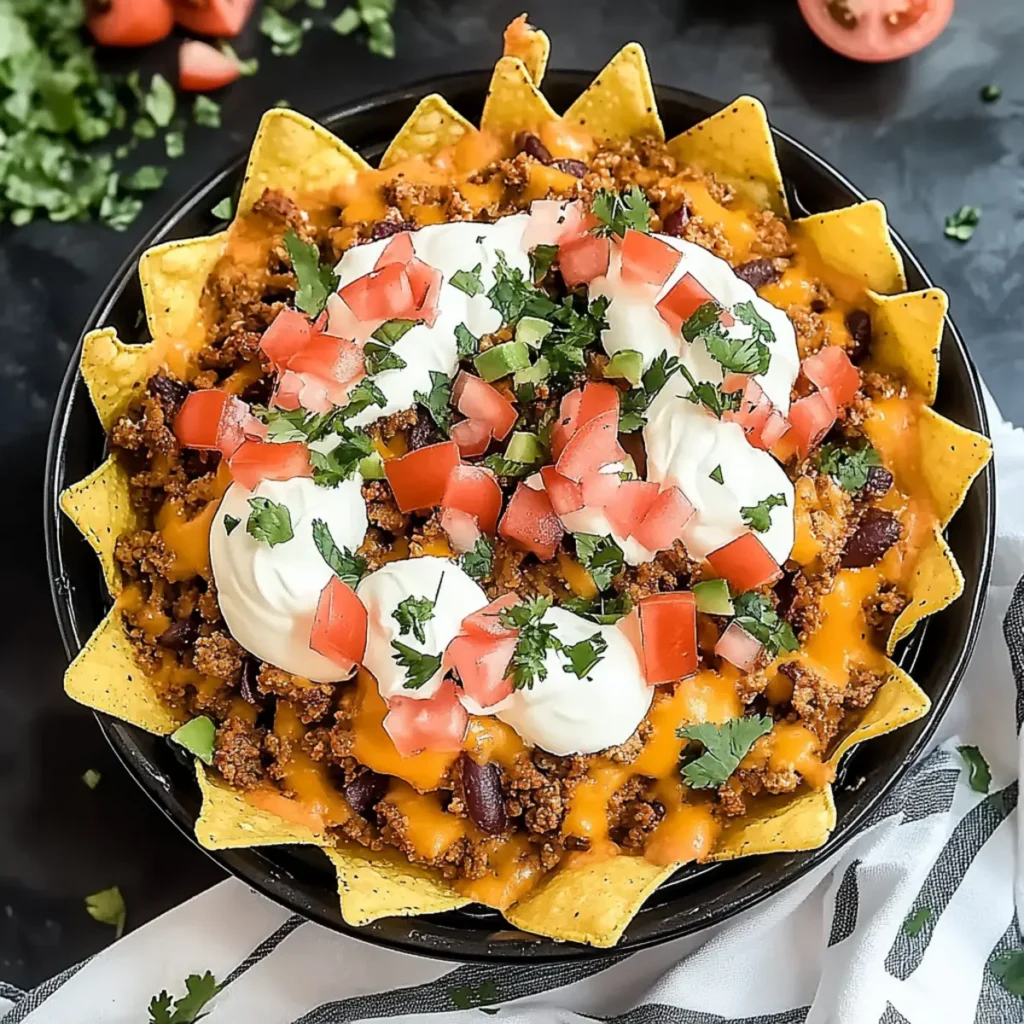
Imagine diving into a mountain of gooey cheese, crispy tortilla chips, and seasoned beef with a melty surprise lurking beneath. That’s the kind of magic we’re channeling with these irresistible Bundt Pan Nachos. Perfect for game day or a cozy movie night, this dish promises to tickle your taste buds and ignite your cravings for something truly delicious. Now, picture yourself surrounded by friends, laughter echoing around the room as you unveil your culinary masterpiece. With every scoop, you’ll feel like a kitchen rock star, while everyone else wonders how you made nachos look this stunning—without breaking a sweat. Get ready for flavors that’ll dance in your mouth and leave your guests begging for the recipe! Ingredients for Bundt Pan Nachos Here’s what you’ll need to make this delicious Bundt Pan Nachos: 0.5 pound lean ground beef – Opt for lean ground beef to keep the dish flavorful without the excess grease. 0.5 cup diced yellow onion – Yellow onion adds a sweet yet savory undertone that beautifully complements the beef. 0.5 teaspoon salt – Essential for enhancing all the flavors in the nachos, don’t skimp! 0.25 teaspoon black pepper – Just a pinch brings a subtle kick that makes all the difference. 0.25 cup water – Helps to dissolve the taco seasoning and creates a rich sauce that clings to every chip. 2 tablespoons taco seasoning – The secret weapon that infuses all your ingredients with that classic Mexican flavor. 8 ounces Colby jack cheese shredded – This mix of cheddar and Monterey Jack creates a creamy, melty texture you’ll adore. 12 ounces tortilla chips – For the best crunch, reach for a sturdy brand that can hold up under all that deliciousness. sour cream – Use as a refreshing garnish to balance the richness of the cheese and beef. diced tomatoes – Fresh tomatoes add a burst of color and freshness right at the top. chopped fresh cilantro – A sprinkle of cilantro not only pretties up your nachos but also adds a bright herbal note. How to Make Bundt Pan Nachos Follow these simple steps to prepare this delicious Bundt Pan Nachos: Step 1: Preheat the Oven Start by preheating your oven to 450°F. Then, generously spray a 12-cup Bundt pan with nonstick cooking spray to ensure those nachos release easily. Step 2: Cook the Beef In a large skillet over medium-high heat, combine the lean ground beef with the diced yellow onion, salt, and black pepper. Cook this mixture for about 6-7 minutes or until the beef is browned and no longer pink. Drain any excess fat for a cleaner taste. Step 3: Season the Beef Return the skillet to the heat and pour in the water and taco seasoning. Stir until the beef is fully coated. Let it cook for another 2-3 minutes, allowing most of the liquid to evaporate which will infuse the beef with that yummy flavor. Step 4: Layer in the Bundt Pan Start layering by adding half of the shredded cheese to the bottom of the sprayed Bundt pan. Next, spoon half of that beautifully seasoned beef mixture over the cheese, followed by ⅓ of the tortilla chips. Be gentle here—don’t pack them too tightly or you’ll lose that crunchy goodness. Step 5: Repeat Layers Now, repeat with the remaining shredded cheese, followed by the rest of the beef mixture, and finally top with another ⅓ of the chips for an amazing final layer. Make sure to keep those chips even without cramming them in! Step 6: Bake to Perfection Transfer the Bundt pan to your preheated oven and bake for about 10 minutes. You want that cheese to melt beautifully and the chips to get a hint of golden brown. When it’s done, carefully remove it from the oven and place a heat-proof plate upside down on top of the Bundt pan. With a quick flip, transfer those nachos onto the plate for a stunning presentation. Serve your stunning Bundt Pan Nachos as they are or dollop on some sour cream, sprinkle those diced tomatoes, and finish with chopped cilantro for color and flavor. Now, picture your guests diving in—cheesy goodness dripping down their fingers, laughter ringing out as they praise you for this ingenious creation. Who knew nachos could be such a showstopper? Whether you’re celebrating game day, hosting a gathering, or just treating yourself on a Tuesday night, these Bundt Pan Nachos are bound to impress and delight! This showstopping Bundt Pan Nachos delivers restaurant-quality results using simple ingredients you probably already have at home. The perfect balance of textures and flavors creates an unforgettable dining experience that will have everyone asking for seconds. Picture-perfect presentation with vibrant colors makes this dish absolutely Instagram-worthy and guaranteed to impress any dinner guest. Incredibly versatile recipe that works beautifully for weeknight dinners, meal prep, special occasions, or even outdoor entertaining sessions. Perfecting Bundt Pan Nachos Cooking Process Begin your delicious journey with ground beef, searing it first for that golden flavor. While it cooks, prepare your Bundt pan and layer the ingredients. This smart sequencing saves time and yields perfect melty layers. Add Your Touch to Bundt Pan Nachos Feel free to customize your Bundt Pan Nachos with black beans, jalapeños, or even a drizzle of spicy chipotle sauce. Switch up the cheese—pepper jack or queso fresco spice things up, making every bite a delightful surprise! Storing & Reheating Bundt Pan Nachos Store any leftover Bundt Pan Nachos in an airtight container in the fridge for up to three days. To reheat, place in the oven at 350°F until warmed through to maintain that gooey cheese goodness. Sometimes, when I serve these Bundt Pan Nachos, my friends can barely contain their excitement. One time, my buddy remarked that if nachos were a love language, these would be a heartfelt declaration! FAQs About Bundt Pan Nachos What are Bundt Pan Nachos? Bundt Pan Nachos are a delicious twist on the classic nacho dish, creatively baked in a Bundt pan for
Delicious Homemade Date Bars Recipe for a Healthy Snack Option
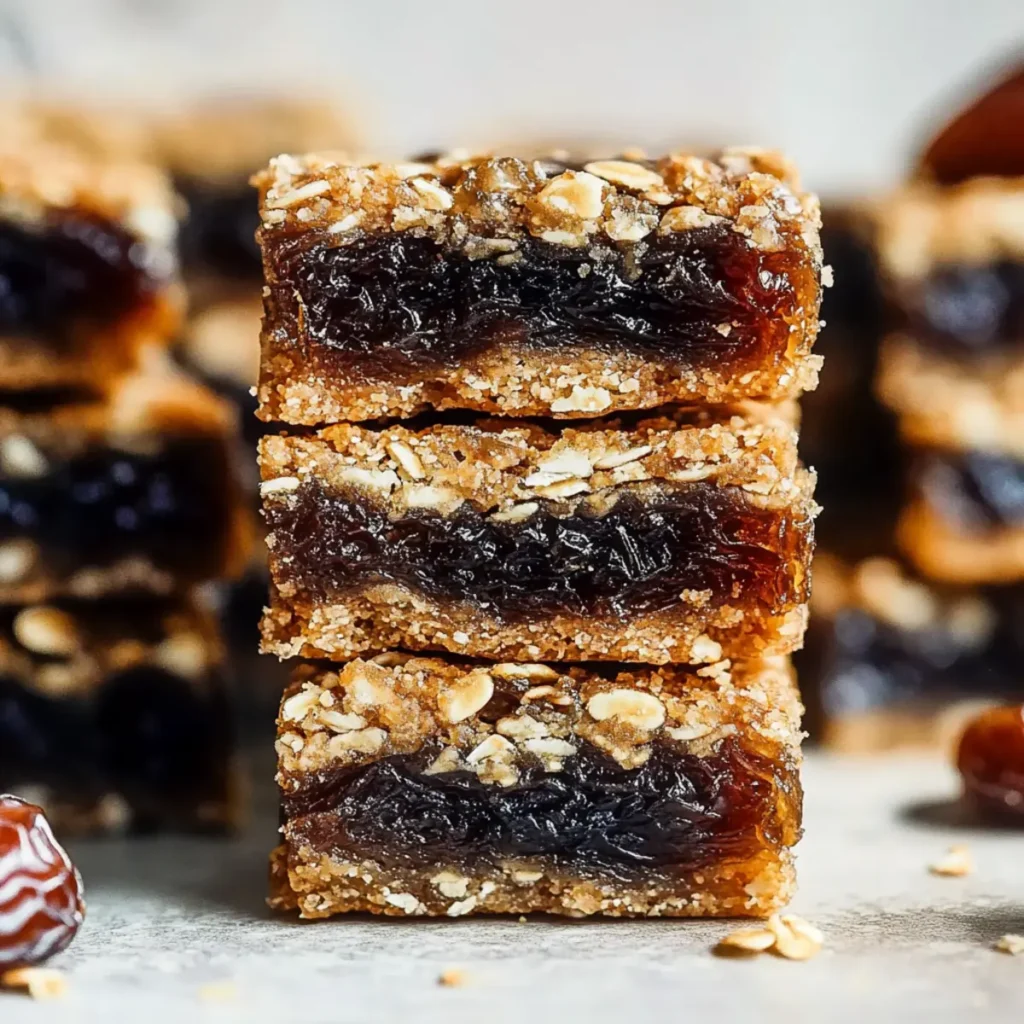
There’s something magical about the warmth and sweetness of a freshly baked treat, isn’t there? Imagine biting into a soft, chewy date bar, its luscious flavors harmonizing with the earthy notes of oats and the whisper of coconut sugar. Delve into this delightful experience with our delicious homemade date bars recipe for a healthy snack! These bars are not just a treat; they’re a celebration of wholesome goodies that bring joy to your taste buds and a smile to your face. Whether you’re curled up on the couch watching a nostalgic movie or gearing up for a picnic with friends, these date bars will be a hit. Who doesn’t love a snack that feels indulgent but is packed with goodness? As you prepare this recipe, you’ll create a moment where flavors collide brilliantly, making it a memorable experience to share with family and friends. [ love_box title=”Why You’ll Love This Delicious Homemade Date Bars Recipe for a Healthy Snack”] This incredible Delicious Homemade Date Bars Recipe for a Healthy Snack transforms simple everyday ingredients into restaurant-quality flavors that will blow your mind completely. Foolproof recipe techniques guarantee perfect results every single time, making even novice cooks feel like professional chefs instantly. Stunning visual appeal with gorgeous colors and mouthwatering aromas creates the ultimate Instagram-worthy dish for any special occasion. Endlessly adaptable for different dietary needs while working beautifully for meal prep, date nights, or entertaining large groups effortlessly. [/love_box] Ingredients for Delicious Homemade Date Bars Recipe for a Healthy Snack Here’s what you’ll need to make this delicious Delicious Homemade Date Bars Recipe for a Healthy Snack: 1.5 cups oat flour – This gluten-free flour brings a nutty flavor and delightful texture to the bars. You can make your own by grinding rolled oats in a blender. 1 cup old-fashioned rolled oats – These provide a satisfying chewiness and are rich in fiber. Always go for old-fashioned, as quick oats might turn mushy. 0.5 cups coconut sugar – It adds a lovely caramel-like sweetness and is a great alternative to refined sugars. Feel free to adjust based on your sweetness preference. 1 teaspoon vanilla extract – A splash of this adds warmth and depth of flavor, making your date bars taste even more delightful. 0.5 teaspoon baking soda – This acts as a leavening agent, helping the bars rise just slightly during baking. 0.5 teaspoon salt – Just a pinch enhances all the other flavors present in the mix. 0.5 cups unsalted butter or coconut oil, softened – Butter gives richness while coconut oil keeps things dairy-free and adds a subtle coconut taste. 1 package dates, chopped (about 1 ¼ cups) (approximately 8 ounces) – These natural sweeteners provide that gooey, decadent texture; sweeten your day without the guilt! 1 cup water – Helps to soften the dates and bind everything together. 1 teaspoon lemon juice – A splash of acidity balances the sweetness and adds a lovely brightness to the overall flavor profile. How to Make Delicious Homemade Date Bars Recipe for a Healthy Snack Follow these simple steps to prepare this delicious Delicious Homemade Date Bars Recipe for a Healthy Snack: Step 1: Preheat the oven and prepare your baking dish Preheat your oven to 350°F (175°C). While that heats up, grease a 9×9-inch baking dish with butter or coconut oil to ensure your bars come out easily after baking. Step 2: Mix your dry ingredients In a large mixing bowl, combine the oat flour, rolled oats, coconut sugar, baking soda, and salt. Stir well to integrate everything evenly, creating a base layer that will bring your date bars to life. Step 3: Cream the butter or coconut oil In a separate bowl, use a hand mixer or spatula to cream the softened butter (or coconut oil) with the vanilla extract until it’s fluffy. The goal is a light and airy texture, so don’t rush it! Step 4: Combine your wet and dry ingredients Gently fold the dry mixture into the wet, ensuring no dry clumps remain. Add in the chopped dates, water, and lemon juice until all ingredients are fully incorporated. Step 5: Pour and bake Transfer the mixture into your greased baking dish, smoothing it out into an even layer. Bake in your preheated oven for about 35 minutes or until the edges turn golden brown and the mixture feels set in the middle. Step 6: Cool and cut Once baked, remove the dish from the oven, and let the bars cool completely in the pan for about 10-15 minutes. This cooling moment is crucial; if you cut them while they’re warm, you might end up with a delicious mess instead of beautiful bars! Once cooled, cut into squares or rectangles as you prefer, and feel free to show them off on social media with your fabulous hashtag. These delicious homemade date bars are perfect for snacking on the go, sharing with friends, or simply enjoying during a quiet moment to yourself with a cup of tea. So next time you’re looking for a healthy treat, whip up this recipe and savor the delightful fusion of flavors and textures. Happy snacking! This showstopping Delicious Homemade Date Bars Recipe for a Healthy Snack delivers restaurant-quality results using simple ingredients you probably already have at home. The perfect balance of textures and flavors creates an unforgettable dining experience that will have everyone asking for seconds. Picture-perfect presentation with vibrant colors makes this dish absolutely Instagram-worthy and guaranteed to impress any dinner guest. Incredibly versatile recipe that works beautifully for weeknight dinners, meal prep, special occasions, or even outdoor entertaining sessions. Perfecting Delicious Homemade Date Bars Recipe for a Healthy Snack Cooking Process To achieve the best results for the Delicious Homemade Date Bars Recipe for a Healthy Snack, start by preheating your oven while gathering all ingredients. Mix dry ingredients before creaming the butter with vanilla, followed by combining everything for a quick bake. Add Your Touch to Delicious Homemade Date Bars Recipe for a Healthy Snack
Easy Avocado Spinach & Artichoke Dip Recipe Ready in 10 Minutes
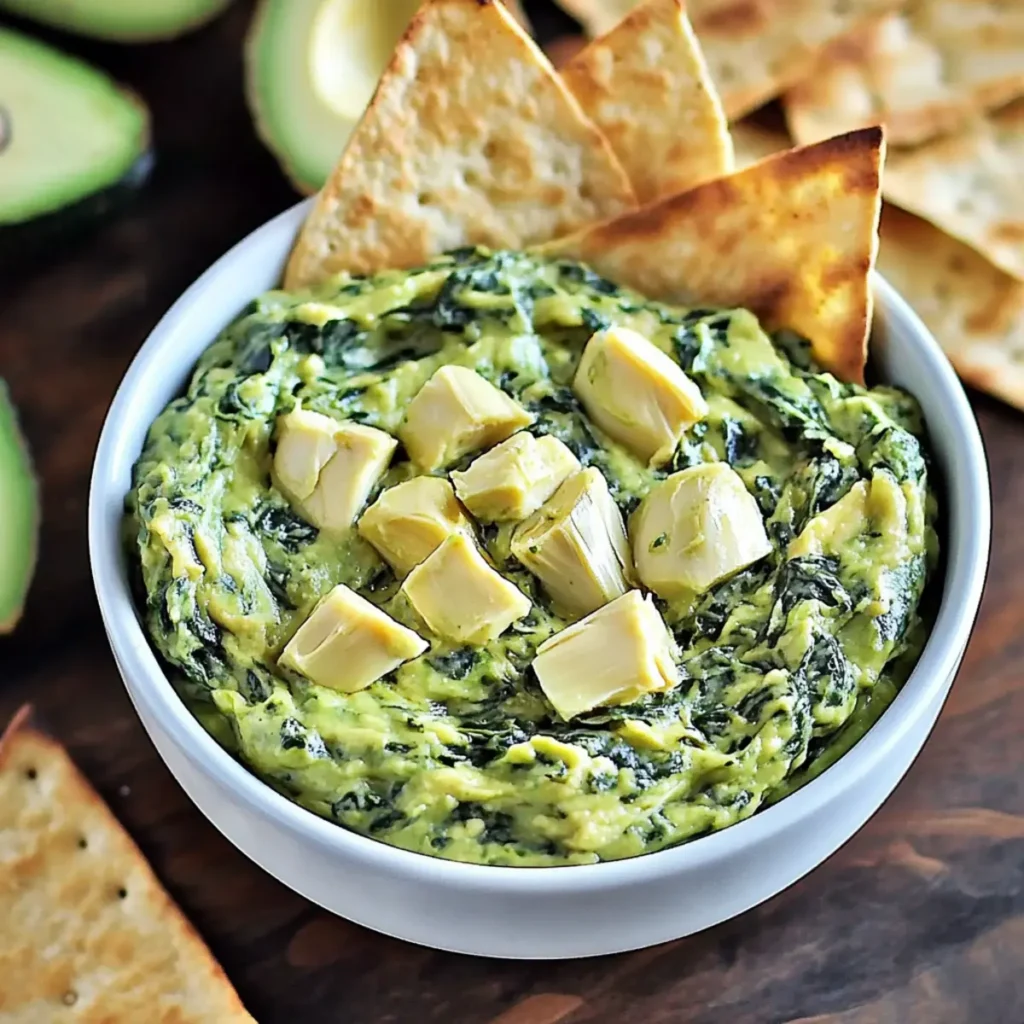
Avocado Spinach & Artichoke Dip is the kind of dip that can easily elevate any gathering, be it a casual movie night, a brunch with friends, or a full-blown dinner party. This Easy Avocado Spinach & Artichoke Dip Recipe Ready in 10 Minutes combines the creamy goodness of avocados with the earthy, robust flavors of marinated artichokes and bright, fresh spinach. Just imagine scooping this vibrant green concoction onto crispy pita chips, and you’ve got the makings of not just a snack, but a full-fledged flavor adventure. Many of us have fond memories associated with dips like this one. Perhaps it was at a family gathering where you devoured so much you set a new record for dip consumption. Or maybe you bonded with a loved one over homemade snacks, stories, and plenty of laughter. This Easy Avocado Spinach & Artichoke Dip is not only a treat for your taste buds but also a bringer of joy and nostalgia. Get your taste buds ready, because once you take a bite, you’ll be dreaming of more! Ingredients for Easy Avocado Spinach & Artichoke Dip Recipe Ready in 10 Minutes Here’s what you’ll need to make this delicious Easy Avocado Spinach & Artichoke Dip Recipe Ready in 10 Minutes: 1 large avocado – Choose one that yields slightly to pressure for optimum creaminess. 1 tablespoon extra-virgin olive oil – A good quality oil enhances the flavor and adds a silky texture. 1 tablespoon lemon juice – Freshly squeezed is best, as it adds a zesty brightness that balances the creaminess. 1 clove garlic, roughly chopped – Fresh garlic lends a pungent flavor that deepens the dip’s taste profile. 1/4 teaspoon fine sea salt – Enhances all the flavors without overpowering the dish. 1 pinch red pepper flakes – A little heat goes a long way; adjust according to your taste. freshly ground black pepper, to taste – Adds complexity and depth to the flavor. 1 1/2 cups baby spinach – Fresh spinach provides vitamins and a lovely green color. 1/2 cup well-drained marinated artichokes – These provide a burst of tangy goodness that complements the dip beautifully. How to Make Easy Avocado Spinach & Artichoke Dip Recipe Ready in 10 Minutes Follow these simple steps to prepare this delicious Easy Avocado Spinach & Artichoke Dip Recipe Ready in 10 Minutes: Step 1: Scoop the Avocado Using a spoon, scoop out the flesh of the avocado into your food processor. Make sure to get every creamy bit out; no avocado left behind! Step 2: Add the Creamy Ingredients To the food processor, add the extra-virgin olive oil, lemon juice, chopped garlic, fine sea salt, red pepper flakes, and black pepper. Blend until you reach a smooth, creamy consistency, stopping occasionally to scrape down the sides. Step 3: Toss in the Green Goodness Now, add your fresh spinach and marinated artichokes to the mix. Pulse the processor around 15 to 20 times so that everything is roughly chopped but still has some texture. You want that lovely contrast! Step 4: Taste Test and Adjust Spoon out a generous portion into a small bowl and taste. Feel free to adjust with more salt, lemon juice, or spice according to your preference. This is your dip after all! Step 5: Serve and Enjoy Transfer the creamy green dip into your serving bowl and serve with crispy pita chips, crunchy veggies, or toasted crackers. This Easy Avocado Spinach & Artichoke Dip is excellent for sharing and will be the highlight of any gathering you attend. Step 6: Store it Right If you happen to have leftovers (unlikely, but let’s be hopeful), press plastic wrap against the dip’s surface to prevent it from browning. It will keep nicely in the fridge for up to 4 days. Now that you’ve got the recipe mastered, mission delightfully creamy dip awaits! Enjoy every scoop, and don’t forget to share your stories while you munch away. Perfecting Easy Avocado Spinach & Artichoke Dip Recipe Ready in 10 Minutes Cooking Process First, chop the garlic and scoop the avocado to blend. Next, combine all your beautiful ingredients in a food processor. Blend until smooth and then pulse in the spinach and artichokes for a delightful texture. Add Your Touch to Easy Avocado Spinach & Artichoke Dip Recipe Ready in 10 Minutes Feel free to swap the marinated artichokes for roasted ones, or add some diced jalapeños for an extra kick. You can also experiment with different herbs, like dill or cilantro, to personalize the flavor! Storing & Reheating Easy Avocado Spinach & Artichoke Dip Recipe Ready in 10 Minutes To store, cover tightly with plastic wrap pressed against the dip’s surface to prevent browning. This will keep it fresh for up to four days in the refrigerator. Reheat gently if desired. Sharing this tasty dip with friends at a backyard BBQ was a memorable hit. Everyone wanted the recipe, and I proudly claimed my title as the “Dip Queen” for the evening! FAQs About Easy Avocado Spinach & Artichoke Dip Recipe Ready in 10 Minutes What is Easy Avocado Spinach & Artichoke Dip Recipe Ready in 10 Minutes? Easy Avocado Spinach & Artichoke Dip Recipe Ready in 10 Minutes is a deliciously creamy dip that incorporates fresh ingredients like avocado, spinach, and marinated artichokes. This vibrant dish is perfect for gatherings, as it’s quick to prepare and packed with flavor. The combination of smooth avocado and the savory artichokes paired with a hint of garlic makes it a crowd-pleaser. Served with pita chips or fresh veggies, it’s an enticing way to elevate any appetizer spread. You can whip it up in no time, making it an ideal choice for impromptu get-togethers. How do I make Easy Avocado Spinach & Artichoke Dip Recipe Ready in 10 Minutes? Making Easy Avocado Spinach & Artichoke Dip Recipe Ready in 10 Minutes is simple and straightforward. Start by scooping the flesh of a ripe avocado into a food processor, then add lemon juice, olive oil, garlic,
Delicious Cinnamon Roll Energy Bites for Healthy Snacking
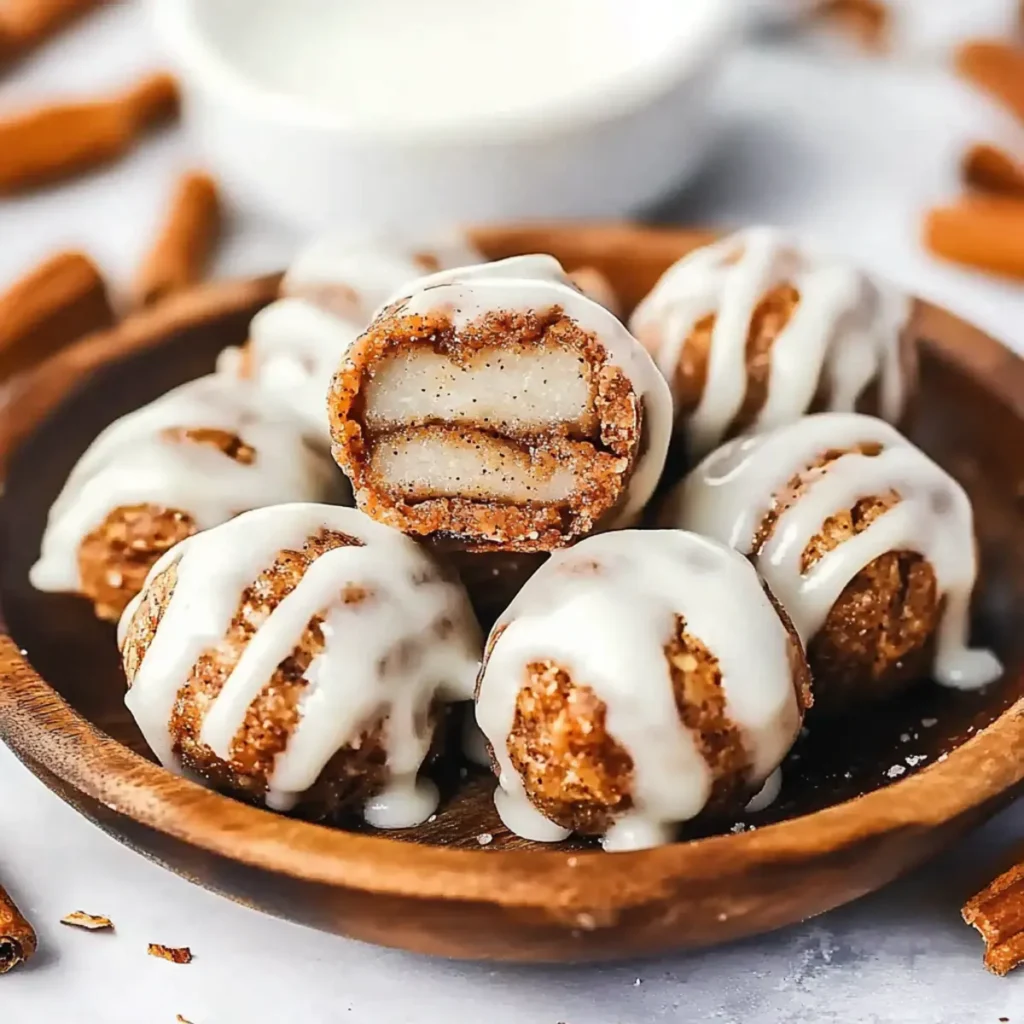
Welcome to a world of deliciousness where your snacking game is about to change forever! Say hello to these delightful Cinnamon Roll Energy Bites, the perfect fusion of sweet, creamy almond butter and the warm, cozy scent of cinnamon. If you’re anything like me, reaching for a handful of these will quickly become your new favorite guilt-free indulgence. Forget about those store-bought snacks that leave you feeling sluggish; these bites pack a protein punch while giving you the sweet satisfaction you crave. Whether you’re on your way to the gym, need a midday energy boost, or just want something delicious to nibble on while binge-watching your favorite show, these Cinnamon Roll Energy Bites will have you covered and coming back for more! Ingredients for Cinnamon Roll Energy Bites Here’s what you’ll need to make this delicious Cinnamon Roll Energy Bites: 1 cup natural creamy almond butter – This rich, nutty base gives your bites a smooth texture and a delightful flavor. Make sure to choose a brand without added sugars or oils for the best results. ⅓ cup pure maple syrup – This natural sweetener adds the perfect amount of sweetness while providing a touch of that iconic maple flavor. ½ cup vanilla protein powder – A fantastic way to boost the protein content and keep you feeling full. Choose a protein powder you enjoy, as it will contribute to the overall flavor. 2 teaspoons vanilla extract – A must-have for enhancing the flavor profile of these bites, adding depth and a beautiful aroma that will remind you of fresh-baked cinnamon rolls. ½ cup rolled oats – These provide a bit of chewiness to your energy bites and a great source of fiber to keep you feeling satisfied. 1 teaspoon salt – Just a pinch enhances flavors and brings out the sweetness of the other ingredients. 1 ½ teaspoons cinnamon – The star of our show! This warm spice is essential for that signature cinnamon roll taste, making these bites cozy and comforting. ½ cup white chocolate chips – For a sweet little surprise in every bite, these chips melt beautifully in your mouth and add a creamy element. 1 teaspoon coconut oil – Helps bind the ingredients together while adding a hint of tropical flavor to your bites. How to Make Cinnamon Roll Energy Bites Follow these simple steps to prepare these delicious Cinnamon Roll Energy Bites: Step 1: Mix the Base In a mixing bowl, combine the almond butter, maple syrup, protein powder, vanilla extract, rolled oats, salt, and cinnamon. You want to stir this mix until everything is well combined, and it resembles the cookie dough that you secretly wish you could eat raw. Step 2: Add the Fun Stuff Fold in the white chocolate chips and melted coconut oil gently. Ensure that each bite is full of tasty surprises by evenly distributing those creamy chips throughout the mixture. Step 3: Roll Them Up Once everything is mixed, it’s time to roll! Grab a handful of the mixture and roll it into bite-sized balls. The mixture should be soft but moldable, just like a perfect play dough that never gets old. Step 4: Chill Out Place the rolled energy bites onto a baking sheet lined with parchment paper. Pop them in the fridge and let them chill for at least 60 minutes. This will help the bites firm up and become the perfect snack. Step 5: Enjoy and Share Once chilled, they’re ready to be devoured! Grab a couple for yourself or impress friends and family by sharing these delicious bites during game night or book club. These Cinnamon Roll Energy Bites are perfect for any occasion—whether you’re headed to work, off to the gym, or enjoying a lazy Sunday at home. Enjoy the feeling of being a culinary genius, even if you only mixed a few ingredients! Enjoy your new favorite snack, and remember, they may be small, but they pack a mighty flavor punch—just like you! Perfecting Cinnamon Roll Energy Bites Cooking Process To make the best Cinnamon Roll Energy Bites, start by mixing together the wet ingredients first. Blend almond butter, maple syrup, and vanilla extract until creamy. Then, gradually fold in the dry ingredients, ensuring even distribution before adding the white chocolate chips. Add Your Touch to Cinnamon Roll Energy Bites Don’t hesitate to get creative! Swap almond butter for peanut butter or use agave syrup instead of maple syrup for a unique twist. You can also throw in some chopped nuts, flaxseeds, or even a pinch of sea salt for extra flavor. Storing & Reheating Cinnamon Roll Energy Bites Store these delightful bites in an airtight container in the fridge for up to a week. If you want them even chillier, you can freeze them for a month. Just pop them in the fridge for a few minutes to soften before enjoying. After experimenting with these bites at a family gathering, my cousin shouted, “Are these even healthy?!” For a moment, I felt like a wizard in the kitchen, conjuring up treats that were guilt-free yet delicious. FAQs About Cinnamon Roll Energy Bites What are Cinnamon Roll Energy Bites? Cinnamon Roll Energy Bites are a delightful and healthy snack inspired by the classic cinnamon roll. Packed with nourishing ingredients like almond butter, oats, and protein powder, these no-bake bites are not only easy to prepare but also provide sustained energy. They are perfect for when you need a quick pick-me-up or a post-workout snack. With the sweet touch of maple syrup and a sprinkle of cinnamon, these bites deliver on flavor without the guilt. How do I store Cinnamon Roll Energy Bites? You can store Cinnamon Roll Energy Bites in an airtight container in your refrigerator for up to a week. If you want to keep them even longer, consider freezing them. They will stay fresh in the freezer for about a month. Just remember to let them thaw in the fridge for a few minutes before enjoying. This way, they’ll
Basil Pesto Cheesy Puff Pastry Christmas Tree Recipe for Festive Gatherings

Basil pesto isn’t just a spread; it’s pure culinary magic wrapped in green. Imagine the vibrant aroma wafting through your kitchen as fresh basil dances with garlic and pine nuts, all drizzled in olive oil. Now, picture this divine concoction layered between flaky, buttery puff pastry, transformed into a festive Christmas tree. The Basil Pesto Cheesy Puff Pastry Christmas Tree isn’t just a dish; it’s a conversation starter, a centerpiece for holiday gatherings, and a guaranteed family favorite. If you’re looking for a way to elevate your holiday festivities—or simply bring a bit of cheer to your Tuesday—this dish is where you want to start. The excitement of pulling this golden, cheesy pastry from the oven will light up your home, bringing people together with its irresistible aroma and delightful presentation. Ingredients for Basil Pesto Cheesy Puff Pastry Christmas Tree Here’s what you’ll need to make this delicious Basil Pesto Cheesy Puff Pastry Christmas Tree: 2 sheets frozen puff pastry – Make sure they’re thawed for easy handling and optimal layering. Look for high-quality brands for the best results. 3 tbsp basil pesto – You can use store-bought for convenience or whip up a homemade version if you’re feeling adventurous. 1 cup grated mozzarella or tasty cheese – This is the gooey goodness that holds everything together. Feel free to mix it up with other cheeses if you like. 1 egg – Lightly beaten for that glossy egg wash finish, giving your pastry an appetizing shine. 1 tbsp sesame or poppy seeds – These are optional but add a lovely texture and visual appeal. Small skewers or pretzel sticks – These will act as the tree trunk, adding a fun and festive touch. How to Make Basil Pesto Cheesy Puff Pastry Christmas Tree Follow these simple steps to prepare this delicious Basil Pesto Cheesy Puff Pastry Christmas Tree: Step 1: Preheat the Oven Preheat your oven to 200°C (180°C fan-forced). Don’t forget to line two large baking trays with baking paper to prevent any sticky situations. Step 2: Prepare the First Layer Lay one sheet of thawed puff pastry flat on a clean surface. Now, unleash the aromatic delight of basil pesto by spreading a thin, even layer over the entire surface right to the edges. Be generous; this is where the magic begins! Step 3: Add the Cheese Sprinkle the grated mozzarella or tasty cheese evenly over the pesto layer. The more cheese, the merrier—don’t hold back! Step 4: Create the Layers Place the second sheet of puff pastry directly on top of the first, pressing down gently so the layers bond seamlessly. Your creation is already looking amazing! Step 5: Slice and Shape Using a sharp knife or pizza cutter, slice the layered pastry into long strips about 2 cm wide. Each strip will become a tree, so think of this as your own festive assembly line! Step 6: Form the Christmas Trees From the top of each strip, fold the pastry back and forth in a zigzag manner—like a fabulous ribbon dance. This will create the classic tree shape that narrows gracefully toward the top. Insert a small skewer or pretzel stick into the base for a sturdy trunk. Step 7: Bake to Perfection Transfer your whimsical trees onto the prepared baking trays. Brush each one lightly with the beaten egg for a golden, glossy finish. Sprinkle with sesame or poppy seeds if you’re feeling extra fancy. Bake for 12–15 minutes, or until they’re beautifully puffed and golden brown. Step 8: Serve and Enjoy Once they’re out of the oven, let the trees cool slightly. Serve warm or at room temperature, and prepare for the compliments to roll in! Nothing quite compares to a warm, cheesy, and aromatic Basil Pesto Cheesy Puff Pastry Christmas Tree. Not only do they fill the room with mouthwatering scents, but they also become a magical part of your festive gatherings, inviting smiles and sparking joy. Whether you whip them up for a holiday party, a family gathering, or just because you can, they are bound to leave a lasting impression on all who indulge. Bon appétit! Perfecting Basil Pesto Cheesy Puff Pastry Christmas Tree Cooking Process To make the most of your cooking time, begin by preheating your oven and preparing the baking trays. While that heats up, layer the pesto and cheese to save time and ensure everything bakes evenly. Add Your Touch to Basil Pesto Cheesy Puff Pastry Christmas Tree Feel free to get creative! Swap the basil pesto for sun-dried tomato pesto for a tangy twist, or add some cooked chicken or spinach to the cheese layer for extra heartiness. Storing & Reheating Basil Pesto Cheesy Puff Pastry Christmas Tree To store leftovers, place them in an airtight container and refrigerate for up to three days. Reheat in the oven for a few minutes to restore crispiness, avoiding the microwave to keep the pastry flaky. The first time I made this Basil Pesto Cheesy Puff Pastry Christmas Tree, my friends couldn’t get enough. They called it the highlight of our holiday get-together, and it barely survived the night! FAQs About Basil Pesto Cheesy Puff Pastry Christmas Tree What is Basil Pesto Cheesy Puff Pastry Christmas Tree? The Basil Pesto Cheesy Puff Pastry Christmas Tree is an eye-catching appetizer that doubles as festive decor for your holiday table. This delightful creation combines layers of flaky puff pastry spread with rich basil pesto and gooey cheese, shaped into a stunning tree formation. It’s perfect for gatherings, offering a deliciously cheesy bite infused with fresh basil flavor. Whether served warm or at room temperature, this charming dish is sure to impress your guests and elevate any celebration with its whimsical presentation. How do I store leftovers of Basil Pesto Cheesy Puff Pastry Christmas Tree? To store leftovers of your Basil Pesto Cheesy Puff Pastry Christmas Tree, place the pieces in an airtight container. Make sure to keep it refrigerated for up to three days. For the best taste and texture,
Whoville’s Spiced Up Christmas Margarita Punch for Holiday Cheer

The holidays are upon us, and what better way to celebrate the festive spirit than with a delightful drink in hand? Whoville’s Spiced Up Christmas Margarita Punch is your ticket to a merry gathering that sparks joy in every sip. With hints of pomegranate and a warm, spicy kick, this punch will jingle its way into your heart. Imagine walking into a cozy, twinkling room filled with laughter, the smell of sweet and spicy concoctions wafting through the air. As you sip on a glass of this holiday magic, you instantly feel transported to Whoville, surrounded by the warmth and cheer of friends and loved ones. Whether you’re hosting a big holiday bash or a quiet evening by the fire, this punch is a perfect delight for any occasion. Ingredients for Whoville’s Spiced Up Christmas Margarita Punch Here’s what you’ll need to make this delicious Whoville’s Spiced Up Christmas Margarita Punch: 2.25 cups pomegranate juice – This adds a beautiful, rich red color and a sweet-tart flavor profile that is perfect for the holidays. 2 cups orange juice – Freshly squeezed is best, bringing a bright citrus note that complements the other ingredients. 2 cups tequila – A good-quality tequila elevates the punch; you can opt for silver or reposado based on your preference. 1 cup orange liquor – A touch of orange liqueur enhances the citrus flavors and adds depth to the punch. 0.5 cups honey – This natural sweetener balances the tartness while providing a lovely floral note. 2 teaspoons vanilla extract – A pinch of vanilla rounds out the flavors and adds warmth; make sure to choose pure vanilla for the best results. 1 teaspoon ground cinnamon – It’s Christmas in a spice! The cinnamon offers warmth and the classic flavor associated with the season. 1 teaspoon ground ginger – Ginger adds a zingy kick that pairs beautifully with the warmth of the cinnamon. cayenne (to taste) – A hint of cayenne brings out the spiciness in this festive drink; adjust according to your heat preference. 6-8 sprigs fresh rosemary – Not only does this look beautiful as a garnish, but it also imparts a lovely herbal aroma that complements the sweetness. 4 bottles ginger beer (for topping, optional) – This bubbly addition can brighten and lighten the punch, adding fizz and extra flavor. 0.25 cups coarse sugar – Ideal for rimming glasses; a combination of sugar and spice makes this dressing fun. 0.25 cups granulated sugar – Perfect for the rim along with the coarse sugar to create that delicious sweet-spicy combination. 1 tablespoon cinnamon – Use this to mix with the sugars for rimming the glasses, adding another layer of holiday cheer. cayenne (to taste) – For that extra kick on the rim, if you dare to spice it up. How to Make Whoville’s Spiced Up Christmas Margarita Punch Follow these simple steps to prepare this delicious Whoville’s Spiced Up Christmas Margarita Punch: Step 1: Mix the Base In a large pitcher, combine the pomegranate juice, orange juice, tequila, orange liquor, honey, vanilla extract, ground cinnamon, ground ginger, and a dash of cayenne. Use a wooden spoon to stir until well combined, and the honey dissolves completely. Step 2: Chill or Serve Immediately Let the mixture sit for about 15 minutes to allow the flavors to mingle or chill in the refrigerator for about an hour if time permits. If you’re in a hurry, you can serve it over ice right away. Step 3: Prepare the Glasses On a plate, combine coarse sugar, granulated sugar, and cinnamon. Run a slice of orange around the rim of your glasses first; this helps the sugar blend stick. Dip the rim in the sugar-cinnamon mix until coated evenly. Step 4: Garnish and Top with Ginger Beer Pour the punch into the prepared glasses, filling them halfway. If you like a bubbly punch, top it off with ginger beer. Add a sprig of fresh rosemary to each glass for that perfect holiday touch. Step 5: Add the Heat (Optional) For those who enjoy a bit of heat, you can sprinkle some cayenne on top or along the rim for an extra punch. Step 6: Serve and Enjoy Gather your holiday crew, raise a glass, and enjoy the cheers! This Whoville’s Spiced Up Christmas Margarita Punch is sure to warm hearts and spirits alike. With the anticipation of joyful gatherings and festive cheer, this punch is a guaranteed hit. Whether you’re nursing your drink during a festive game of charades or passing it around to friends, every sip will leave you wanting more. So, let your holiday celebrations sparkle a little brighter with this festive cocktail that’s as fun to make as it is to drink! Perfecting Whoville’s Spiced Up Christmas Margarita Punch Cooking Process Start by gathering all your ingredients together. Mix the pomegranate juice, orange juice, tequila, orange liquor, honey, vanilla extract, ground spices, and cayenne in a large pitcher. Stir well to combine before chilling. Serve it over ice, garnishing with rosemary and ginger beer for a delightful finish. Add Your Touch to Whoville’s Spiced Up Christmas Margarita Punch Feel free to customize your Whoville’s Spiced Up Christmas Margarita Punch by swapping out the orange juice for cranberry juice for an extra tart kick. You could also use agave syrup instead of honey for a lighter sweetness or add fresh citrus slices for visual appeal. Storing & Reheating Whoville’s Spiced Up Christmas Margarita Punch Store any leftover Whoville’s Spiced Up Christmas Margarita Punch in the refrigerator in an airtight container for up to four days. Avoid adding ginger beer until ready to serve to maintain its fizz, and simply stir before enjoying again. Sharing this recipe with friends during a holiday get-together resulted in loads of laughter and compliments! They couldn’t get enough, and it quickly became the go-to drink for our festive gatherings. FAQs About Whoville’s Spiced Up Christmas Margarita Punch What is Whoville’s Spiced Up Christmas Margarita Punch? Whoville’s Spiced Up Christmas Margarita Punch